
A few days ago, Emily from Micro Four Nerds released a new video titled “Everyone Should Try Infrared Photography!“ Naturally, I was immediately interested. However, to my disappointment, the video focused mainly on the more common options, such as using IR filters, Photoshop actions, and IR-converted cameras.
Of course, in my enthusiasm, I thought I’d quickly promote my own instant infrared PictureFX LUTs solution. So, I left a comment under the video, starting with the usual pleasantries about how much I appreciate her blog and video content—which is true! As you’ve probably read in many articles here on OSP, I admire Emily for her contributions to the Micro Four Thirds community.
But here’s where I made a silly mistake—I didn’t ask for permission before posting a link. Within what felt like less than 60 seconds, my comment had disappeared like snow melting in the sun. Honestly, who could blame her? I certainly don’t.
Still, it’s a shame because there’s no easier way to take your first steps into the world of infrared photography than using a LUT, and I’m sure she knows that too. So, I wanted to strike while the iron is still hot and share this with you now.
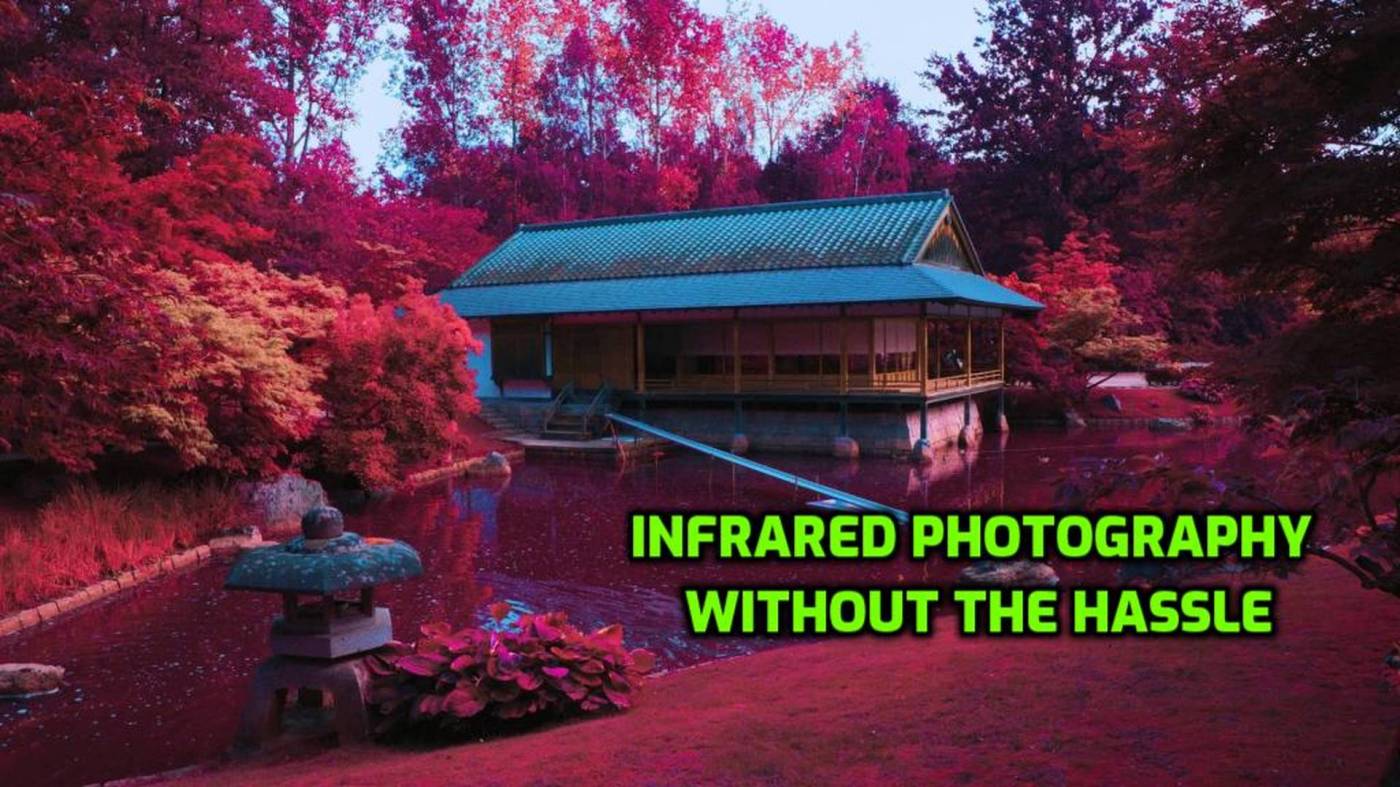
If you’re curious about experimenting with infrared photography (which can be a lot of fun!), know that there’s a simpler solution than messing around with filters, actions, and expensive converted cameras—PictureFX Infrared LUTs! You can find them on my site or download them directly from FreshLuts. The links are at the bottom of the article, and there’s absolutely no cost involved. Just download and use them.
Here’s a quick rundown on How To :
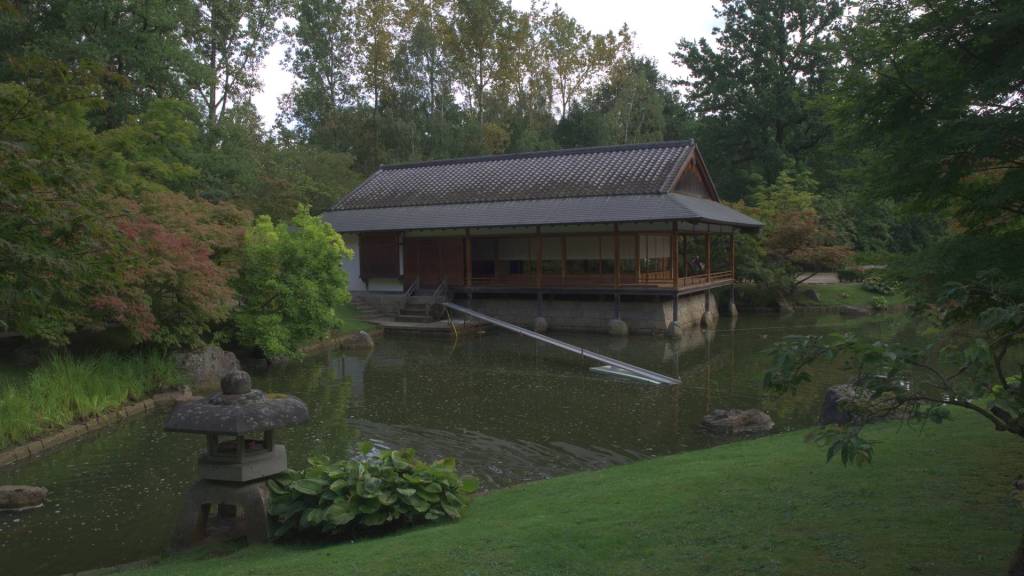
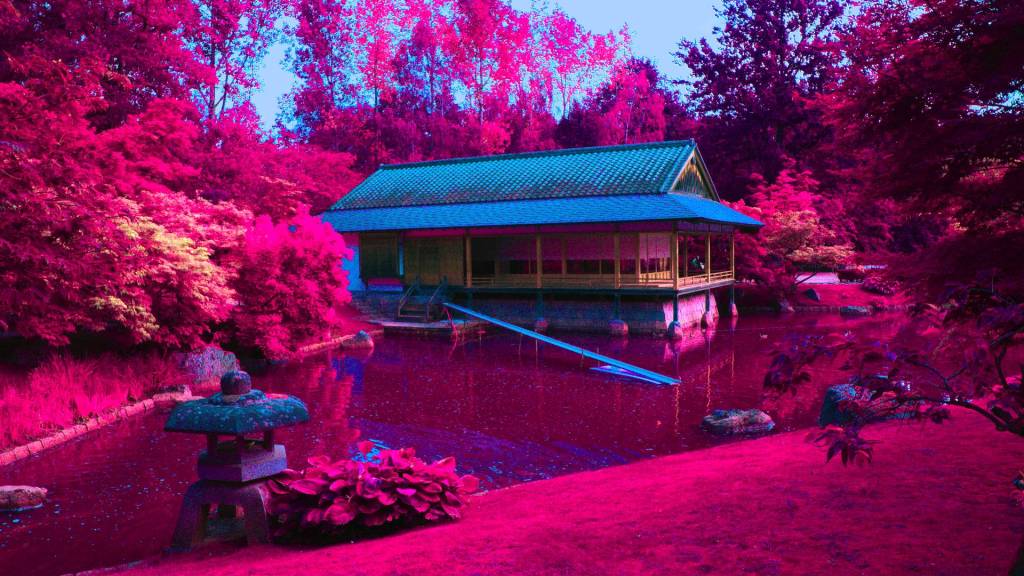
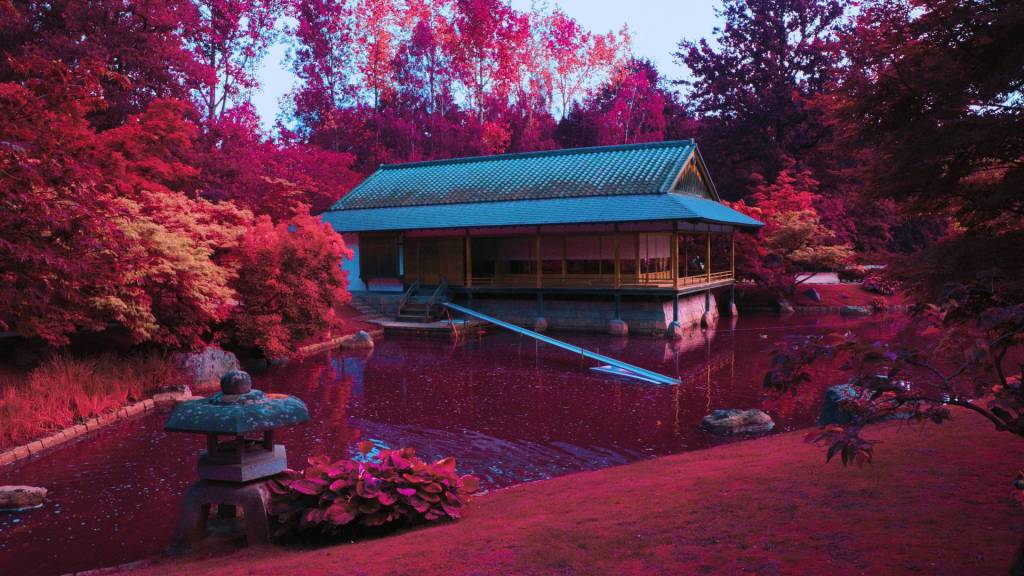
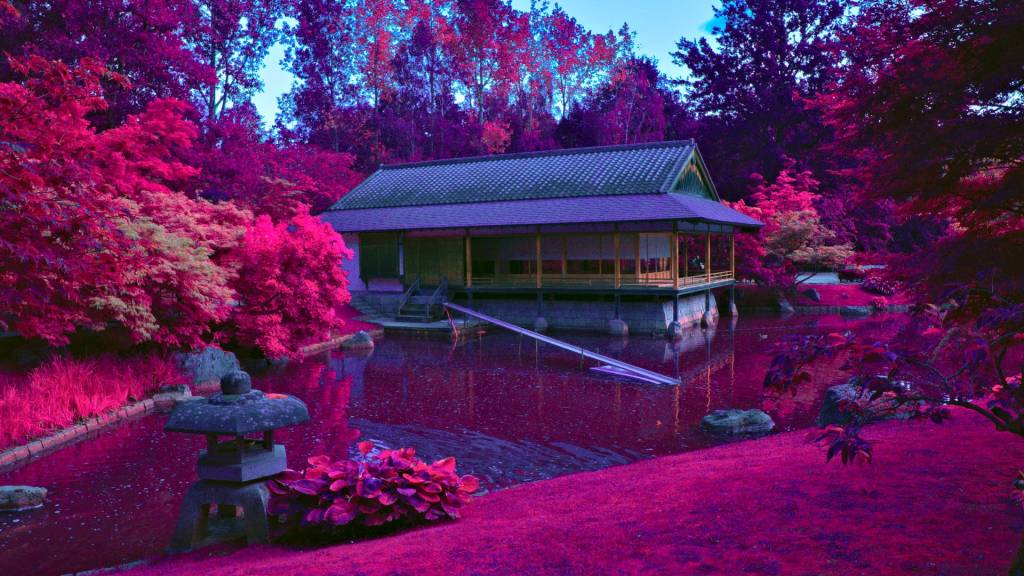
Open a photo, preferably in RAW format, in your favorite photo editing software, such as Darktable, Photoshop, Luminar, etc. Then, open the Film Simulation Module and select the PictureFX Faux Infrared LUT. Adjust the intensity to your liking, as it can be quite pink at full strength. Make any other adjustments to exposure, contrast, or settings as needed, and save your new IR creation.
And yes, I would greatly appreciate it if you could mention PictureFX LUTs when you publish photos created with them. That’s all I ask.
So, check out Emily’s video and decide for yourself which method you’d like to try. Oh, and just to clarify, I’m not sponsored by any company. I don’t receive money or free products to test. All the gear I review on OSP is purchased with my own money.
If you enjoyed this article, please give it a like, and even better, subscribe!
Thanks in advance,
Marc
Links :
My OSP PictureFX page : /picturefx-pro-2024/
My latest PictureFX Infrared Lut : PictureFX Faux Infrared 2024 mod
More on Infrared on OSP : /2024/04/19/infrared-photography-glass-filter-gimp-or-picturefx-lut-part-i/ and also /2024/04/26/infrared-photography-the-secrets-behind-the-2020-picturefx-faux-infrared-lut-and-a-new-improved-version-part-ii/
Discover more from Open Source Photography
Subscribe to get the latest posts sent to your email.


Interesting, thank you!
LikeLike
My pleasure.
LikeLiked by 1 person
This is interesting! I’ve never tried infrared photography before, but your PictureFX LUTs seem like a great way to start. Can I make this look in PhotoShop?
LikeLiked by 1 person
Hey Ilze,
You can use the LUTs in most image editing programs, at least the ones that support LUTs in .cube format—Photoshop should definitely work. Personally, I only use Open Source software like Darktable, so I can’t give you exact instructions—every program works a little differently. Just keep in mind that you’ll likely need to adjust the strength, as 100% often doesn’t give the desired result—it also depends on your photo.
If you have any questions, feel free to ask! By the way, I used to work in IT too as a network administrator—used to, since I’m now retired. I came across your website by chance and ended up reading about the renovations on your house. It brought back memories of our own renovations 40 years ago—an old house from the late 1800s. My wife and I did everything ourselves—really, everything!
A little piece of advice: take plenty of photos of the project and of your family. Trust me, you’ll see why later.
Marc
LikeLiked by 1 person
Hi, Marc,
It’s great to hear about your renovation experience—sounds like our project! We do all by ourselves 🙂 I’ll take your advice to heart and make sure to capture plenty of photos. I already regret not taking more. It’s always nice to look back on those memories.
Best, Ilze
LikeLiked by 1 person
I quickly looked up via AI how this works in Photoshop:
To use LUTs (Lookup Tables) in
.cubeformat in Photoshop, follow these steps:1. Open the Image in Photoshop2. Add a Color Lookup Adjustment Layer
3. Load the .cube LUT
.cubeLUT file and select it. Photoshop will immediately apply the LUT to your image.4. Adjust Opacity (Optional)
5. Save Your Image
LikeLiked by 1 person