
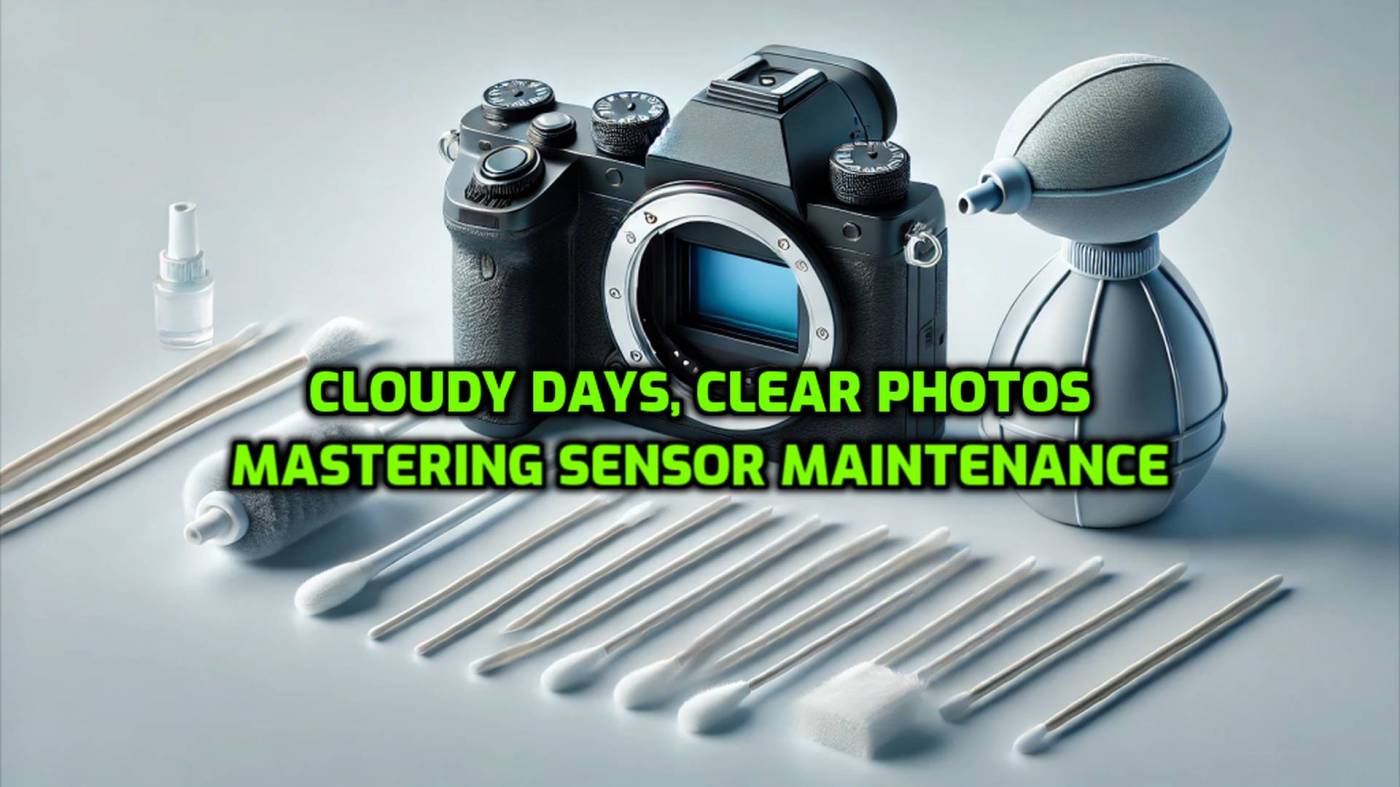
What Does a Photographer Do When It’s Cold, Wet, and Gloomy Outside?
Well, it’s the perfect time to clean your camera sensor! If you frequently switch lenses, it’s worth checking if your sensor needs a cleaning. It’s been a while since I wrote about this topic, but it’s always good to revisit.
Here’s a quick guide:
- Set Up Your Camera
- Use your regular lens (the type doesn’t matter).
- Set the aperture between f/8.0–f/16.0, higher is better. A smaller aperture reveals dust and dirt on the sensor more clearly.
- Point your camera upwards to the sky or towards a bright, uniform light source—avoid dark gray clouds! A white computer screen works too or a white paper.
- Don’t worry about shutter speed; since the dust is on the sensor, motion blur isn’t an issue.
- Inspect the Test Photos
- Upload the images to your computer and adjust the exposure for even lighting.
- Increase the contrast to make any dust or dirt stand out. Look for small or large gray spots on the image.
- Cleaning the Sensor
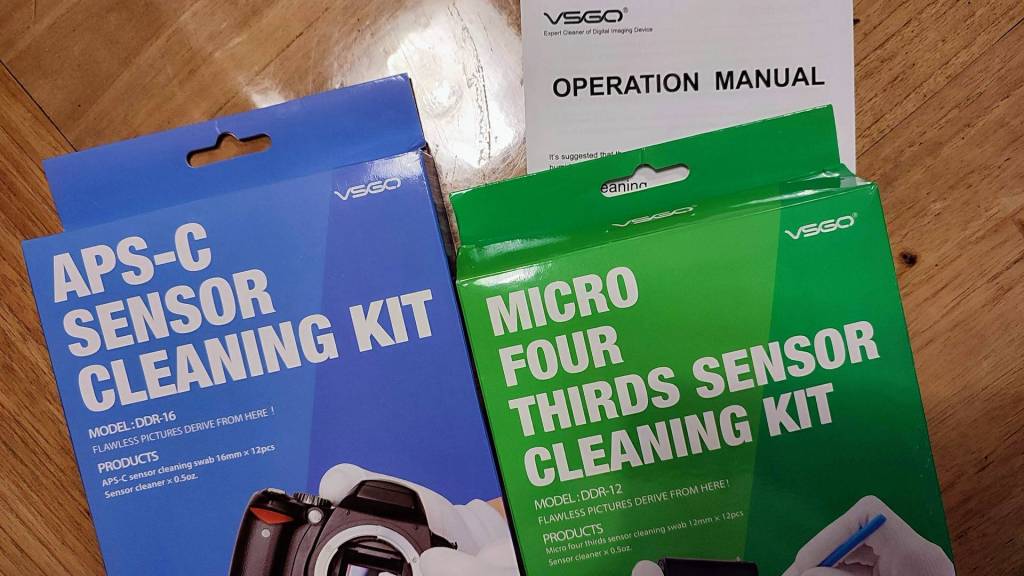
- If the sensor is dirty, invest in a sensor cleaning kit. I recommend the VSGO kit—it’s reasonably priced and highly effective.
- Don’t toss the used swabs right away! They’re also great for cleaning the metal or plastic mounts of your lenses, an often-overlooked spot.
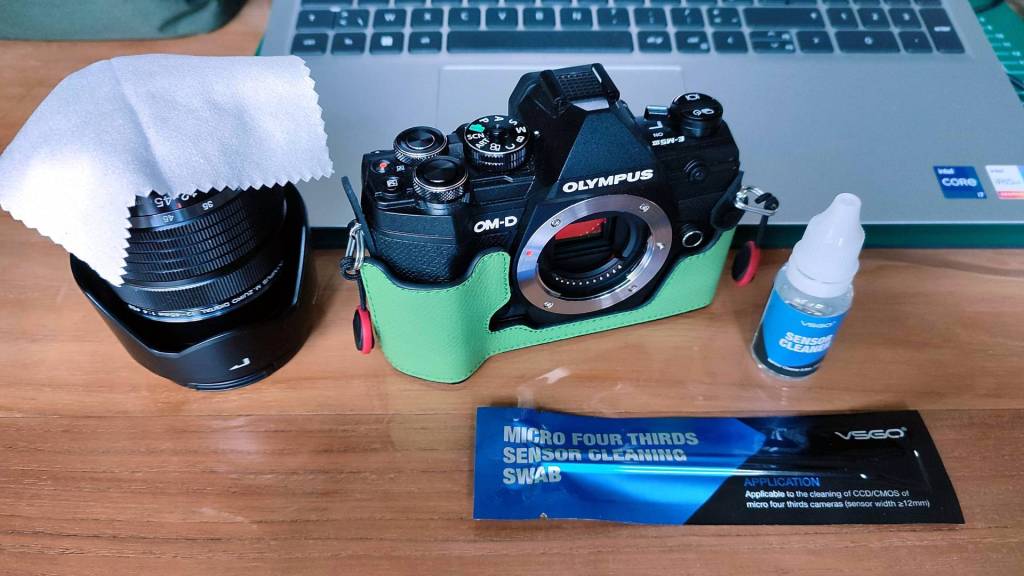

VSGO offers specialized cleaning kits tailored to every type of sensor.
When cleaning a Micro Four Thirds (M4/3) camera sensor, be extra cautious about applying pressure ! These sensors have a delicate suspension system, making them more susceptible to damage.
How to Clean Your Camera Sensor: A Simple and Cost-Effective Guide :
Having your camera sensor professionally cleaned can cost around €50, but the truth is, you can achieve the same results at home for much less. With a VSGO sensor cleaning kit, you’ll spend roughly the same amount, but you’ll be able to clean up to twelve cameras or use it multiple times.
Here’s how you can clean your sensor safely and effectively:
Prepare Your Workspace
- Choose a clean room: Avoid dusty environments, like bedrooms.
- Choose a dry room: Not in the bathroom.
- Set up a clean surface: Ensure you have a tidy area to work on.
- Have the right tools: Besides a sensor cleaning kit, a blower (air pump) will be invaluable.
Step-by-Step Cleaning Process
- Perform a Test
- First, check if cleaning is necessary by taking a photo of a plain background (e.g., a white wall or the sky) and inspecting it for spots or smudges.
- Initial Cleaning with a Blower
- Position your camera upright and remove the lens.
- Use the blower to remove any loose dust particles from the sensor.
- Reattach the lens and test again.
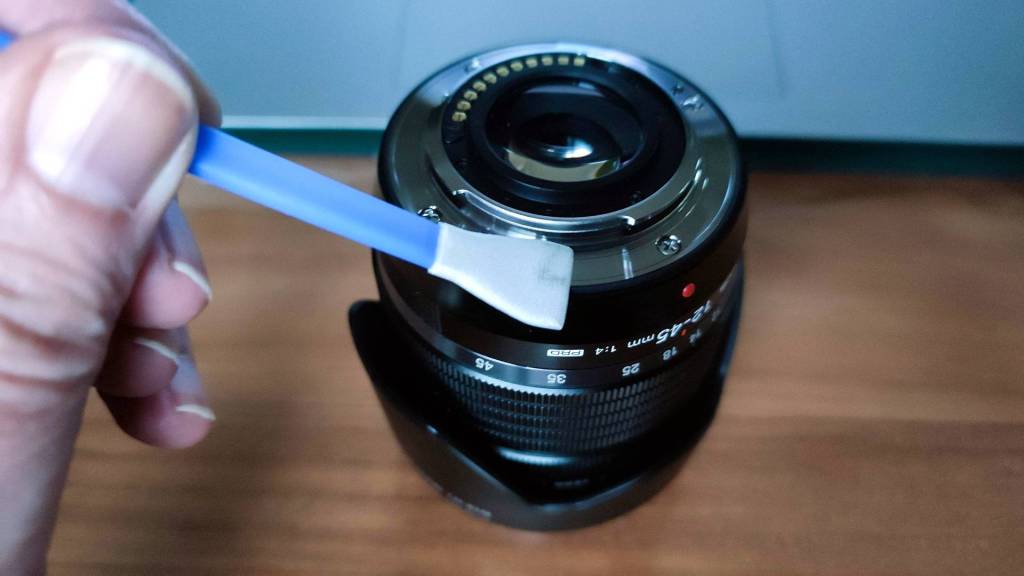
- Deep Cleaning with a Swab
If the sensor is still dirty:- Remove battery from mirrorless camera (not on a DSLR)
- Open a fresh cleaning swab.
- Apply two drops of cleaning fluid to the swab.
- With the lens removed and the camera lying flat, gently swipe the swab across the sensor, in a 45° angle, from left to right (or vice versa) using light pressure. Ensure you clean the upper and lower edges.
- Flip the swab to the dry side and repeat to remove excess liquid.
- Re-insert battery and re-attach the lens and test again.
- Repeat if Necessary
- If spots remain, repeat the process using a new swab.
Lens Changing Tip: A Reader’s Valuable Advice
Thanks to a helpful suggestion from Mark G. Adams of OneCameraOneLens.com, here’s an updated tip for keeping your camera sensor clean during lens changes.
Whenever you switch lenses, it’s a good practice to hold your camera with the lens mount facing down. This position minimizes the chance of dust or dirt entering the camera. Additionally, before attaching the new lens, use a blower to gently blow upwards into the camera while it’s held downward. This allows any dust to fall away naturally, rather than being blown around inside.
Remember: keeping the lens mount pointed downward is always the safest way to swap lenses. Thank you, Mark, for this excellent tip!
Sensor Protector: Another Reader’s Tip!
Some readers have shared that cleaning their camera sensor feels like a step too far — they worry about causing irreparable damage. But thanks to our reader and good friend Berny, there might be a solution that makes this task much less intimidating.
Berny uses a clip-in filter: a stainless steel frame with a Teflon coating that clicks into place right in front of the sensor. This filter acts as a shield, protecting the sensor from dust and debris. When cleaning is needed, it’s the filter that gets cleaned, not the delicate sensor itself.
The best part? These filters are priced similarly to a single professional sensor cleaning service, making them a cost-effective, long-term solution.
Interested? Here’s the link Berny shared: STC Optics Clip Filters. A quick online search should help you find a local or online retailer near you.
Thanks, Berny, for this valuable tip!
Important Notes
- Don’t worry about damaging your sensor. It’s protected by a glass layer, making it highly resistant to scratches or damage.
- Always use fresh swabs and apply minimal pressure during cleaning.
By following these steps, you can keep your sensor clean and save money in the process!
For more detailed instructions, check my YouTube video on using the VSGO kit – see below.
Happy cleaning!
Discover more from Open Source Photography
Subscribe to get the latest posts sent to your email.


It’s an important part of photography that we should all do. As I live by the sea and often shoot down by the sea, my sensor is particularly prone to all sorts of dirt.
Your guide is spot on, but may I add, that EVERY time I change a lens I use the blower (camera facing downward and blow up into it). Having started doing this in the last 9 months, I’ve noticed my sensor is keeping cleaner, much longer.
Brilliant article Marc, I’ll share it on my groups.
LikeLiked by 1 person
Thank you, Mark! You know how much I value your opinions and advice—and your comment is no exception.
The tip you shared is excellent. Flipping the camera upside down while cleaning makes perfect sense—it allows dust and debris to fall out naturally due to gravity, instead of being blown further into the camera.
If you don’t mind, I’d like to update my article to include this valuable advice.
Thanks again for your insightful tip, Mark!
All the best,
Marc
LikeLiked by 1 person
Article updated !
Thanks again Mark.
LikeLiked by 1 person
Looking good! Enjoy your week.
LikeLiked by 1 person
… 🙂 come to Australia and melt in +41º with 99% humidity. Sorry Marc I am a bit of topic. 🙂 But, you welcome to Brisvegas of OZ.
LikeLike
Hey Sergei, no problem at all!
Honestly, I wish I could teleport there right now.
We all need sunlight and warmth—especially as we get a bit older! 😊
LikeLiked by 1 person
Wow, I could never do that myself! I’m way too scared I’d mess something up 😅
LikeLike
Hi Ilze,
I think you’re being too modest! Seeing what you’ve achieved with your home, it’s clear you’re more than just “handy.”
For a project like this, all you really need is some common sense and a bit of caution—it’s not something that requires special training or expertise. Most of the people in the stores handling these things are just regular sales staff anyway.
Thank you so much for your comment and for subscribing—I really appreciate it!
Wishing you a fantastic day,
Marc.
LikeLiked by 1 person
Hi Marc,
Thank you for the kind words! I guess I do like to take on challenges, especially with the house, but when it comes to delicate things like camera sensors, I feel like I’m all thumbs. 😂 I don’t clean my own sensors because I worry about the environment—my workspace always feels too dusty. I’d want a completely dust-free area, like a lab, for something so precise. 😅
I’m also very “protective” (or maybe over-cautious?) with my photo gear. I avoid using it in dusty or rainy conditions—it’s my way of keeping it safe and lasting longer. Maybe I just need to build up the courage and trust my common sense more!
Thanks again for the encouragement and for sharing your tips—it’s always inspiring to learn from others. Wishing you a fantastic day as well!
Cheers,
Ilze
LikeLiked by 1 person
Hi
I have just cleaned my sensor for the very first time despite the fact
that I have owned several mirrorless cameras over several years. You may
wonder why.
I have just bought a used Sony body and it had some stubborn dust specs
on the sensor. After cleaning it, I fitted a clip-in sensor protector
made by STC which has been my standard practice whenever I buy a new camera.
These are far and away easier to clean and less fragile than the camera
sensor.
LikeLiked by 1 person
Hi Berny,
Thanks for the great tip about the sensor protector—it sounds like a fantastic solution!
Would you mind sharing how you got yours? If it was online, could you provide a web address? Here in Belgium, I haven’t been able to find it easily, and since I have readers from all over the world, any advice on where and how to get one would be super helpful.
If you’re okay with it, I’d also love to include this information in the article to share with other readers.
Thanks in advance!
LikeLike
Hi,
LikeLiked by 1 person
Hi
Glad to share my experience with a clip-in sensor protector. I did buy it online from:
https://www.stcoptics.com/products/sensor-protector-clipfilter-panasonic-micro-four-thirds-cameras-bmpcc-4k-z-cam-e2?variant=41291421089945
I believe Kase sell them as well.
You are welcome to quote me in your article as well.
LikeLiked by 1 person
Another important article, well done 👍👍.
LikeLiked by 1 person
Thanks, Ted!
I hope this helps someone out there.
As for me, I’ve done it countless times already.
Wishing you a great day or evening!
LikeLiked by 1 person
Daar durf ik mij niet aan wagen. Blazen met de balg ja maar verder….
LikeLike
Het schrikt veel mensen af Joke, dus dat begrijp ik,
maar zelf heb ik het al ontelbare keren gedaan, en eigenlijk is er niets aan.
Hoe dan ook, blazen met het balgje doet al veel.
LikeLiked by 1 person
Hoop ik 😀
LikeLiked by 1 person
I’ve never had a need to clean my Olympus/OM Systems sensors. I’ve just never noticed any dust blobs. I used to own a Sony camera and that thing seemed like a magnet for dust. I think Canon’s cameras have some protective cover that protects the sensor when changing lenses.
LikeLike
Hey,
You might not notice it in your photos,
but it could become apparent if you test against a bright white background.
Either way, it never hurts to test! 😊
Regards, Marc.
LikeLike