
2 minutes reading time
I use RawTherapee for editing my photos. It’s a completely free and open-source tool that offers a powerful and flexible workflow. Now that I’ve started working with video, I needed an editing program that met the same criteria—free, open-source, and feature-rich. For me, that choice was Shotcut.
Just like in RawTherapee, where you can apply color grading and use LUTs to refine the look of your images, Shotcut provides similar capabilities for video editing. This allows for a consistent creative approach across both photography and videography while maintaining full control over the final aesthetic.
However, adjusting the strength of a LUT is not straightforward since Shotcut lacks a built-in intensity slider. In this guide, we’ll show you how to apply a LUT and fine-tune its strength using two effective methods.
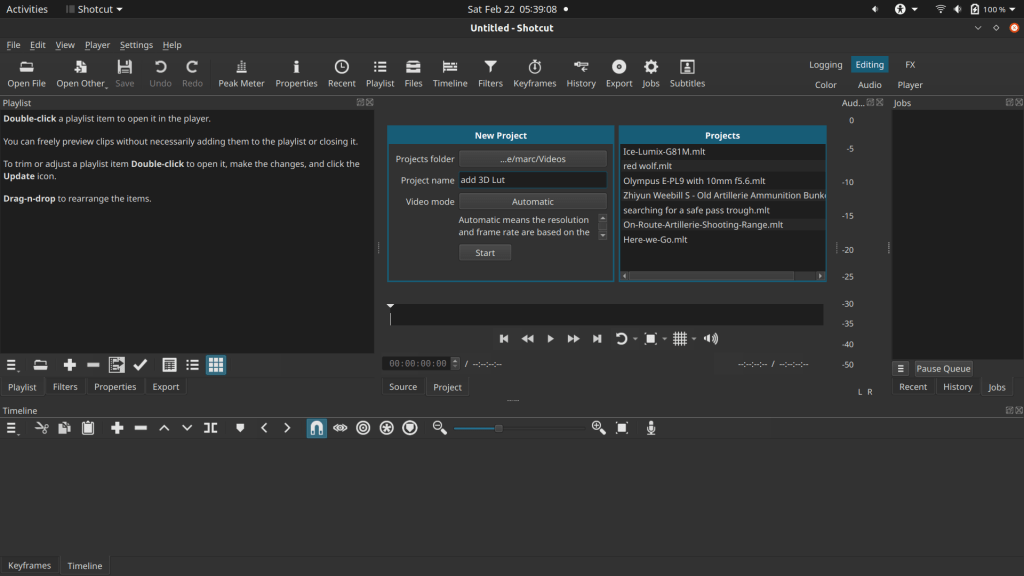
Step 1: Create a New Project
Open Shotcut and start a New project – set Video mode to Automatic – click Start
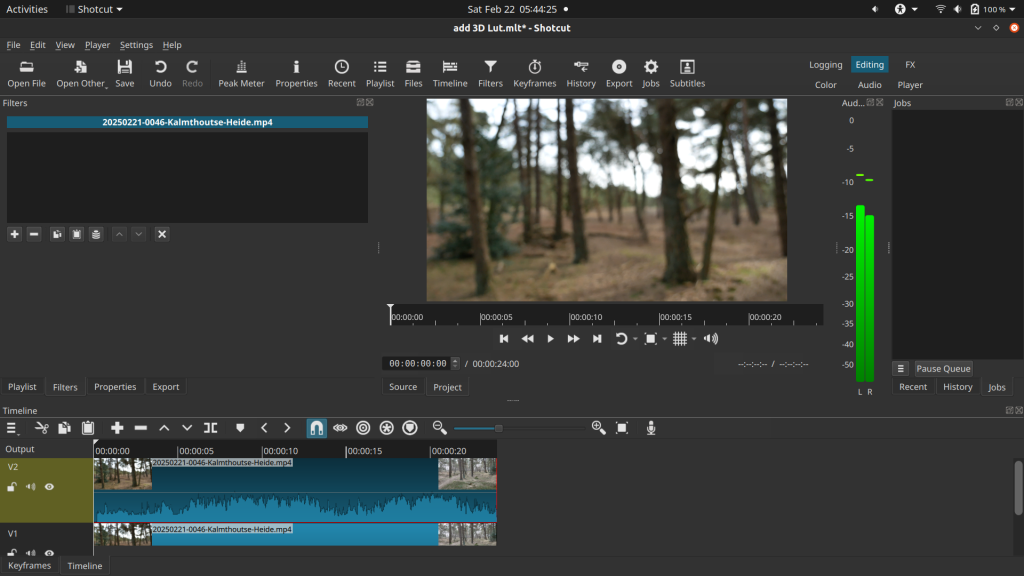
Step 2: Import and Duplicate Your Clip
- Drag your video clip into the Timeline.
- Right-click the clip and select Copy.
- Click on the menu icon with three lines left above the timeline and select Add Video Track to create a new track.
- Click on the new track to select it.
- Press Ctrl + V (or right-click and choose Paste) to duplicate the clip onto the new track.
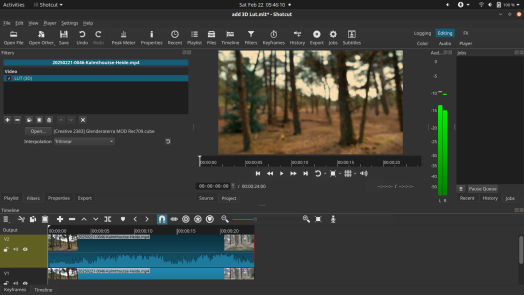
Step 3: Apply the 3D LUT Filter
- Select the top clip.
- Go to the Filters panel and click the + button.
- Choose Video Filters and search for 3D LUT.
- Click Open LUT File and load your desired LUT (.cube file).
Step 4: Adjust Brightness & Contrast
To refine the look:
- Add the Brightness and Contrast filters to the LUT-applied clip.
- Adjust the sliders to balance the image.

Step 5: Control LUT Strength (Two Methods)
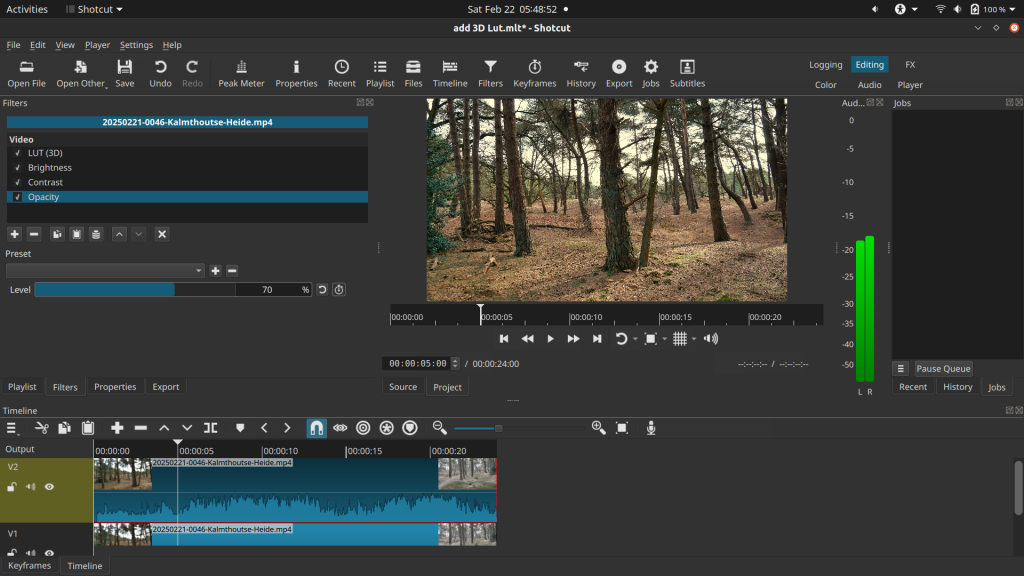
Method 1: Opacity Filter
- Select the top (LUT-applied) clip.
- Add the Opacity filter from the Filters panel.
- Lower the opacity to blend the LUT effect with the original clip.
Method 2: Blend Mode
- Instead of Opacity, you can use the Blend Mode filter.
- Set the blend mode to Overlay, Soft Light, or Multiply for different effects.
- Adjust the intensity by modifying brightness/contrast on either layer.

Video
Final Thoughts
By using Opacity or Blend Mode – or even both, you gain full control over the strength of the LUT, allowing for subtle color grading rather than a full transformation. Experiment with different LUTs and settings to achieve your desired look!
This article was written by Marc R.
While I primarily speak Dutch and have some knowledge of English and a little French, ChatGPT helps ensure my writing is grammatically correct. I often mix Dutch and English in my drafts, and ChatGPT steps in to translate and correct.
I don’t have any Sponsoring Companies, Patreon support, or Follower Donations.
I don’t drink Coffee, well, I do … but not the financial form you sometimes find on other websites, like ‘buy me a coffee’ 😊
However, what I truly need to keep going is Motivation, and the best part is, it won’t cost you a thing. You can offer it for free – just hit the Like button and Subscribe !
Discover more from Open Source Photography
Subscribe to get the latest posts sent to your email.

