

Intro :
In today’s article and its follow-up, I aim to explore Adobe Processing Profiles, much like I did earlier this year in “The Raw Advantage – My new Streamlined Workflow”. Yet, with changes in my workflow and the availability of a new version of these Adobe profiles, I’m eager to delve deeper into how to utilize them, what they entail, and where to access these Adobe Processing Profiles.
Previously, I relied on RawTherapee for developing RAW images, especially during my Pentax days. Despite decent JPEG output from Pentax, I found RAW files offered greater potential.
Recently, I’ve explored new camera systems, starting with Fujifilm, where excellent JPEG output minimized the need for RAW development. Transitioning to Olympus or OM System required adjustment to a different system and lenses, heavily influencing my photography style.
Today once more, I’ve fully adopted RAW photography for its versatility in both capture and post-processing. Especially in wildlife photography, RAW enables extensive editing capabilities such as enhancing sharpness and reducing noise, and in my workflow, I often rely on LUTs, presets, or profiles for effective color grading.
That’s why RawTherapee has become my top choice for developing photos more than ever !
For me there are three elements important in developing pictures, and they are:
- Sharpening
- Denoising
- Applying Camera & Lens Profiles, Film Simulation or Color Grading
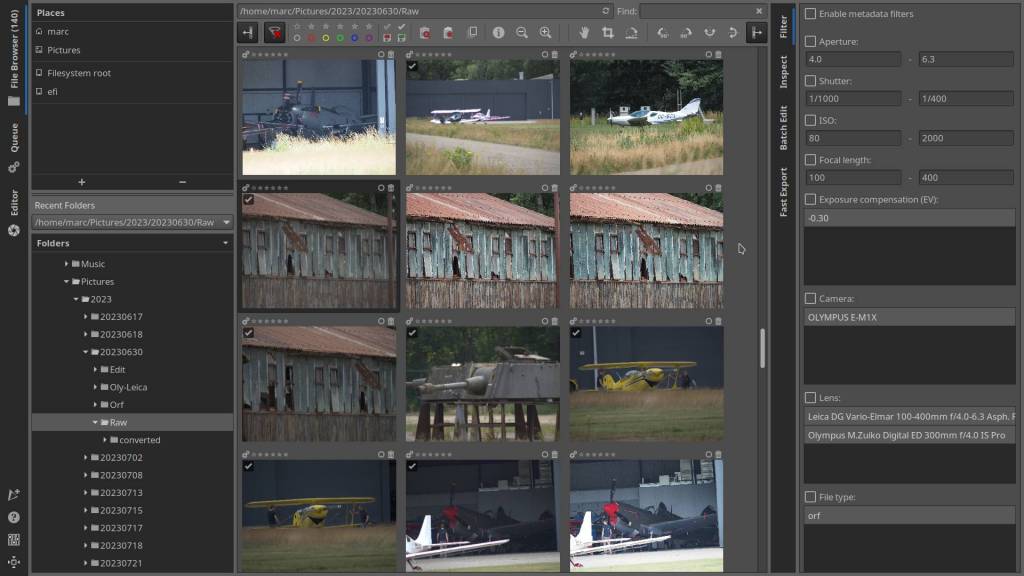
The first step I take when beginning work with RawTherapee is bring in my raw (RAW) pictures using Rapid Photo Downloader. After that, I usually apply a Film Simulation, Color Grading, or, more often than not, I utilize the profiles from the Adobe DNG converter – just as you would choose a Picture Mode (which is Color Grading) in-camera.
Instead of simply using a single click with “Auto Levels” or “Auto Matched Tone Curve”, or set your development exposure completely manually, I prefer employing Adobe DNG converter profiles , used in Adobe Photoshop, Lightroom, CameraRaw, but can also be used in RawTherapee. By utilizing these profiles, you can ensure consistent color and tone accuracy across pictures taken with various cameras. They serve as a reliable base for subsequent editing in your workflow, granting greater mastery over the final look of your images.
But what exactly is the Adobe DNG Converter, and where can I locate it?
The Adobe DNG Converter consists of three elements, the converter itself and also the Camera and Lens Profiles folders :
The Adobe DNG Converter transforms raw files from diverse digital cameras into the universal Digital Negative (DNG) format. This open standard ensures compatibility with Adobe software and other third-party applications supporting DNG -> I don’t use this feature. RawTherapee recognizes *Olympus ORF files well, as does the other software I use. However, installing the Adobe DNG Converter is necessary to access the Profiles.
* A remark I feel compelled to make is that RawTherapee 5.9 apparently recognizes ORF files from original Olympus cameras perfectly, but not ORF files from the new OM System OM-1 and OM-1 Mark II. So, if you happen to own a new OM System camera, the DNG converter can still be useful; convert the ORF files to DNG and you can resume working with RawTherapee. Support for ORF files from those cameras will be supported in RawTherapee version 5.10 which is already available here. However, although the recognition works, it does not go completely smoothly. You will notice that the neutral files are imported fairly dark, and that a fairly large correction is required to make them viewable.
Next, we have the Profiles: Adobe Camera Profiles and Adobe Lens Profiles, which are features seamlessly integrated into Adobe’s suite of imaging software including Photoshop, Lightroom, and Camera Raw. These profiles function to elevate image quality and accuracy by fine-tuning colors, tones, and correcting lens aberrations.
- Adobe Camera Profiles tailor color rendition and tonal range to suit different camera models.
- Adobe Lens Profiles address optical flaws such as distortion and chromatic aberration across a variety of lenses.
Moreover, RawTherapee is compatible with these profiles, allowing users to leverage them for advanced image editing.
Installing the Adobe DNG Converter and Profiles :
Alright, below you’ll find a screenshot of the website along with the corresponding download link. The Adobe Digital Negative Converter supports MacOS and Windows. As for myself, I’m a Linux user, specifically on Ubuntu 20.04 and 22.04. Thankfully, even on these systems, you can seamlessly utilize the Windows version via Wine, a Windows compatibility layer within Linux. Simply download the Windows version, then upon double-clicking the .exe file, Wine will automatically handle the installation (assuming you have Wine installed on your computer, of course.), placing the software in an inconspicuous folder named ‘.Wine’. To reveal hidden folders in Linux, just press Ctrl+H. Reverting to this key combination will conceal the folders and files again. I’ll delve into this further later on.
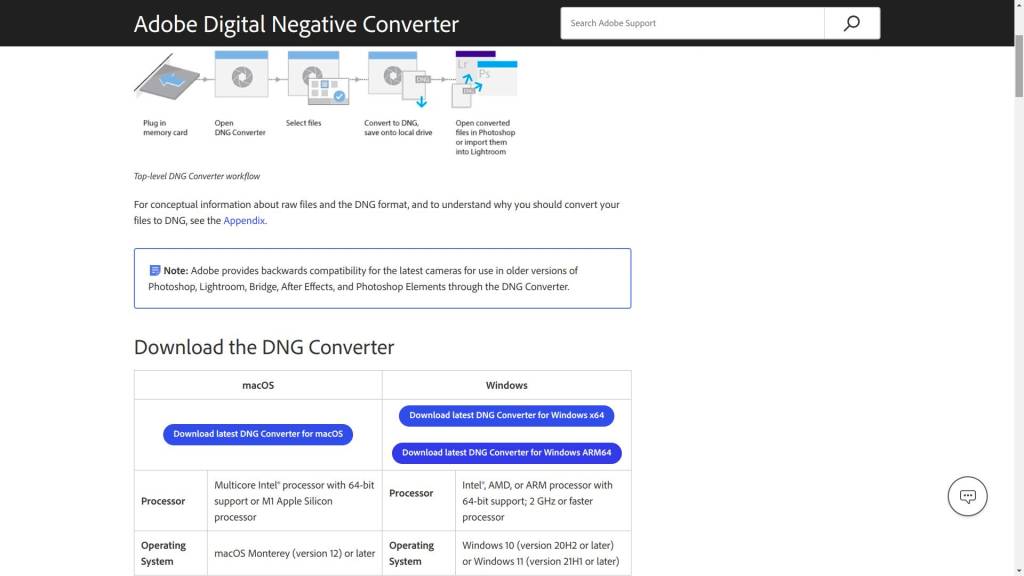
Adobe Digital Negative Converter
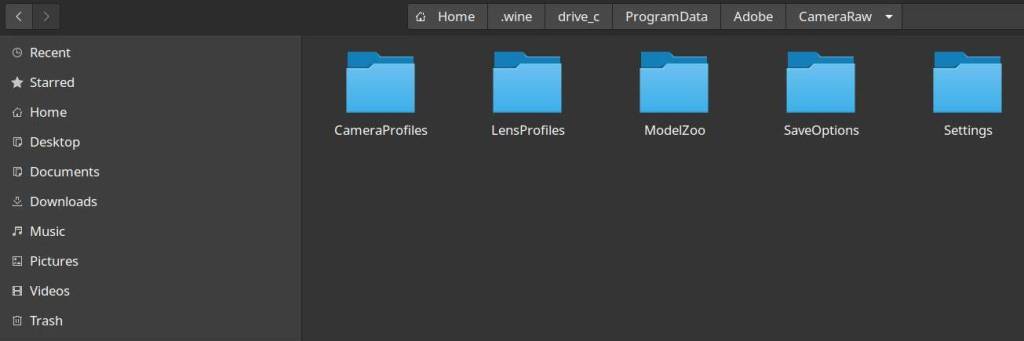
And this is what the Adobe DNG Converter looks like on a Linux computer.
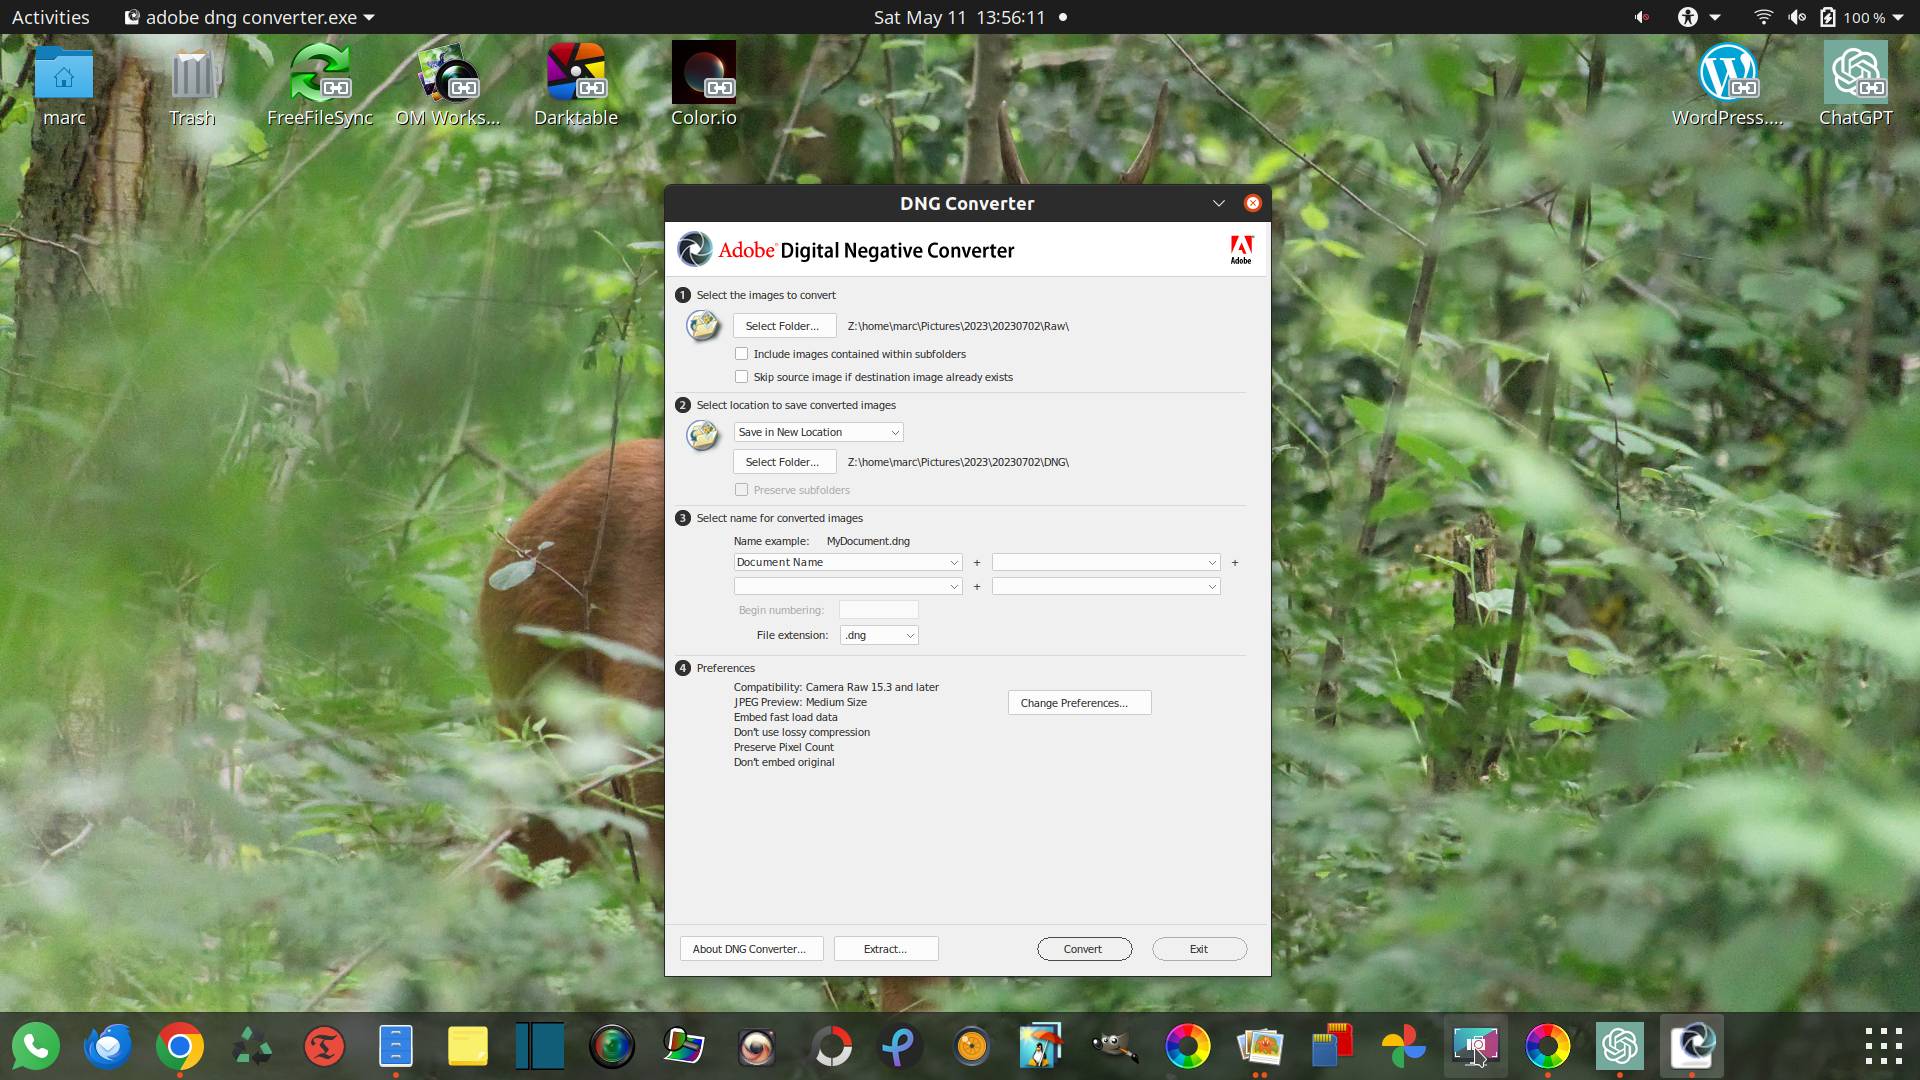
If you want to restart the converter after closing it in Linux, you need to navigate to the .Wine folder on your computer (press Ctrl+H), then go to drive_c – Program Files – Adobe – Adobe DNG Converter – Adobe DNG Converter.exe, and simply double-click it.
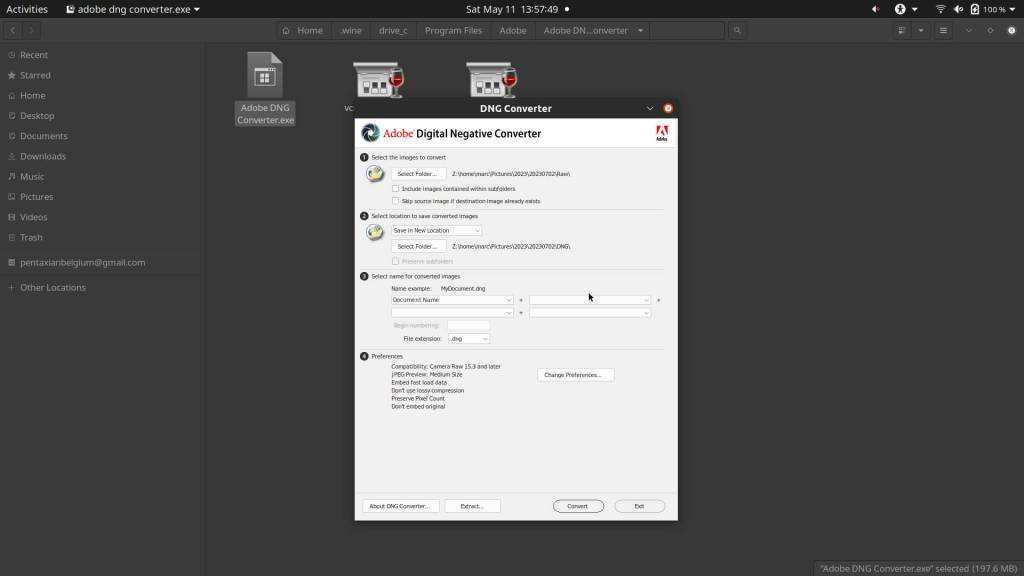
Now, for the part that concerns us as RawTherapee users, the location of the Camera and Lens Profiles :
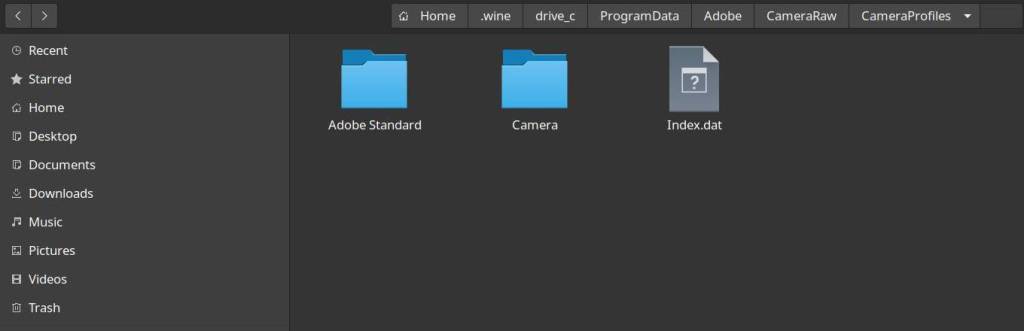
Linux: As you can see above, navigate to your Home directory – .Wine (Ctrl+H) – drive_c – ProgramData – Adobe – CameraRaw – and here you will eventually find the “CameraProfiles” and “LensProfiles” for various cameras and lenses.
For Windows, it’s essentially the same, but you start from the C drive. However, for reassurance, I looked up on the Adobe website what they specify as the location of the profiles, and this is what I found:
User profiles location:
Mac OSX: /Users/(User Name)/Library/Application Support/Adobe/CameraRaw/LensProfiles/1.0.
Windows 7 or Vista: C:\User(User Name)\AppData\Roaming\Adobe\CameraRaw\LensProfiles\1.0. Windows XP: C:\Documents and Settings(User Name)\Application Data\Adobe\CameraRaw\LensProfiles\1.0.
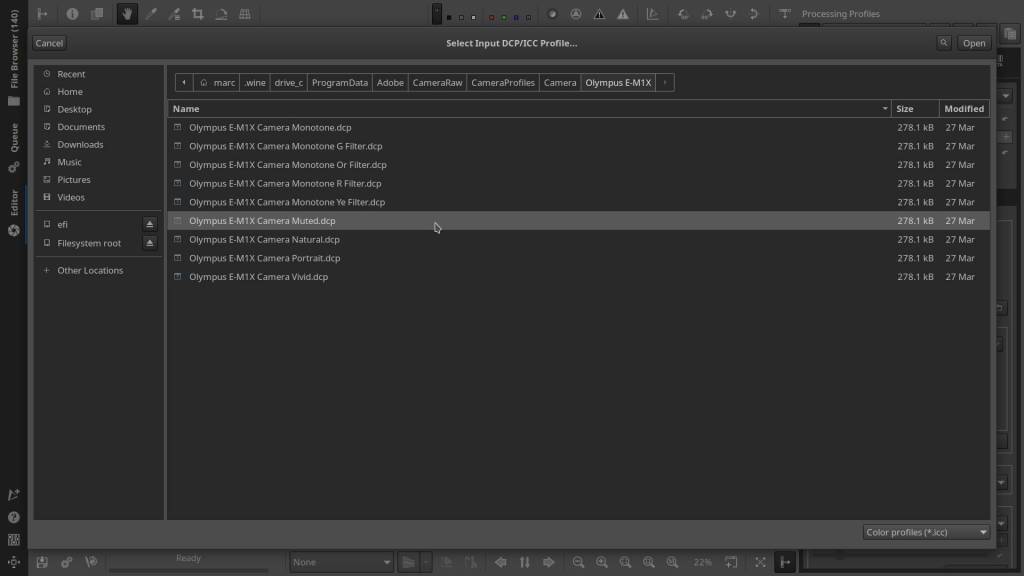
But there is one more step to take. The CameraProfiles folder still contains two additional folders: Adobe Standard and Camera. Within the Adobe folder, there is a single profile for each brand and type of camera: the Adobe Camera Standard profile (more about this later). In the Camera folder, you will find a subfolder for each specific brand and type of camera, each containing various profiles for that camera (such as monochrome, muted, natural…). :
Using and Workflow :
Now that we’ve installed the Adobe DNG Converter and its camera and lens profiles, we can begin working in RawTherapee. Below, you’ll find a step-by-step guide and screenshots on how to apply a camera profile to a picture, potentially multiple pictures, and ultimately produce a finished TIFF or JPG.
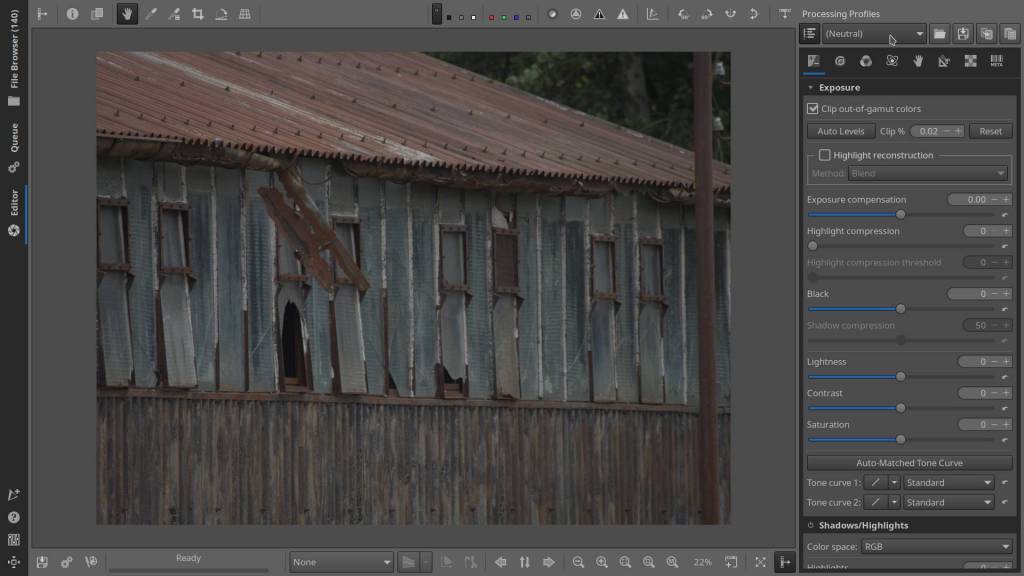
- Open RawTherapee – open a picture
- Make sure u set it to neutral
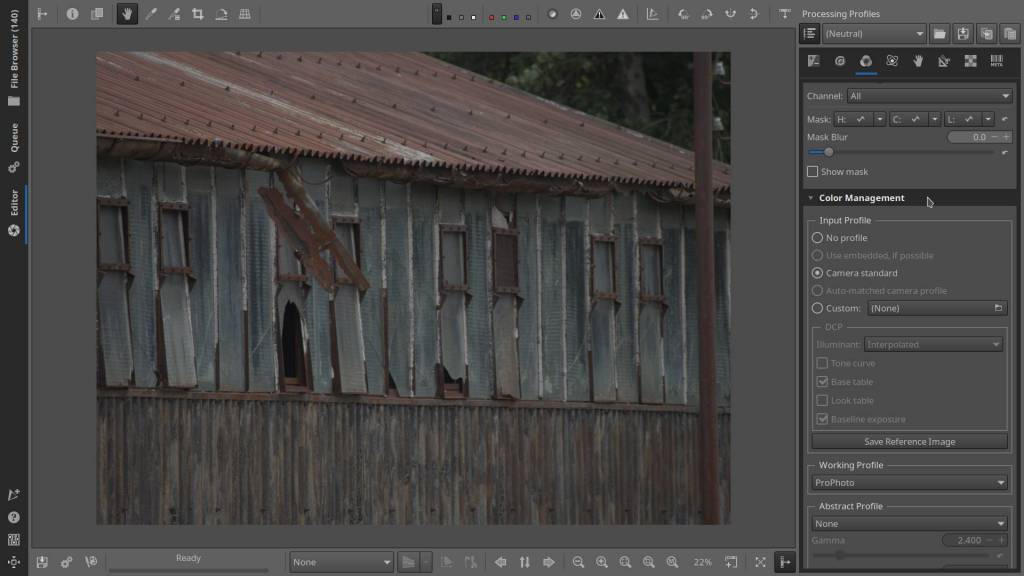
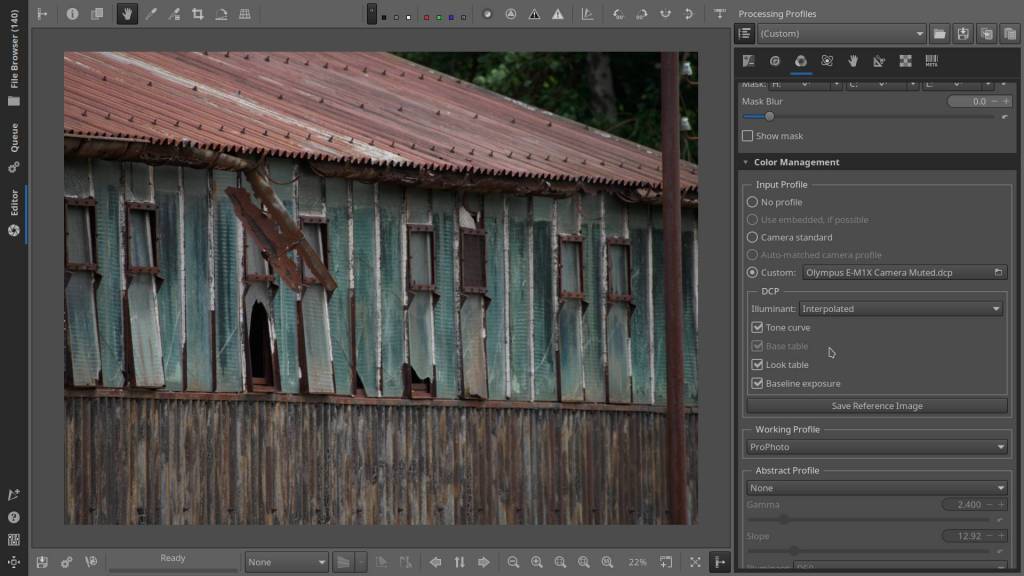
- Open the “Color” tab – scroll down to “Color Management” – activate “Custom” camera profile
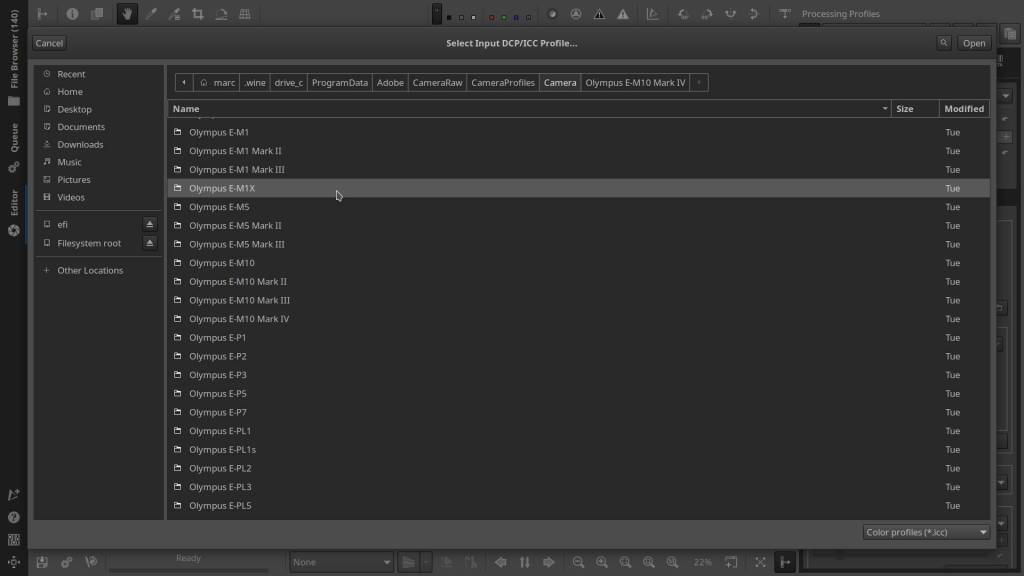
- In “Custom” click the folder icon – go to “CameraProfile” open “Camera” folder – double click on your camera folder
- Select a DCP Camera Profile of your choice
- Activate “Tone Curve” and/or “Look Table” to your taste
Alternatively, in step 4, you can choose the standard Adobe camera profile :
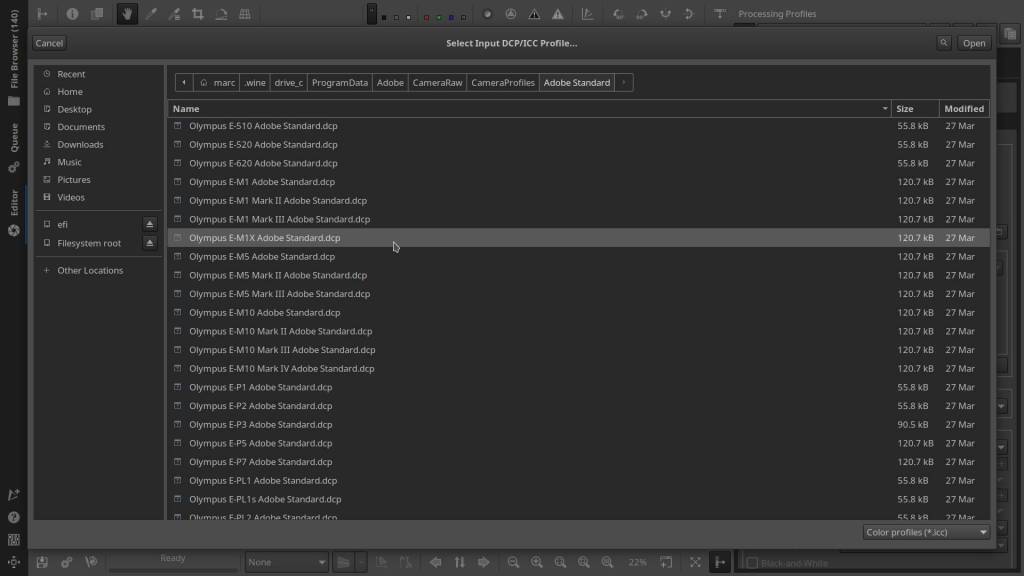
In “Custom” click the folder icon – go to “CameraProfile” open “Adobe Standard” folder – select Adobe Standard DCP profile of your camera
The next step is to select a matching lens profile. To do this, navigate to the scissors and triangle tab, then scroll down to “Profiled Lens Correction.” The simplest and most effective method, which will work in most cases, is to simply activate “Automatically Selected.” This will automatically choose the correct lens.
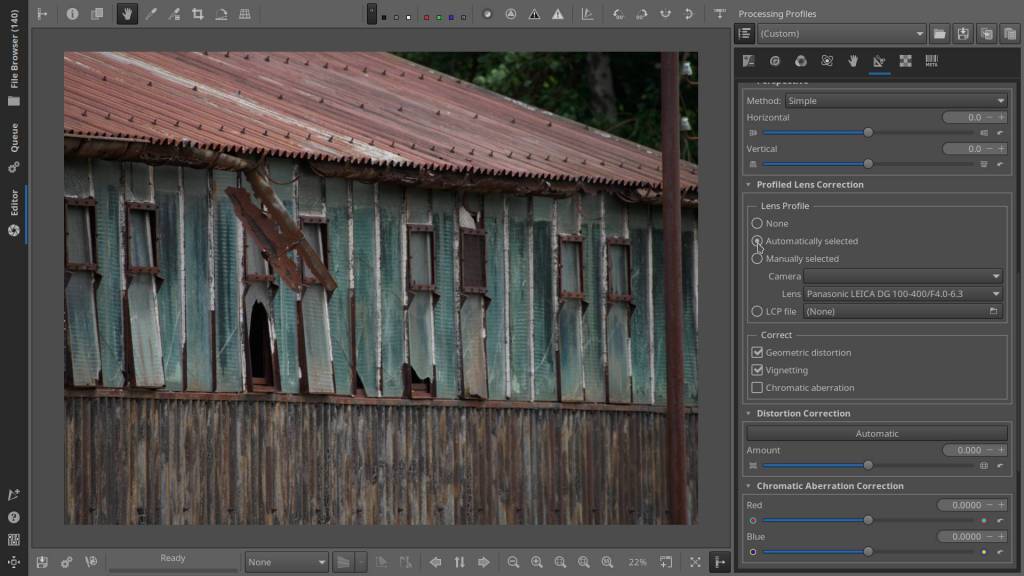
If it’s not automatically detected, you can manually select the correct lens from RawTherapee’s list. Above, you’ll see both options, ‘Automatically Selected’ and ‘Manually Selected’, available.
The third method, to be employed when using a manual or vintage lens without electrical contacts, involves manually selecting an LCP profile from the Adobe Lens Profiles list.
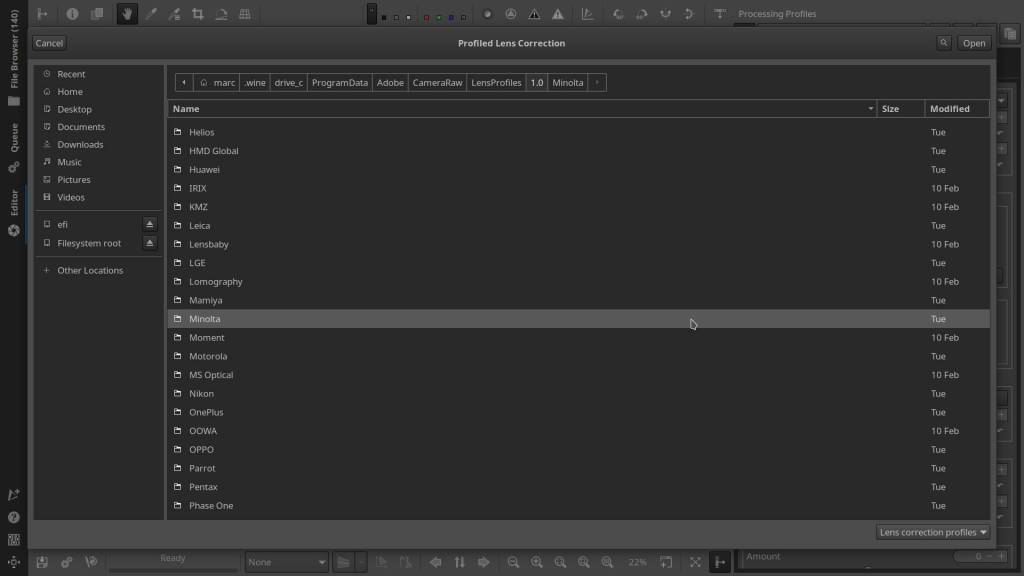
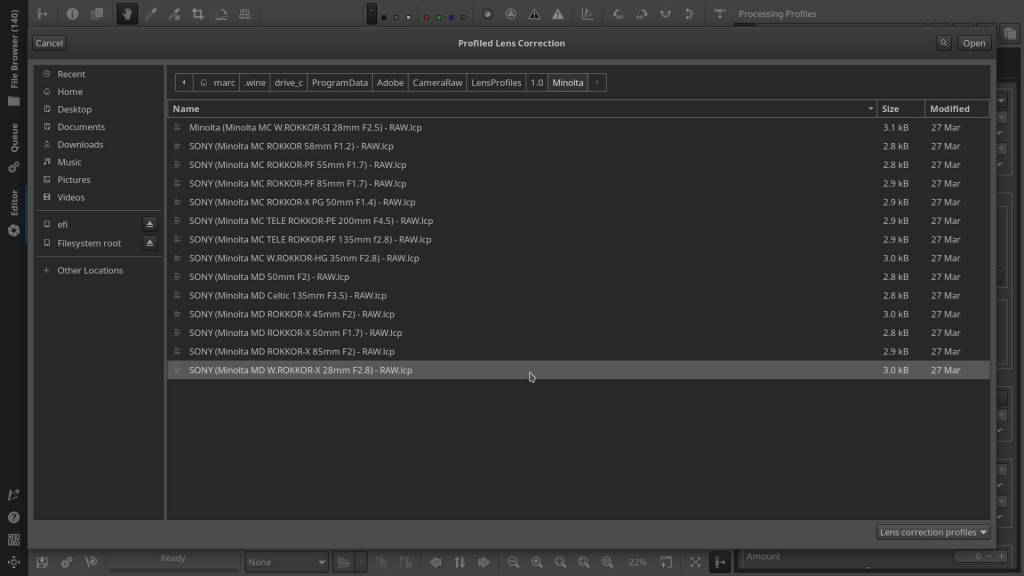
Open the Adobe Profiles folder as indicated earlier in this article. Navigate to “Adobe” -> “CameraRaw” -> “LensProfiles” -> “1.0”. Inside, locate the folder corresponding to your lens brand. From there, choose an LCP profile from the list.
We’re nearing completion in developing our picture in RawTherapee. For the next step, I typically navigate to the “Exposure” and/or “Detail” tabs, where I make final adjustments before saving the picture to my computer. Regarding the “Detail” tab, here you’ll find features like Sharpening and Noise Reduction, which I’ll cover in a new OSP article.
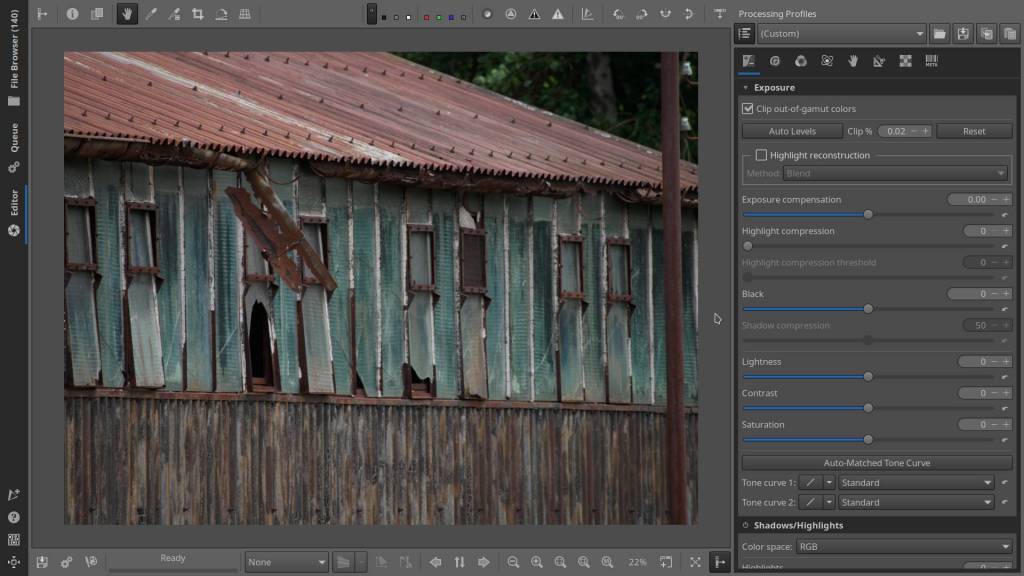
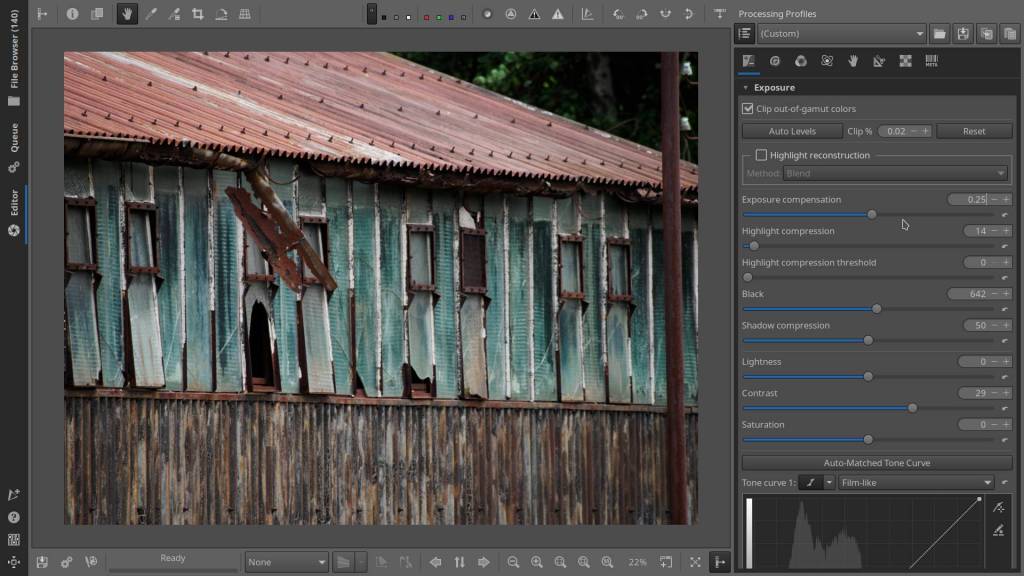
- Go to “Exposure” tab
- Make last adjustments
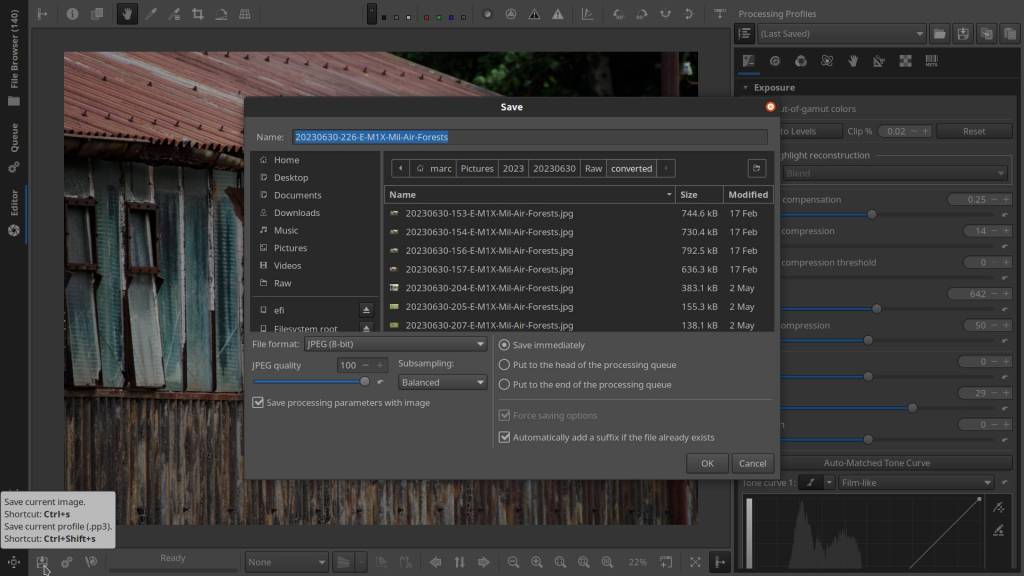
- Select the floppy disk icon located in the bottom-left corner to save the current picture. My preference is to always save processing parameters alongside the image and to append a suffix if a file with the same name already exists, ensuring that earlier saves are not overwritten. Opt for saving as JPG if you’re done with any further editing, and select saving as TIFF if additional editing is required.
You can alternatively process all or multiple pictures at once using the “Processing Queue.” In fact, this is the method I predominantly employ :
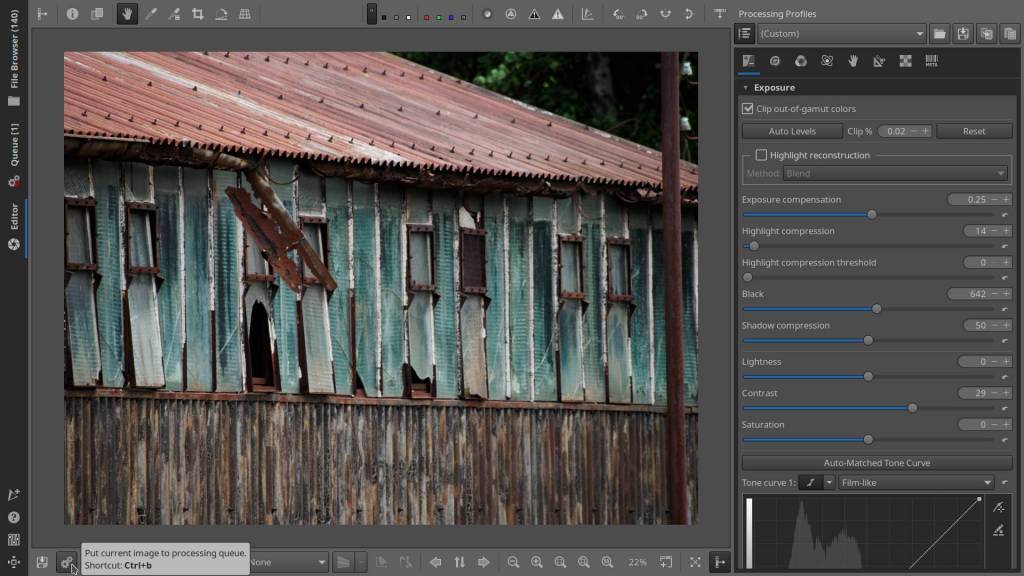
- Click on the Gear icon to place one single edit in the Queue
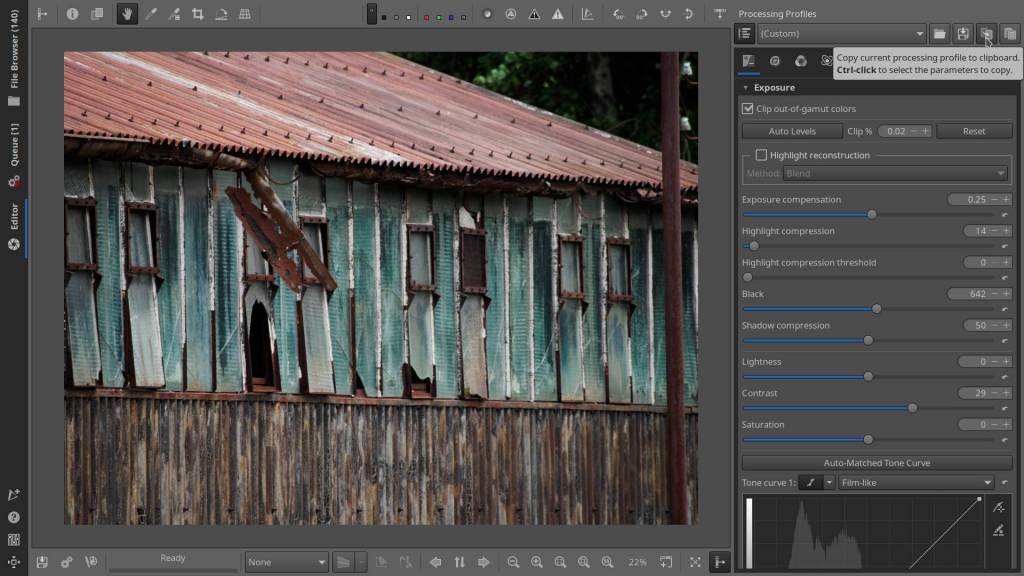
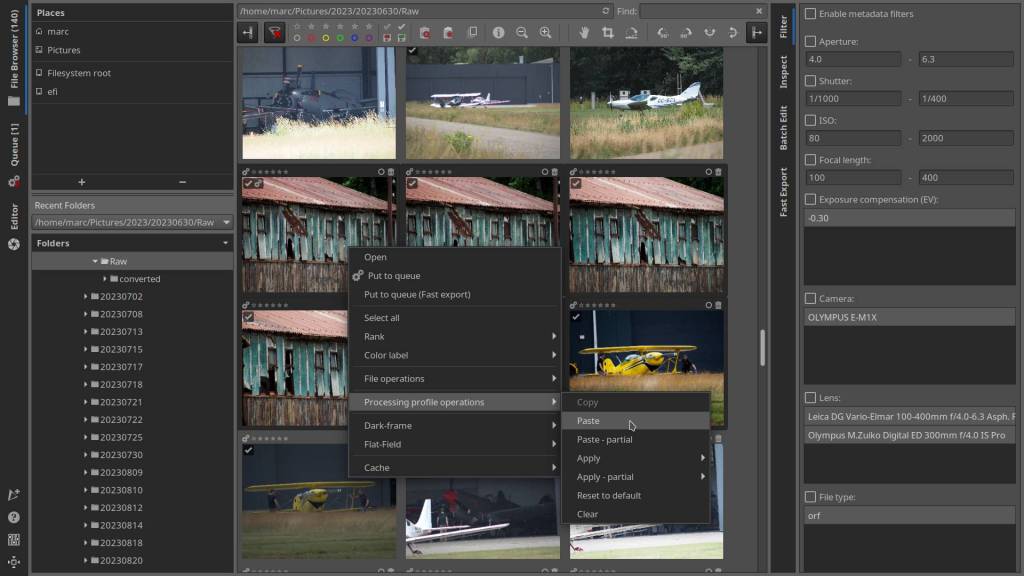
- Alternatively, select the icon located at the upper-right corner, the second one from the right, to copy the current processing profile to the clipboard.
- Choose one or more pictures simultaneously, right-click on any of them, select “processing file operations” from the list, and then choose “paste.” The previously selected settings will be applied to all the selected pictures at once.
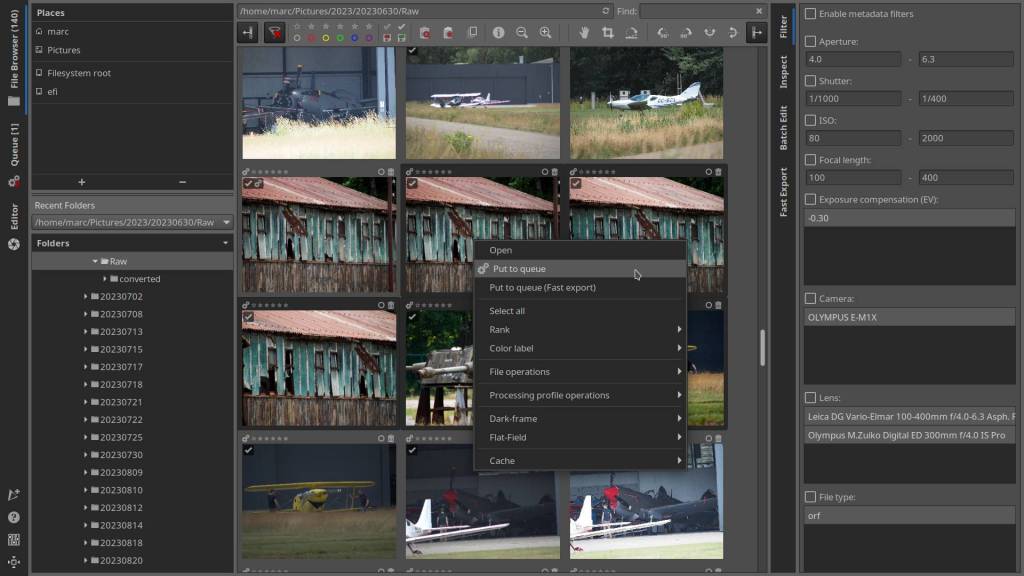
- Again right-click on one of the selected pictures and choose “put to queue” – If desired, you can now edit a new selection with a different Camera or Lens profile and place it also in the Queue
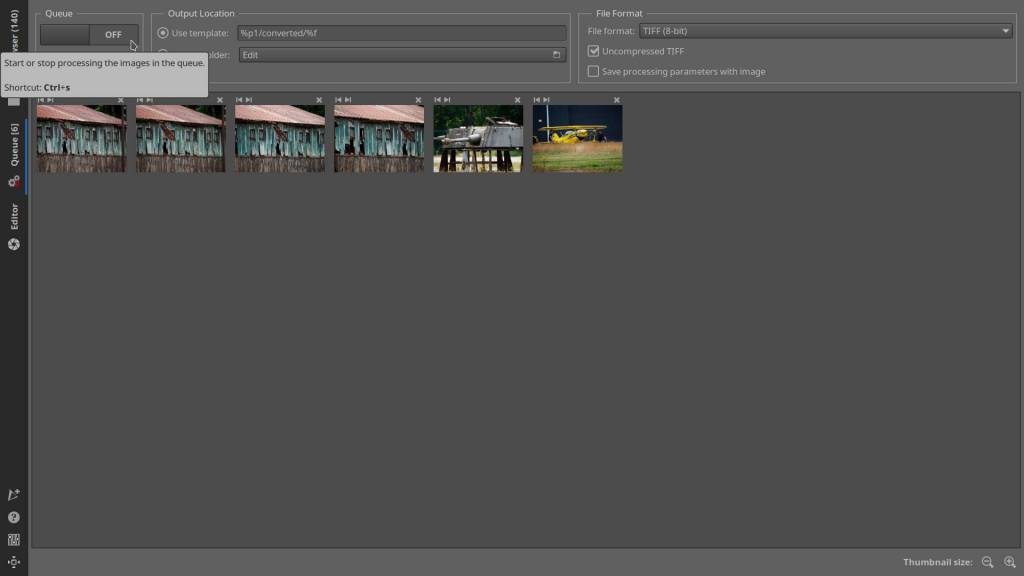
- The only thing left for you to do to develop all the pictures in that Queue is to click on the Start button at the top left. As additional options, you can make the following selections: save as JPG or TIF, save parameters, choose the folder where the output should be saved – in my case, I choose to automatically create a folder named “converted” in my Raw folder. All JPG or TIF files that are ready for publication or further editing will be placed here.
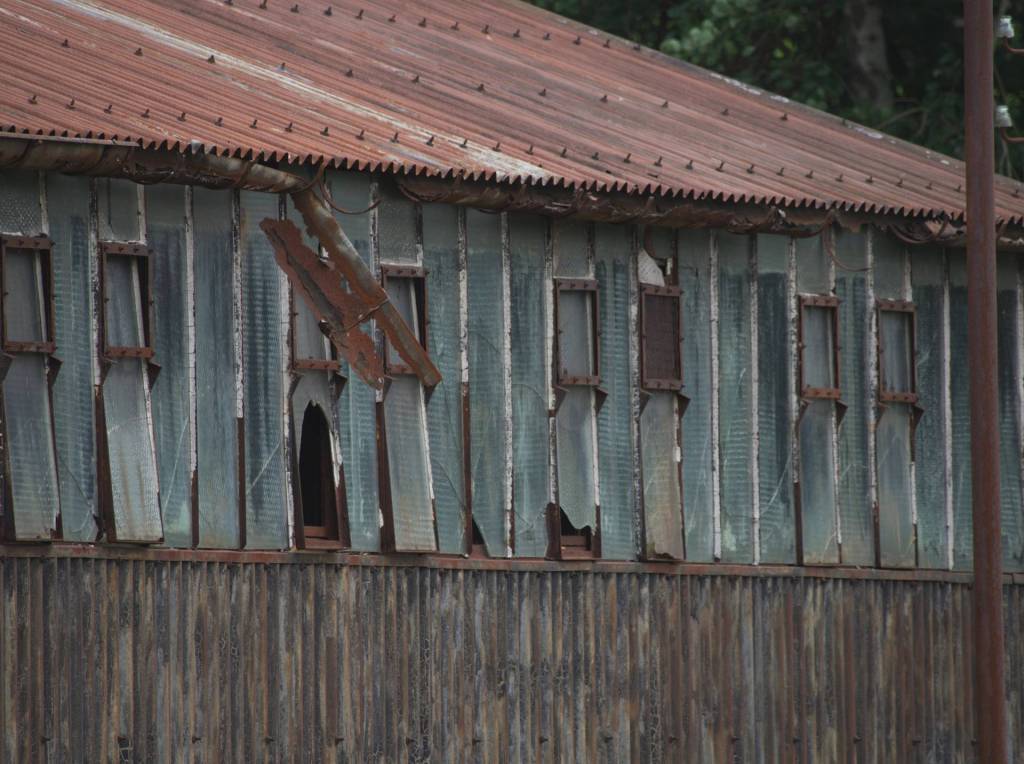
You have now completed the development of pictures using Adobe DNG Camera Profiles. Below, you’ll find some sample pictures with various Adobe camera profiles applied, including the previously mentioned “Adobe Standard” camera profile. It’s the most neutral and natural profile, even more so than the Muted profile from the regular camera selection. Choose this profile as a starting point if you intend to adjust the exposure or make further modifications yourself.


There remains one thing left for me to say:
I don’t have any Sponsoring Companies, Patreon Support, or Follower Donations. I don’t drink Coffee, so that’s not something you can assist me with either. However, what I truly need to keep going is motivation, and the best part is, it won’t cost you a thing. You can offer it for free—just hit the Like and Subscribe button !
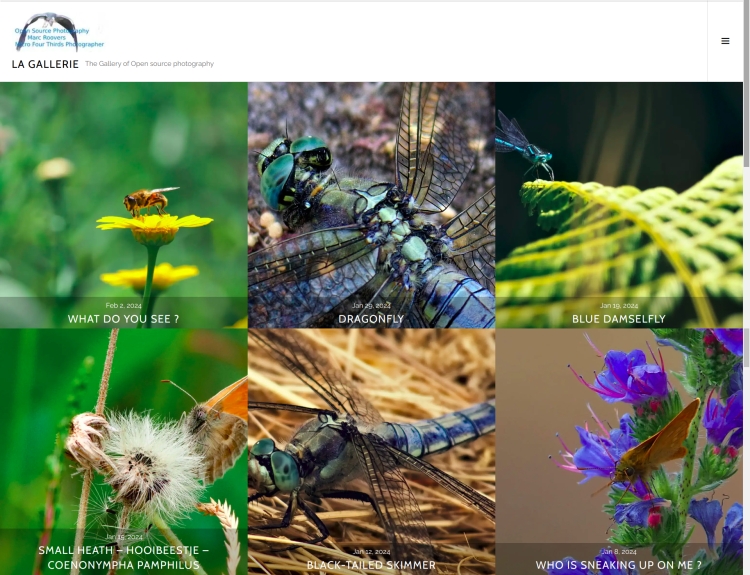
The photo gallery of Open Source Photography, Olympus micro 4/3 system, Vintage Lens Photograpy, Film Simulation, PictureFX, HDR – Photographer : Marc R.
Discover more from Open Source Photography
Subscribe to get the latest posts sent to your email.


A very good and comprehensive guide for those who need it Marc.
LikeLiked by 1 person
Thanks Mark, have a nice weekend !
LikeLike
Moet ik komen herlezen en bekijken voor een Fuji waarvoor ik geen lens profiel heb. Bedankt voor de schitterende uitleg.
LikeLiked by 1 person
Bedankt Joke, graag gedaan, fijn weekend !
LikeLiked by 1 person
Fijn weekend
LikeLike
very interesting, and detailed post. Thanks. The new format of the OM-1 raw files has caused issues for people using just about any software. It might be the weakest and biggest negative of the system itself. After a bit though everybody seems to find a solution that works. Again thanks, nice read.
LikeLiked by 1 person
Thanks, Ted. Yes, it’s a shame that, with such an otherwise great system, such a problem occurs.
But, soon all the software will be up to date,
and everyone will have forgotten about it.
Have a great weekend, Ted!
LikeLiked by 1 person