
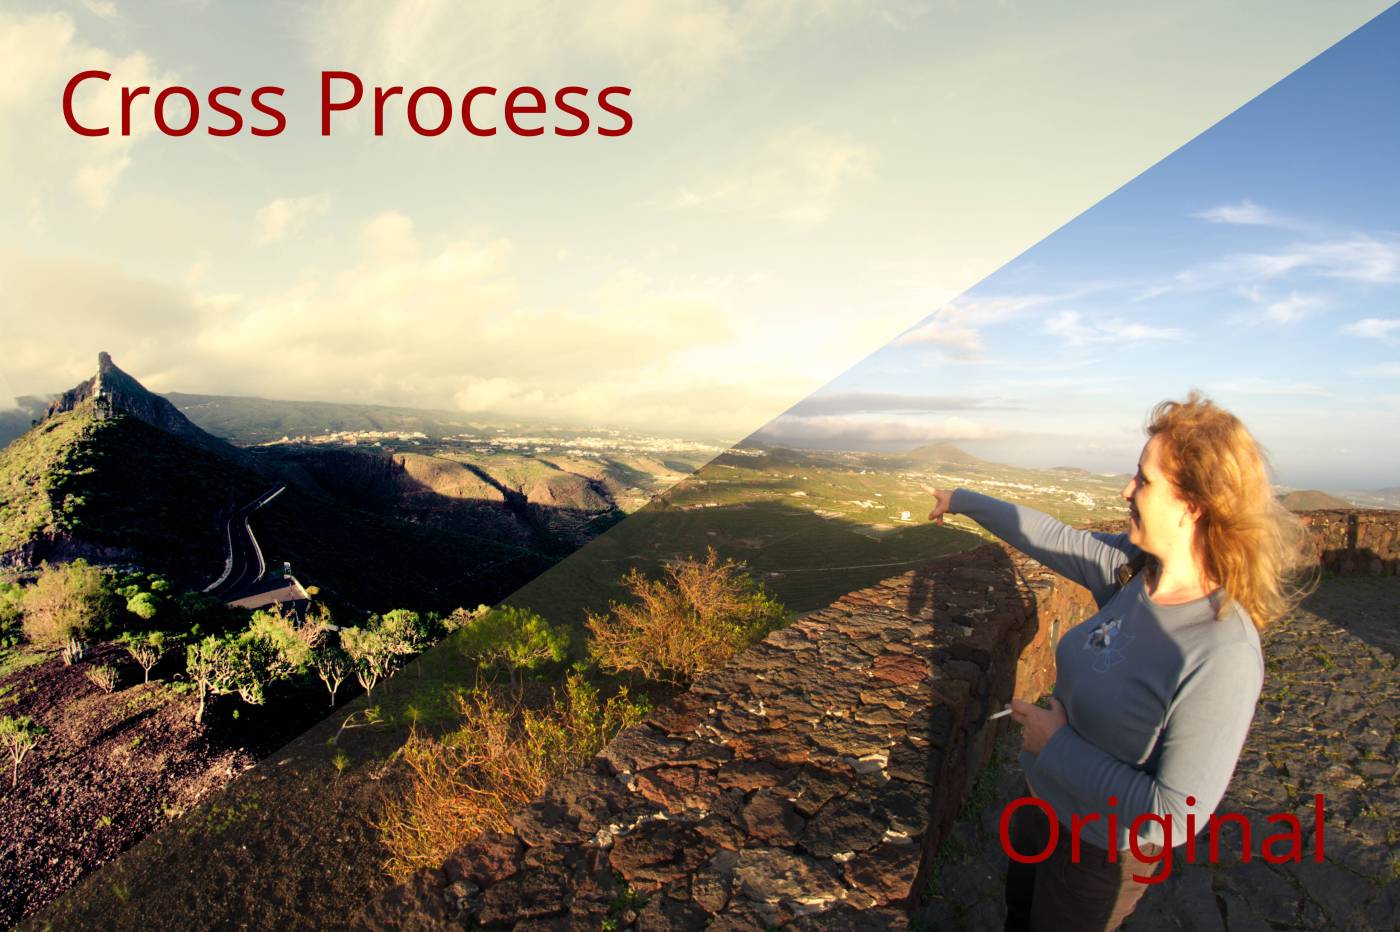
As with the PictureFX versions of the “in camera” Fujifilm Simulations and the “real film” based Superia 200, I had spend a lot of time researching, in this case how to Cross Process digitally.
I am not going to explain what Cross Processing is, because you probably know that, but we will go over the techniques used and you can download two different simulations for different software applications below.
As always, there are many roads that lead to Rome.
I myself have made all the adjustments in RawTherapee, and this according to two different methods. Of course the methods followed are not meant as a bible, you can add changes to your own taste, there are no rules. My intention was to obtain a method that was simple, not too extreme, and applicable to many different subjects and lighting conditions.
You could also Cross Process a picture by adjusting the White Balance, but this is a possibility that you can do on your (Fuji) Camera, so I prefer to leave that open to let you experiment or make your own Recipe.
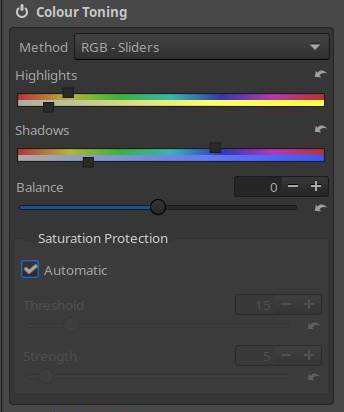
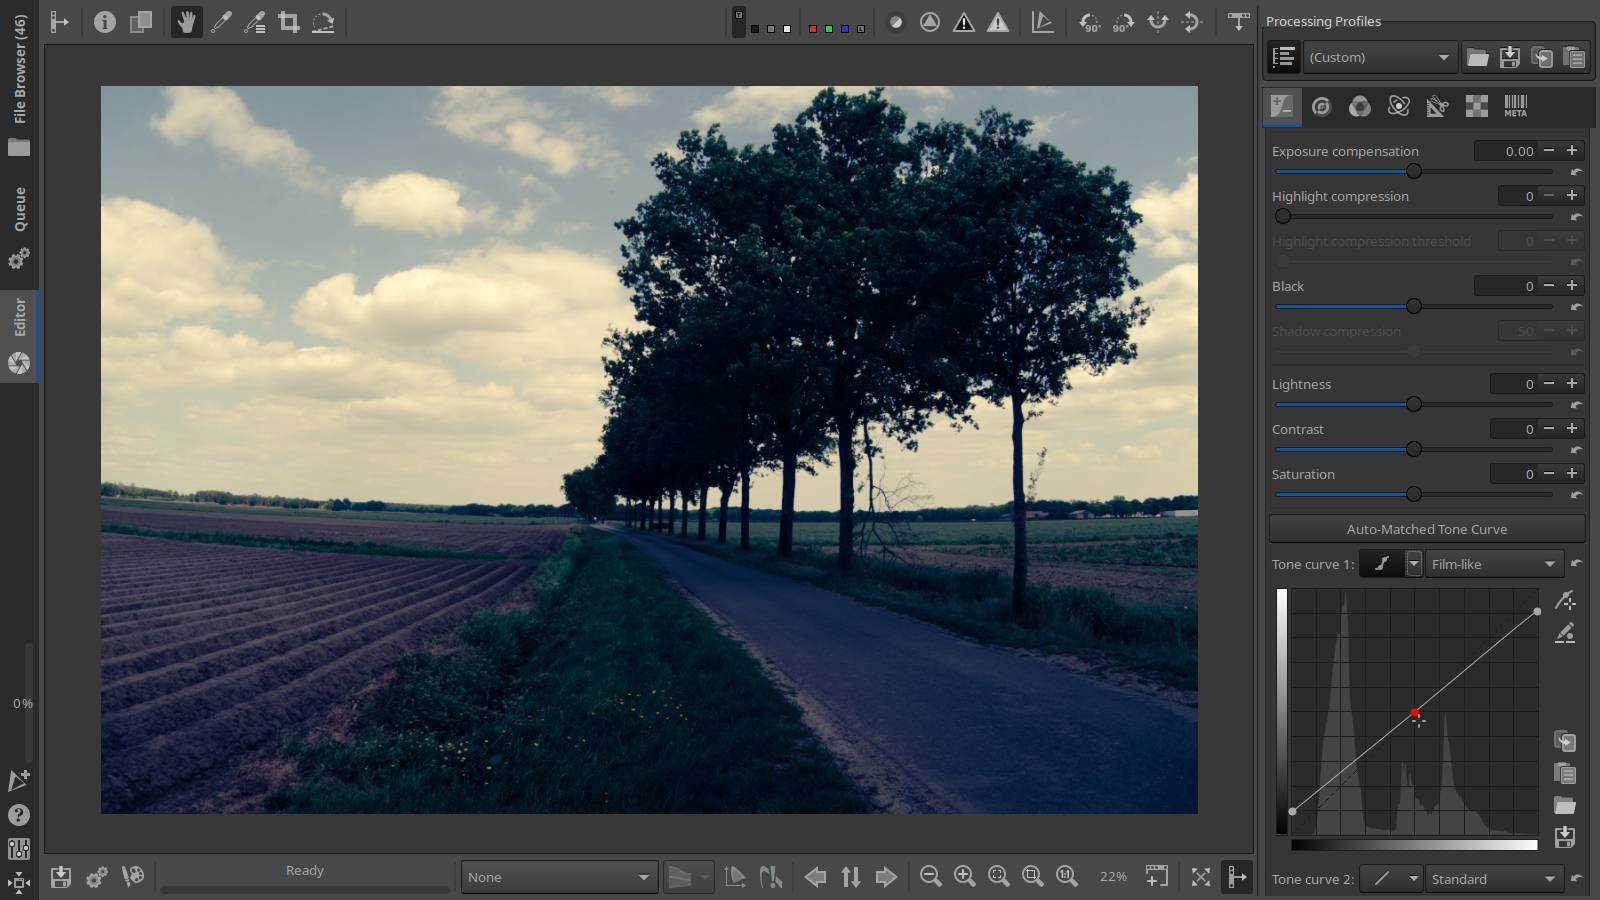
Methode 1 – Color Toning adjustments : Exposure -> Contrast +25, Channel Mixer -> Blue Channel ->20, Film Simulation -> PictureFX Classic Chrome, Color Toning -> RGB Sliders -> Highlights Hue -> 59 -> 10%, Shadows Hue -> 23%
If you search for “how to’s” about Cross Processing yourself, you will notice that some people change all kinds of settings, and that is perfectly possible, but you have to be careful.
You will soon notice that the same effect can usually be achieved with small subtle adjustments, and that usually without strange artifacts and color shifts occurring.
As applies to many things: “less is more”.
This certainly applies to the creation of Lut’s.
Method 1 is such a case where you have to be very careful, the cross processing effect is achieved here by individually influencing the colors in the highlights and shadows (Color Toning – RGB Sliders), hence the low values in the strength of the effect – HH 10% and SH 23%.
In order to obtain an amplification of the effect without color shifting, the contrast was increased to 25%, in the end this effect was applied to my own PictureFX Classic Chrome simulation, and the resulting Lut and Cube were extracted there.
Partial Script : copy text below, paste in text editor ( notepad, kate…) save as .pp3, or in case of Artherapee save as .arp – set RT processing profiles to “partial” -> load script
Note : Edit the path of the Classic Chrome Lut – it will be different on your computer !
[Version]
AppVersion=5.8
Version=346

[Exposure]
Auto=false
Clip=0.02
Compensation=0
Brightness=0
Contrast=25
Saturation=0
Black=0
HighlightCompr=0
HighlightComprThreshold=0
ShadowCompr=50
HistogramMatching=false
CurveFromHistogramMatching=false
ClampOOG=true
CurveMode=Standard
CurveMode2=Standard
Curve=0;
Curve2=0;

[HLRecovery]
Enabled=false
Method=Blend

[Channel Mixer]
Enabled=true
Red=1000;0;100;
Green=0;1000;100;
Blue=0;0;800;

[Film Simulation]
Enabled=true
ClutFilename=HaldCLUT/PictureFX Fujifilm Professional/PictureFX Pro - Fujifilm Classic Chrome.png
Strength=100

[ColorToning]
Enabled=true
Method=RGBSliders
Lumamode=true
Twocolor=Std
Redlow=0
Greenlow=0
Bluelow=0
Satlow=0
Balance=0
Sathigh=0
Redmed=0
Greenmed=0
Bluemed=0
Redhigh=0
Greenhigh=0
Bluehigh=0
Autosat=true
OpacityCurve=1;0;0.29999999999999999;0.34999999999999998;0;0.25;0.80000000000000004;0.34999999999999998;0.34999999999999998;0.69999999999999996;0.80000000000000004;0.34999999999999998;0.34999999999999998;1;0.29999999999999999;0;0;
ColorCurve=1;0.050000000000000003;0.62;0.25;0.25;0.58499999999999996;0.11;0.25;0.25;
SatProtectionThreshold=43
SaturatedOpacity=18
Strength=50
HighlightsColorSaturation=10;59;
ShadowsColorSaturation=23;232;
ClCurve=3;0;0;0.34999999999999998;0.65000000000000002;1;1;
Cl2Curve=3;0;0;0.34999999999999998;0.65000000000000002;1;1;
LabGridALow=0
LabGridBLow=0
LabGridAHigh=0
LabGridBHigh=0
LabRegionA_1=0
LabRegionB_1=0
LabRegionSaturation_1=0
LabRegionSlope_1=1
LabRegionOffset_1=0
LabRegionPower_1=1
LabRegionHueMask_1=1;0.16666666699999999;1;0.34999999999999998;0.34999999999999998;0.82877752459999998;1;0.34999999999999998;0.34999999999999998;
LabRegionChromaticityMask_1=1;0;1;0.34999999999999998;0.34999999999999998;1;1;0.34999999999999998;0.34999999999999998;
LabRegionLightnessMask_1=1;0;1;0.34999999999999998;0.34999999999999998;1;1;0.34999999999999998;0.34999999999999998;
LabRegionMaskBlur_1=0
LabRegionChannel_1=-1
LabRegionsShowMask=-1
Methode 2 – RGB Curves : Film Simulation -> PictureFX Classic Chrome, RGB Curves -> adjustment curve for each color
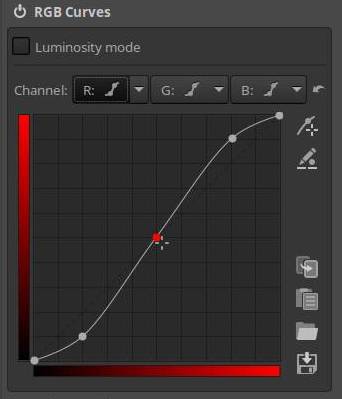
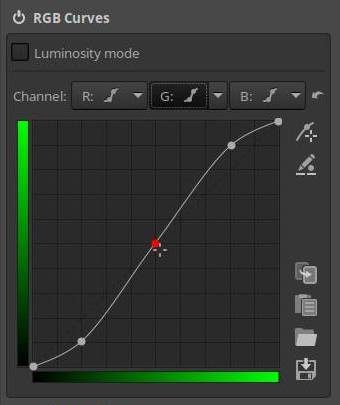
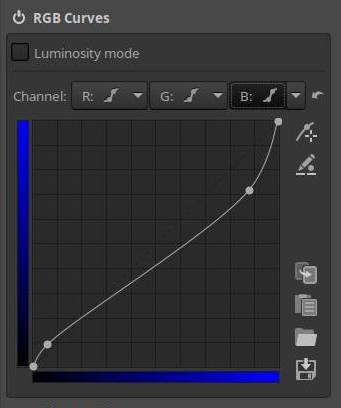
Method two is performed by making adjustments to the RGB curves. I myself have chosen a flexible curve in the drop down menu corresponding to each color, but of course you can also make a different choice.
The intention is to form an S-shaped curve in each of the RGB colors, which may also follow a mirrored S or a completely different curve, just make sure that there is no ugly color shifting.
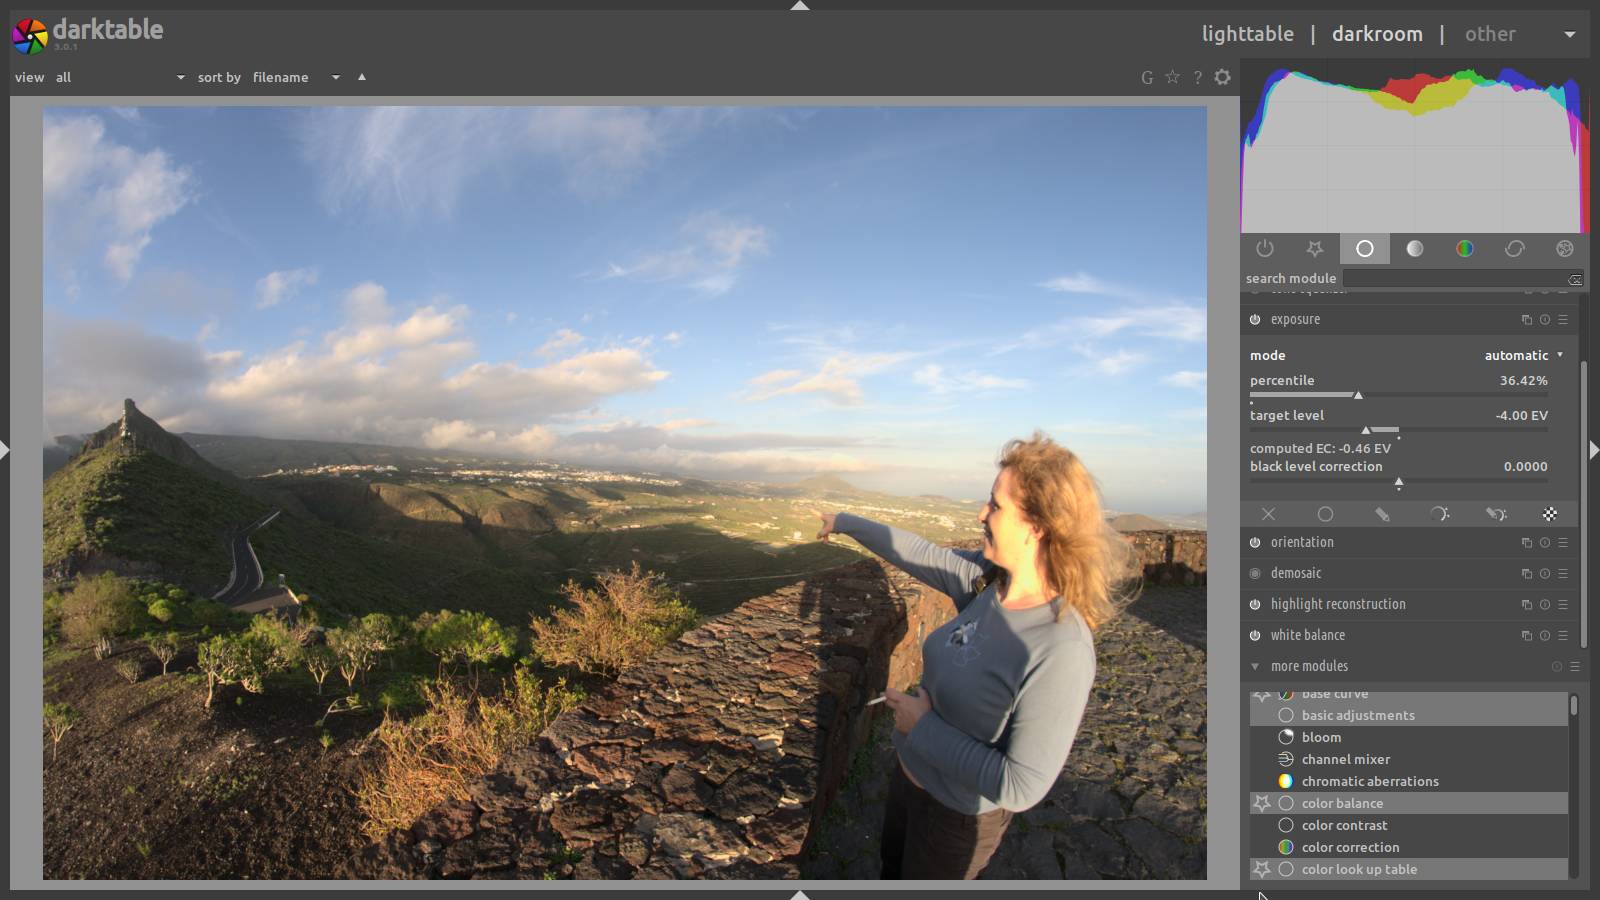
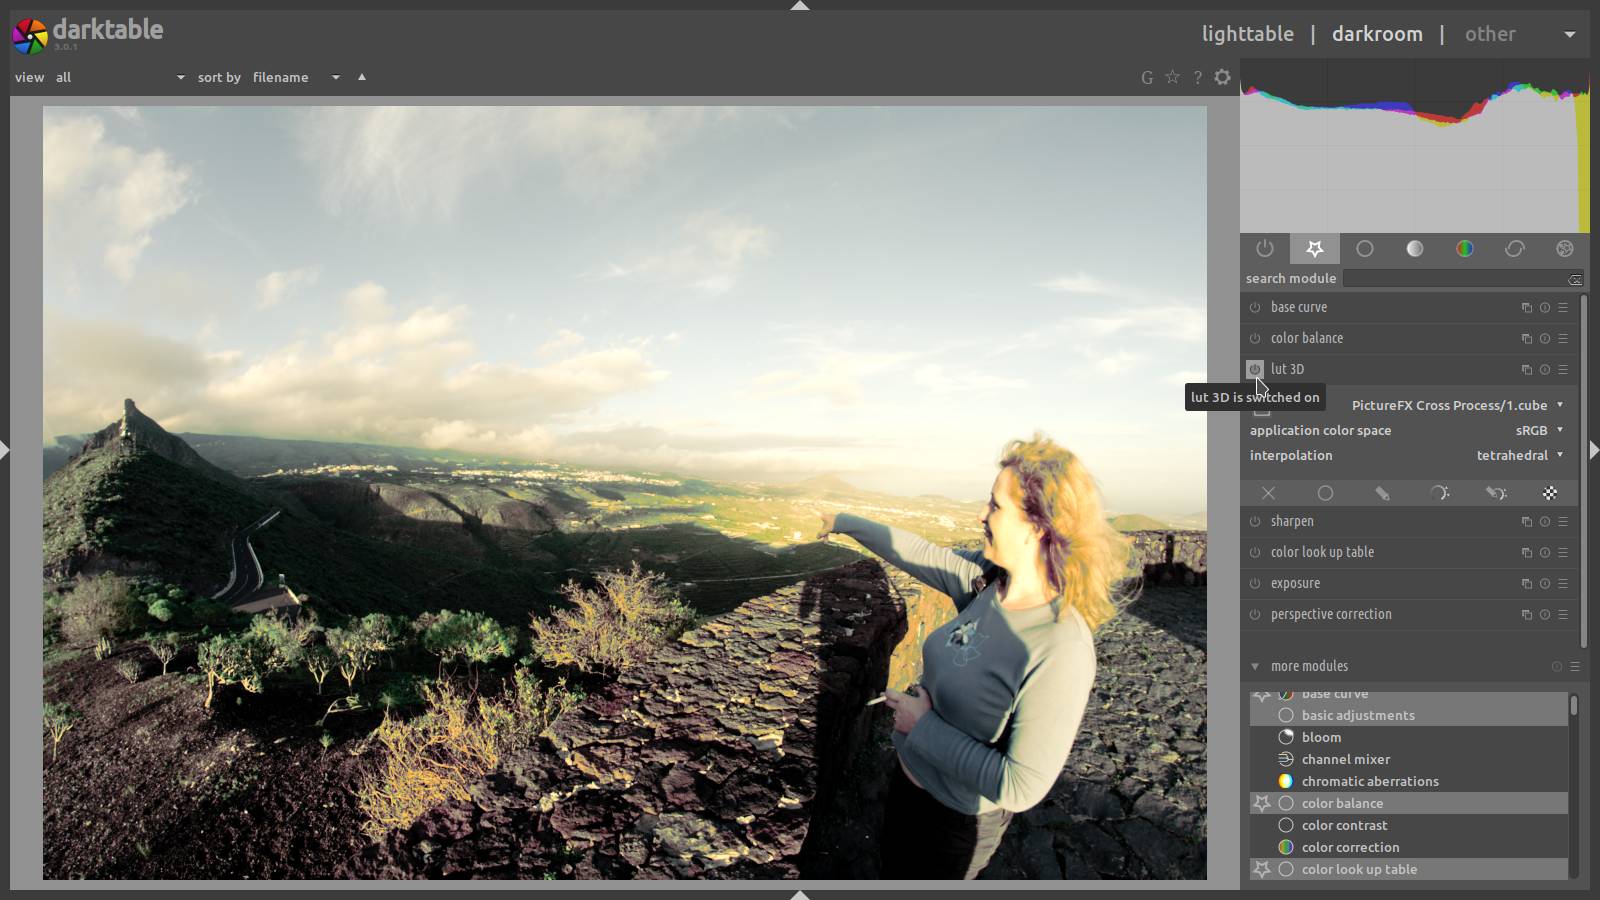
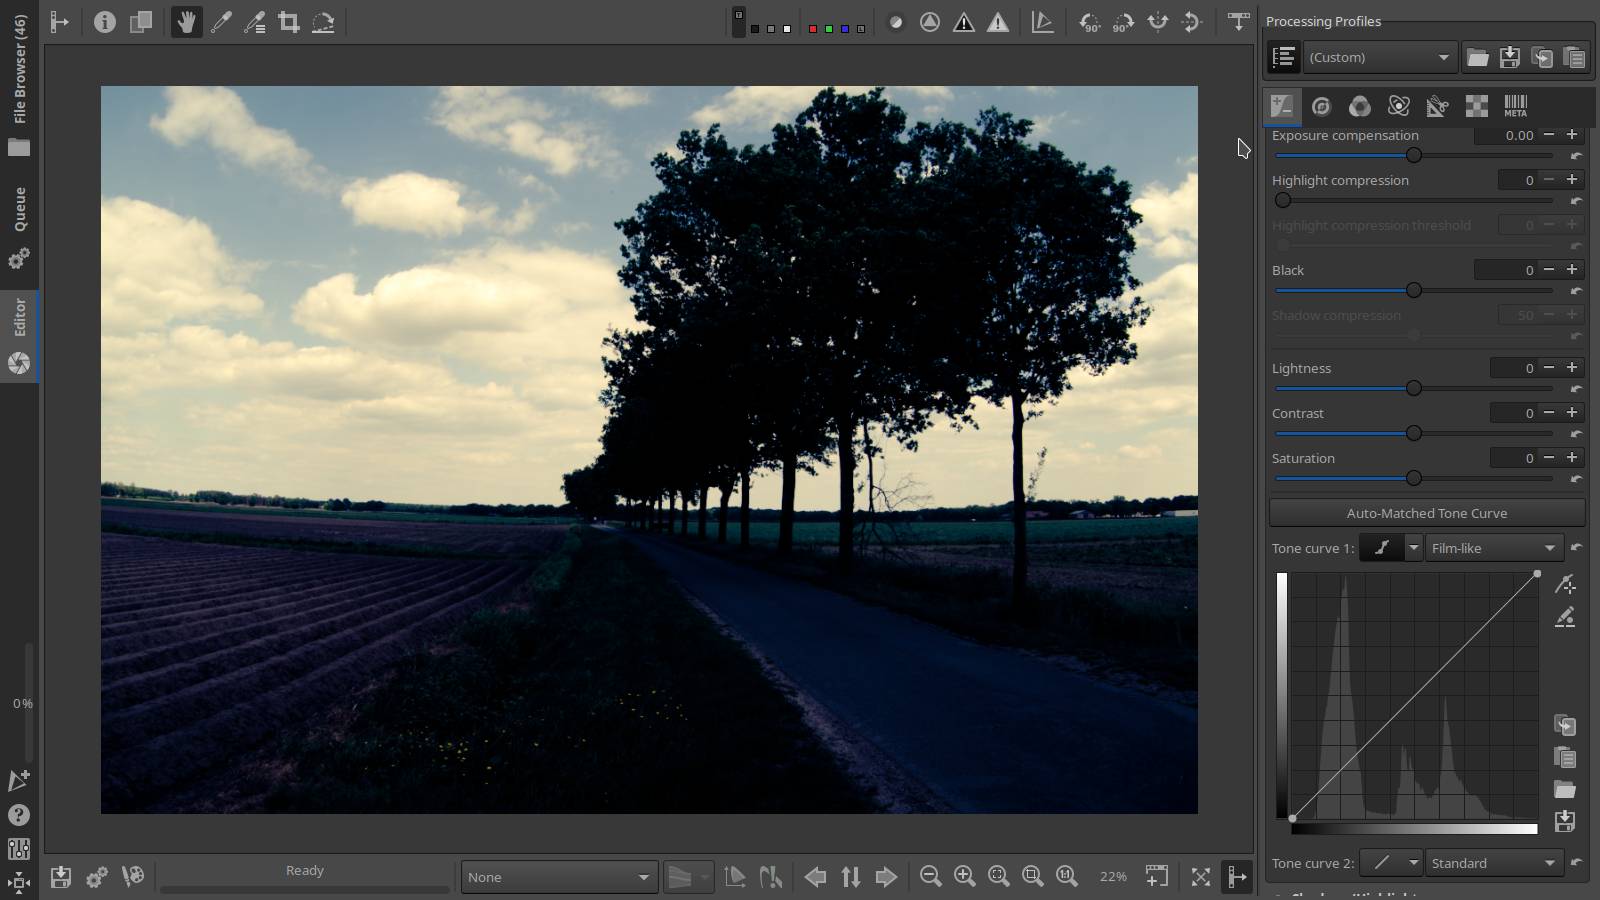
A 3DLut, Cube or Lut is intended to influence the character or atmosphere and color of a picture, not the lighting or exposure.
Working from a RAW file, it is still the intention to adjust the exposure of a picture to taste.
You can do this by simply adjusting the “exposure compensation” slider, but, enhancing the cross process, it can also be done via the “Tone Curve”, just lift the shadows and lower the highlights in a straight line like the example below.
Partial Script : copy text below, paste in text editor ( notepad, kate…) save as .pp3, or in case of Artherapee save as .arp – set RT processing profiles to “partial” -> load script
Note : Edit the path of the Classic Chrome Lut – it will be different on your computer !
[Version]
AppVersion=5.8
Version=346

[Film Simulation]
Enabled=true
ClutFilename=HaldCLUT/PictureFX Fujifilm Professional/PictureFX Pro - Fujifilm Classic Chrome.png
Strength=100

[RGB Curves]
Enabled=true
LumaMode=false
rCurve=4;0;0;0.19591855102040825;0.097959232653061334;0.80816363265306157;0.90612263265306114;1;1;
gCurve=4;0;0;0.19591836734693874;0.10204081632653042;0.80816326530612292;0.90204081632653144;1;1;
bCurve=4;0;0;0.057142832653061228;0.08979577551020404;0.88163246938775575;0.71836653061224665;1;1;
When I started making HaldClut’s for Rawtherapee years ago, I had no idea what developments were going to happen.
Meanwhile, “film simulations” are indispensable in both photo and video world.
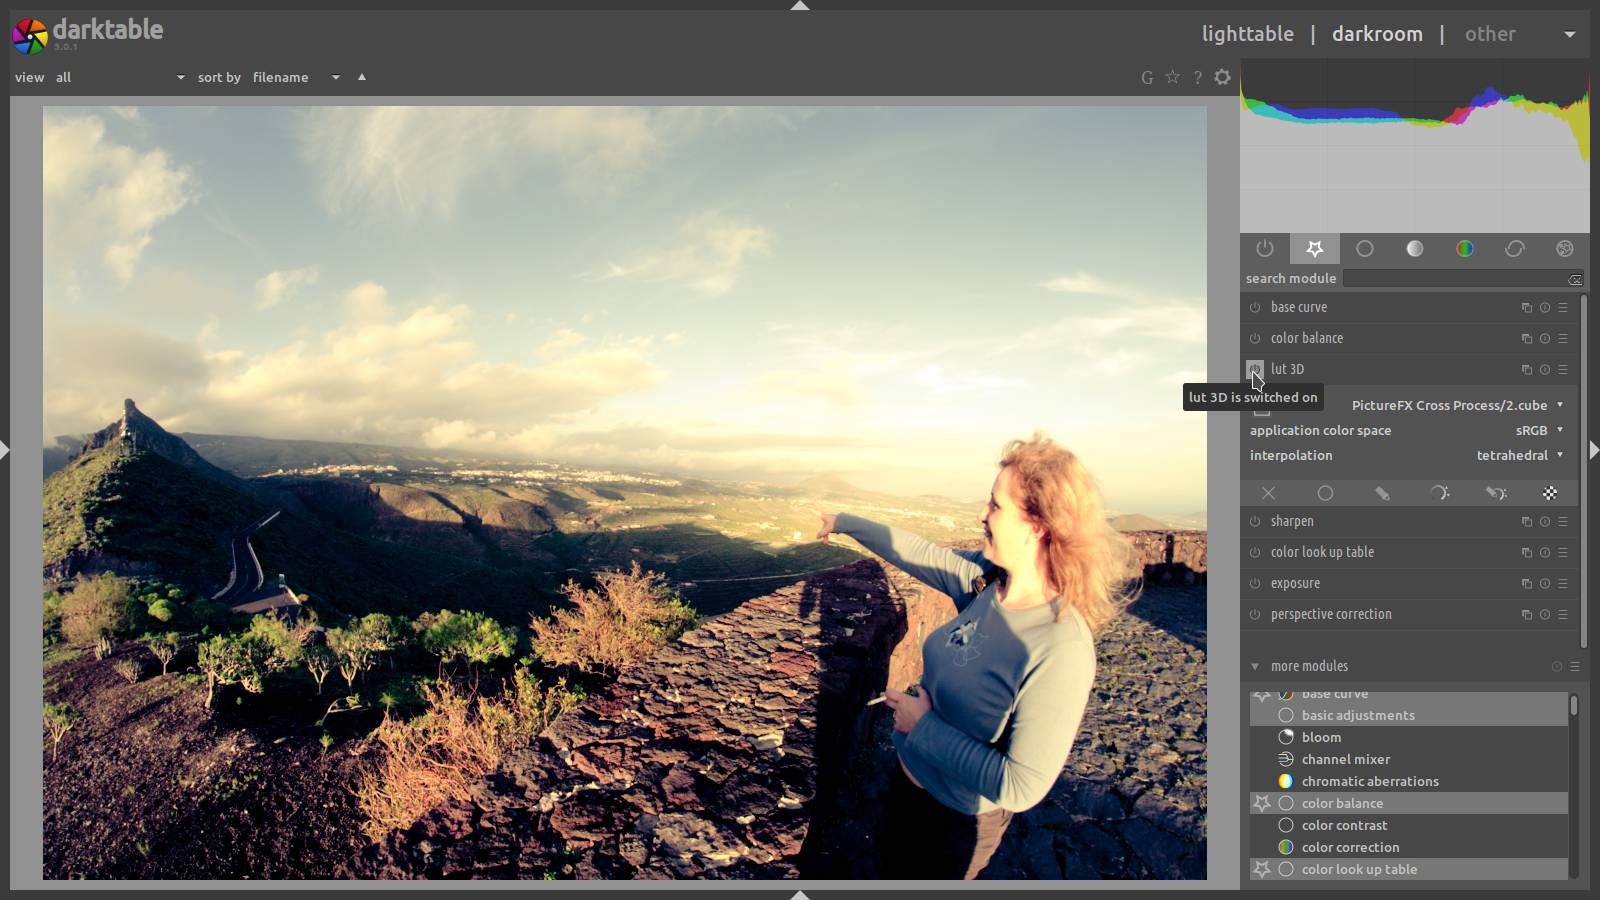
Unfortunately, different formats have emerged as well, there are HaldClut’s, Lut’s, Cube, 3DL, and in many cases the same format names are used for a different kind of application, and especially in the video world, each brand or camera requires a deviation or adjustment in the Lut or Cube (like LOG to Rec.709). It’s a soup, and that’s putting it mildly.
However, the various downloads here have been tested by different photographers and videographers, and they all work but maybe not on your software.
If you have problems to make a simulation work on your software, I advise you to read your software manual or watch one of the many YouTube videos that you can find on this subject on the internet.
Research:
- Youtube: Rawtherapee – Split Toning – Cross Processing
- Kosmofoto Cross Processing Tips
- Vantage : Put A Filter On It
- Shoot It With Film : an introduction to cross-processing film by amy berge
- Zoner Photo Studio: Digital Cross Processing
- Digital Photography School: How To Mimic a Cross-Processing Effect in Photoshop
Well, as I wrote before, there is a third method of cross-processing a picture, and that is through the White Balance.
However, messing around with the white balance can sometimes give strange effects.
The best way to apply this method is via the camera itself – this can be done immediately after the picture has been taken, but also afterwards in your camera before you transfer the pictures to your computer.
Here we enter the territory of the Recipes. About how to make and store recipes on a Fuji you can find out more on the site of my friend Mark G. Adams:
Discover more from Open Source Photography
Subscribe to get the latest posts sent to your email.


Enjoyed this post? Put your thoughts into words! Or just give a thumbs-up in the comment box!