
A while ago I published an article about a script that I used to control the RAW files in my workflow -> A Script to solve a Workflow Problem
In my workflow I splitted the JPGs and RAW files while transferring to my computer
Then I sorted my JPGs, and only kept the RAWs of my best JPGs.
The motive for this workflow was:
- Only opening JPGs on my old Dell Studio 1749 went faster than with both types together
- Free space by removing unnecessary RAW files
The script turned out to be popular, apparently there were still people with similar problems or needs.
In the meantime, the script has been adapted to new circumstances and made more practical.
The same problem :
Now, the laptop is faster, so i don’t have the viewer problem anymore. However, storage remains a problem, also with a new laptop and maybe even more, my old Dell had two drives and 3TB storage space, but most laptops that you find on the market and within a certain price range are limited in storage space – usually 512GB – and also only capable of one drive !
Enough you say ? well hat depends on how many photos you take, and even then, if you also record videos it will rise quickly.
So storage remains an issue.
Of course there are solutions for this, but being economical on the Main Storage space is and remains a necessity.
Workflow :
I have adjusted my workflow slightly, but largely the way of thinking remains the same.
All JPGs and RAWs are first copied in a directory, determined by my SD Card Download Software, that is: directory Year – Subfolder Year/Day/Day.
Manually I create three subfolders: Edit – ORF – RAW
I copy all RAW files to the RAW folder
Then I check and clean out I my remaining jpg’s
The best photos for publication on my website are edited, resized and saved to the folder Edit – you only have to remember one thing : every first edit of a photo and saved in the Edit folder, must have the exact same name as the original, because the script needs to know which jpg to copy a raw from. More edits of the same jpg may have different file names.
Then the script is run – only RAWs of which there is a JPG in the edit folder is copied to the ORF folder – The name ORF comes from the .orf file extension of my Olympus Raws.
Finally, the remaining and therefore unnecessary raws are removed with their RAW folder.
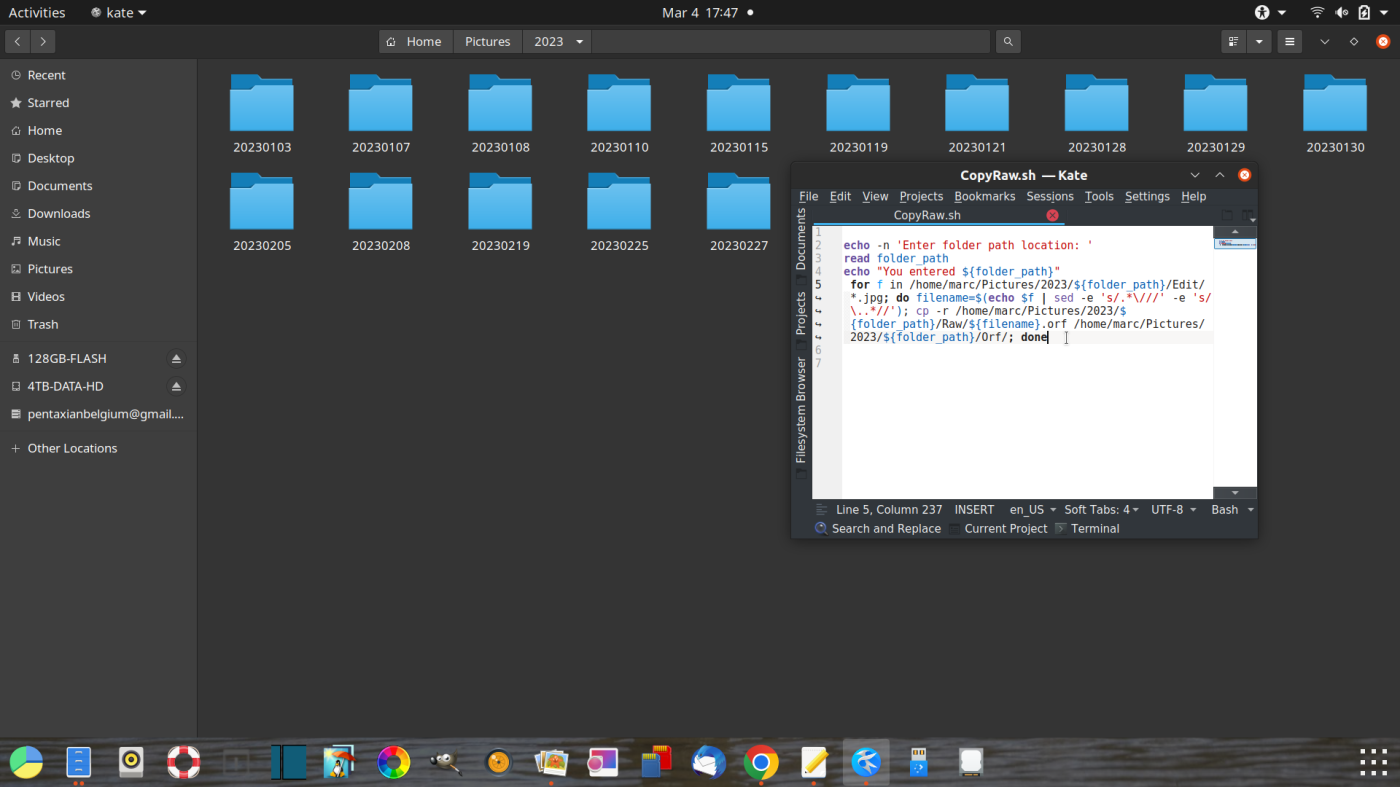
The Code :
echo -n 'Enter folder path location: 'read folder_pathecho "You entered ${folder_path}" for f in /home/marc/Pictures/2023/${folder_path}/Edit/'); cp -r /home/marc/Pictures/2023/${folder_path}/Raw/${filename}.orf /home/marc/Pictures/2023/${folder_path}/Orf/; doneWhat has changed ?
${folder_path}With the “${folder_path}” code, the scripts asks the path of the folder to be treated.
Now you can place the script wherever you want, in my case it’s in the root of my 2023 photo folder.
I only have to open a terminal in that folder, run the script with : sh CopyRaw.sh, enter the date of the folder to be treated and that’s it.
How to create the script :
Open a text editor (Kate), copy and paste the above script in it – adjust the paths , give the script a name and save the text file with the .sh extension.
In this case “CopyRaw.sh”, for easy finding in the the folder where you want it to run.
To make the script executable, open a terminal in the folder where you have the script.
Type : chmod +x followed by the exact full name of your script with extension:
chmod +x CopyRaw.sh
Enter
The Script is then executable.
How it works when put into practice :
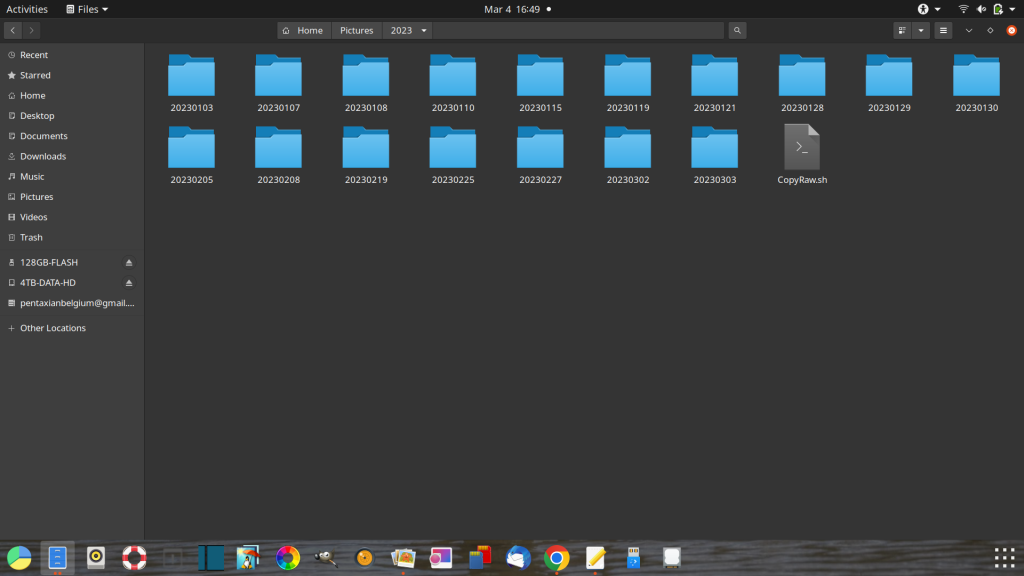
my photo folder for 2023 containing photo folders by date I photographed, and the script in the root of that folder.
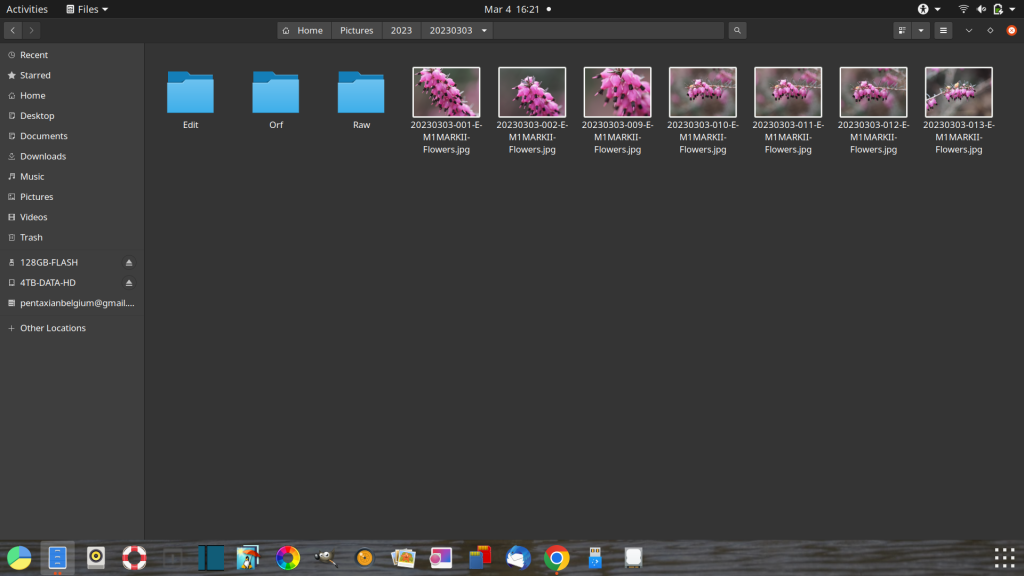
folder 20230303 containing the remaining jpgs after checking and cleaning out, and the folders Edit – Orf and Raw
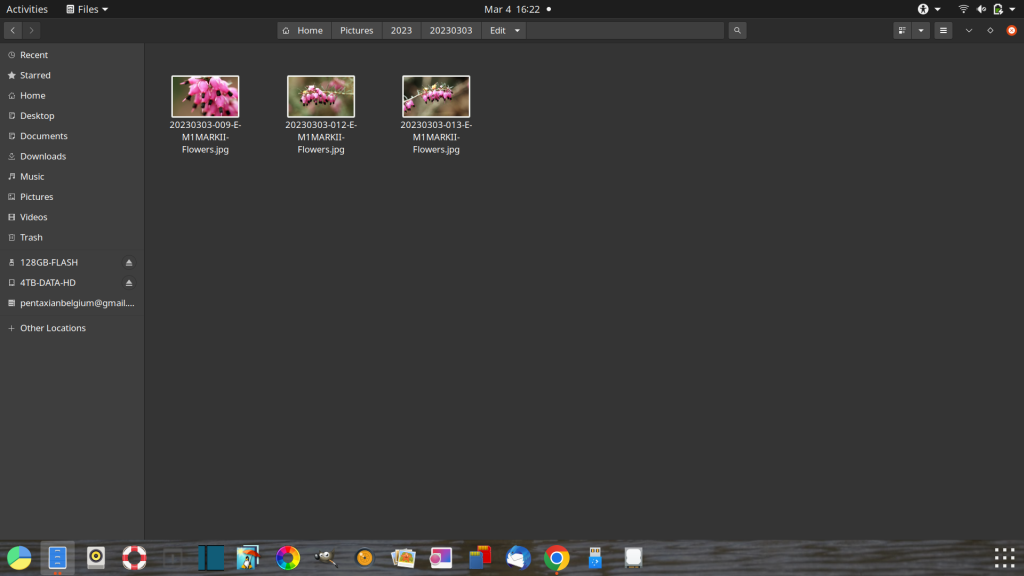
in the 20230303 Edit folder are three modified and resized jpgs
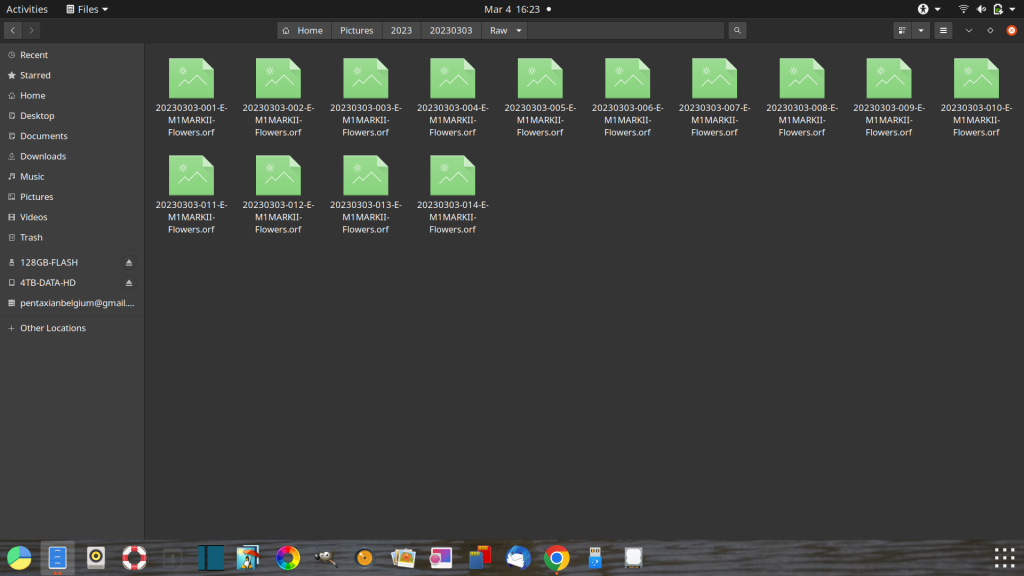
the 20230303 Raw folder containing all raws

open a terminal/konsole in the root where the script is located
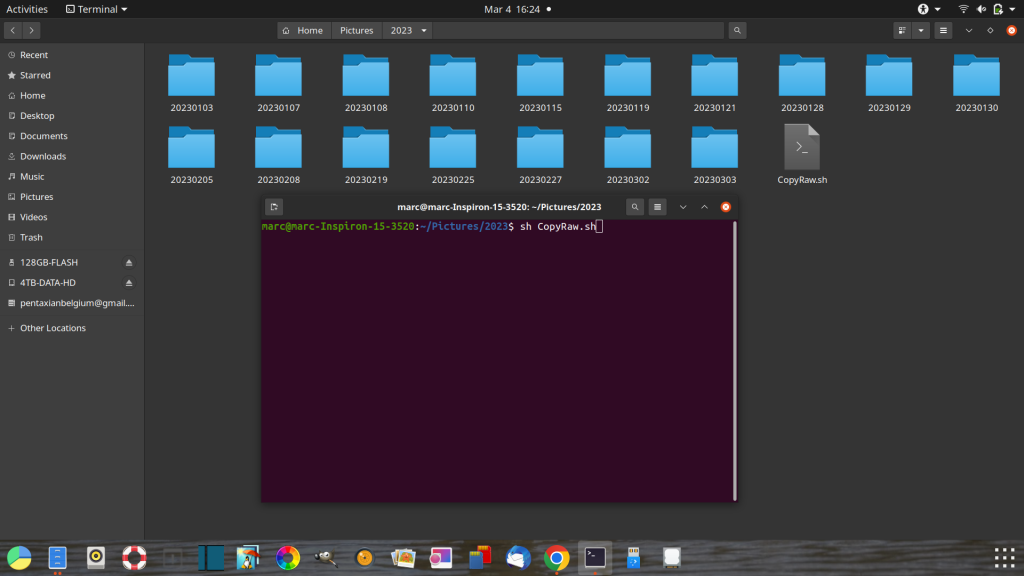
type : sh – the name of the script with its extension – enter
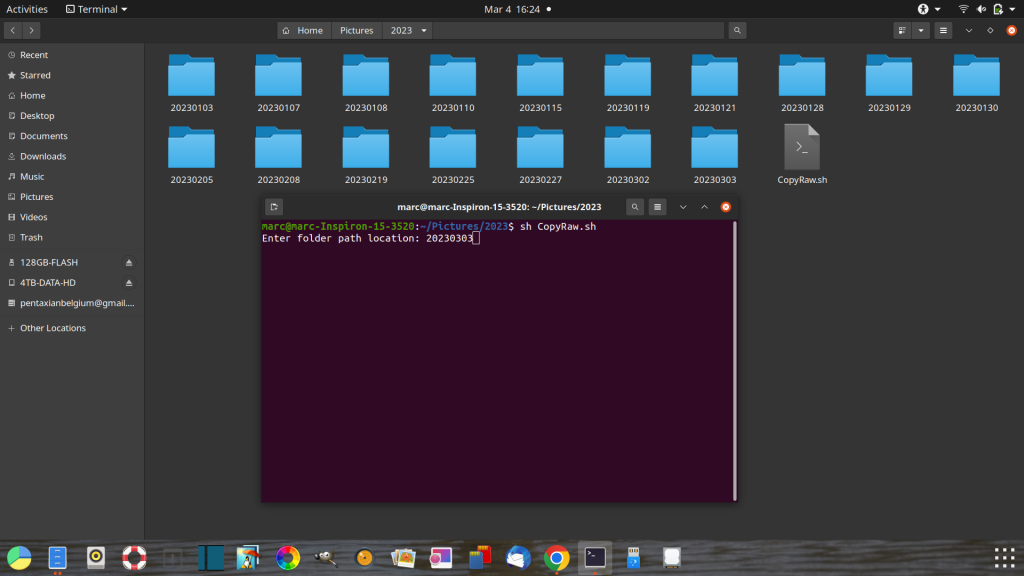
the script will ask you for the folder to handle – in this case 20230303
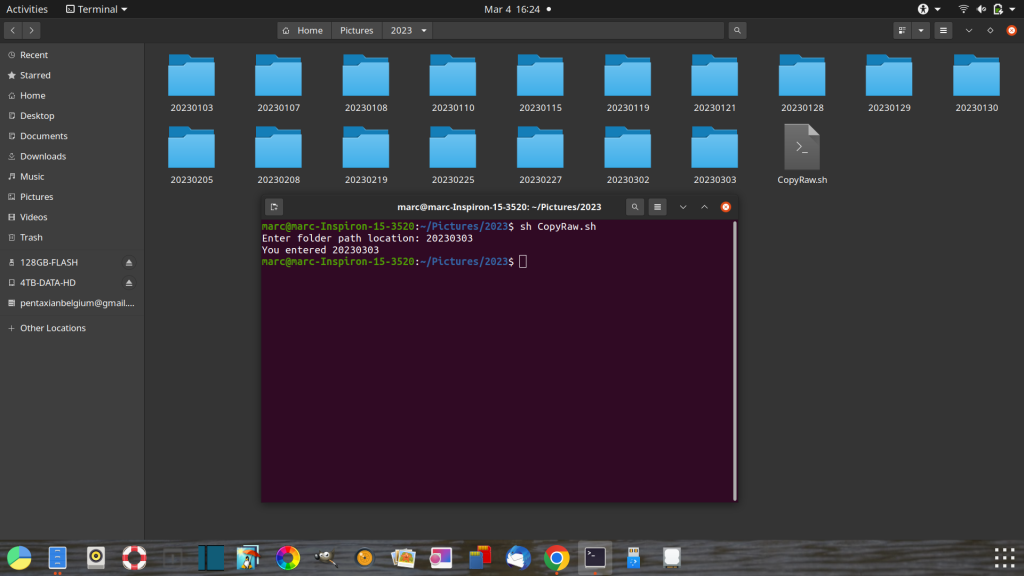
with a fast computer, this script will be ready in an instant
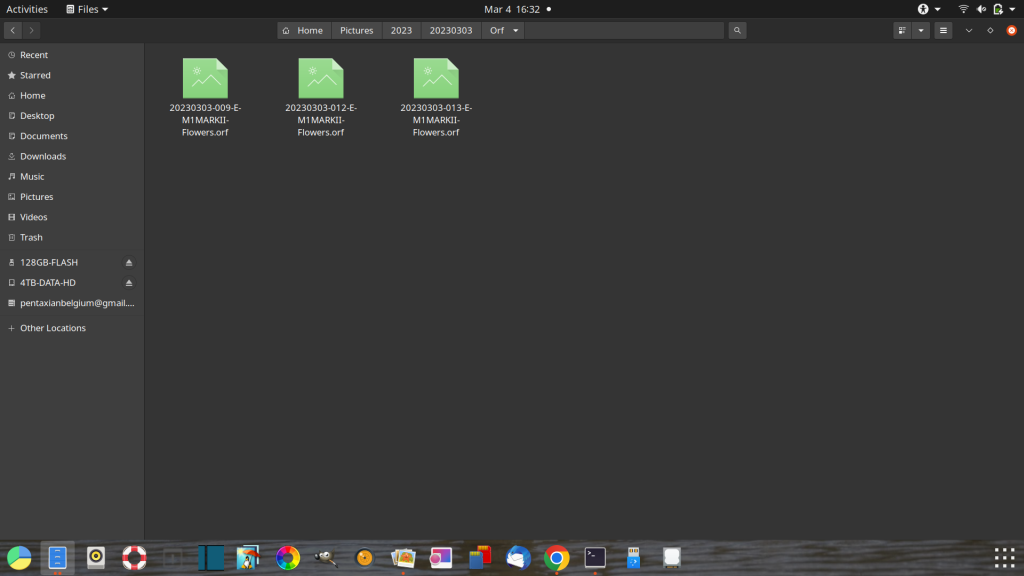
The Orf folder now contains the three raws of the jpgs that are also in the Edit folder
And here the script ends.
The unnecessary Raw folder could now also have been automatically deleted, but it does give you the opportunity to check the correctness of the copy, correct an incorrect entry, change your mind after all, or do something else with the Raw folder.
Either way it gives you a fail safe !

The photo gallery of Open Source Photography, Olympus micro 4/3 system, Vintage Lens Photograpy, Film Simulation, PictureFX, HDR – Photographer : Marc R.
Discover more from Open Source Photography
Subscribe to get the latest posts sent to your email.

