

This tutorial focuses on the process of sharpening a bird or any other animal, which is essentially similar to sharpening a person or any object. Nevertheless, when working with animals, particularly birds, you may have the intention to enhance their appearance and make them more prominent compared to other subjects. That is the main objective of this tutorial.
I am not an expert in Darktable because I primarily work with RawTherapee and RAW files. However, just like when I was still working with Fujifilm, I’m using more and more straight out of camera Jpg’s these days. Very occasionally, because Olympus Jpg’s are already great out of camera, you want to refine a few more things, I used to do that in RawTherapee, but RT also has its limitations, one of them being the sharpening of photos – it’s either sharpening everything or not sharpening anything at all. Therefore, I will mainly utilize RawTherapee for converting RAW files rather than editing them.
Darktable, on the other hand, offers many more editing possibilities. In this case, you can make your subject sharper while leaving the background untouched. This is achieved by using a mask. The mask covers the background, which is everything around your subject, such as a bird. At the same time, you can use the same mask to soften everything around your subject – the bird – so that your subject stands out more.
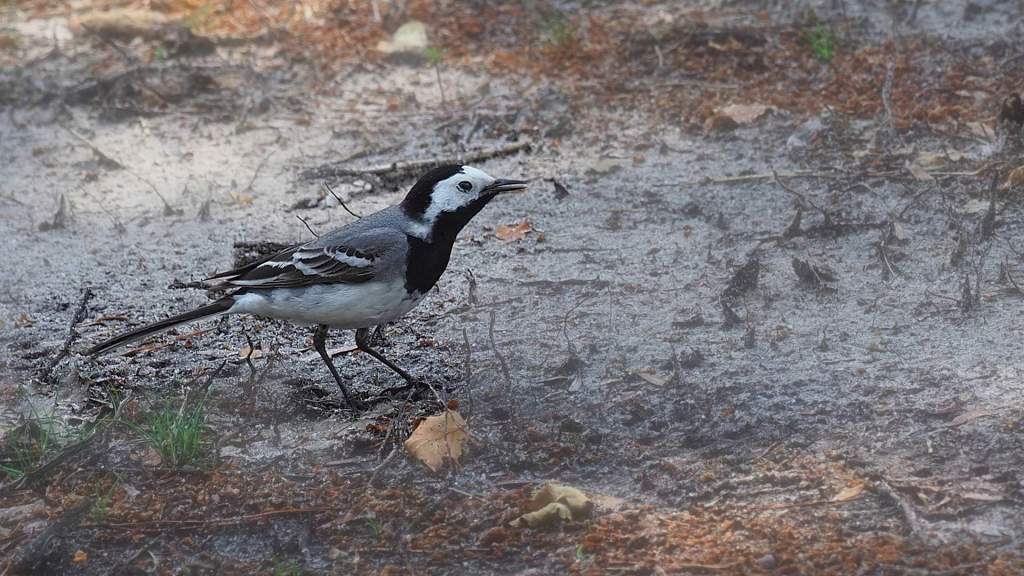
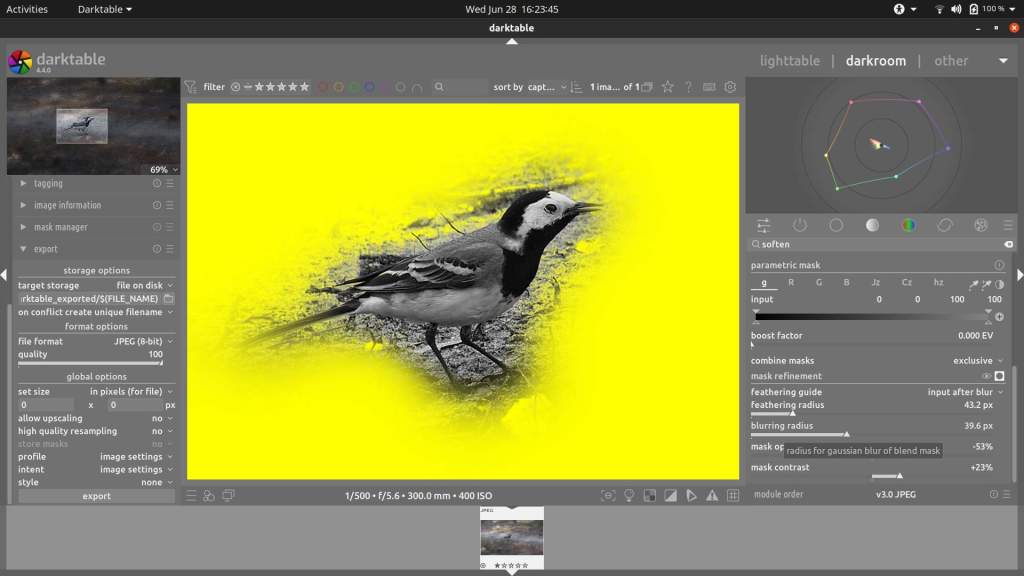
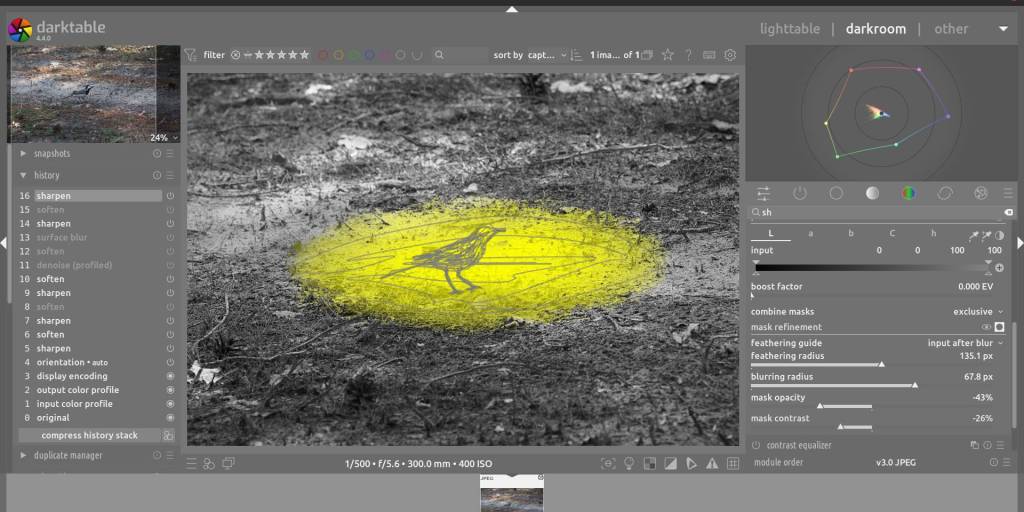
It may all sound complicated, but the method is actually very simple. To understand it well and clearly, I have taken an example of a bird that I want to sharpen, while also making it stand out more by blurring the background. I have exaggerated the execution so you can see what the intention is. The photo below is what I want to achieve, and the method and steps to take follow behind it :
Method :


Steps :
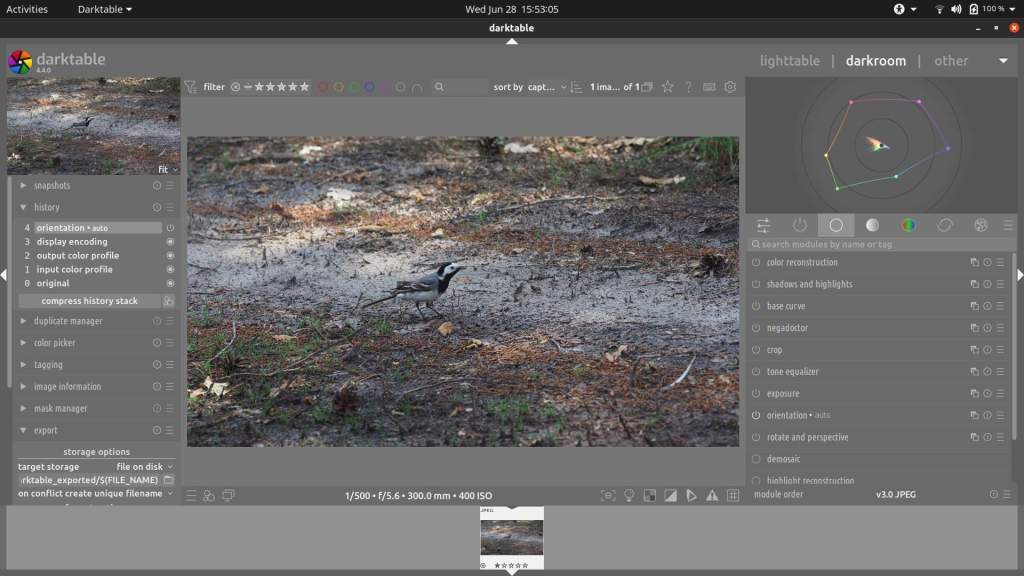
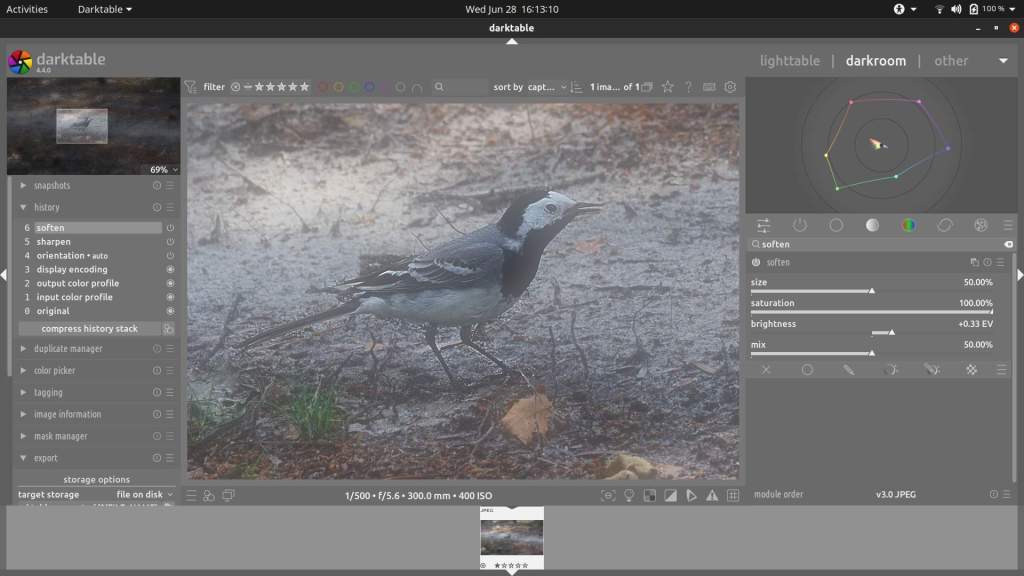
- Open a picture in Darktable
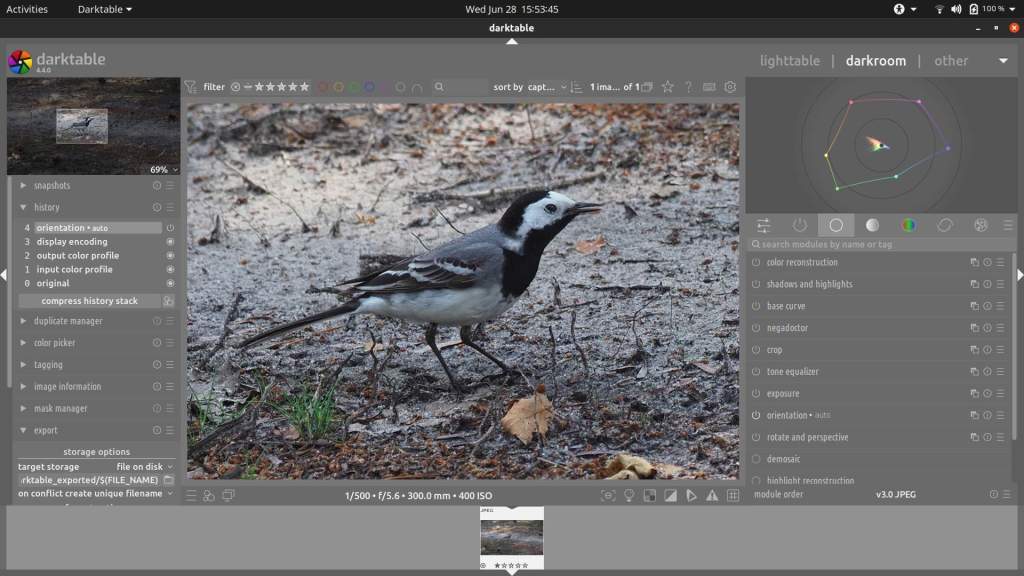
- Scroll to Enlarge subject (in this case a Bird)
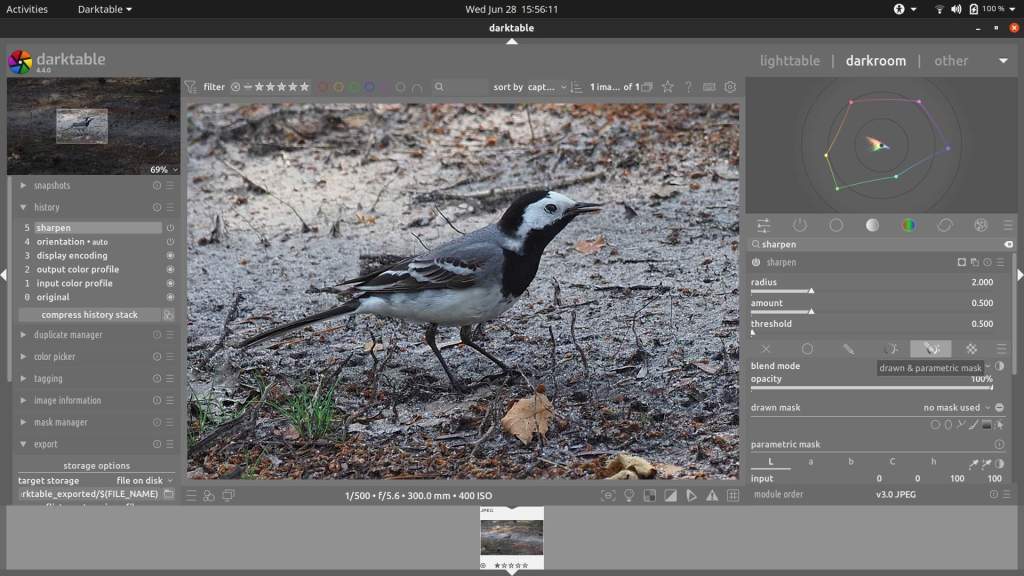
- Open Sharpen Module
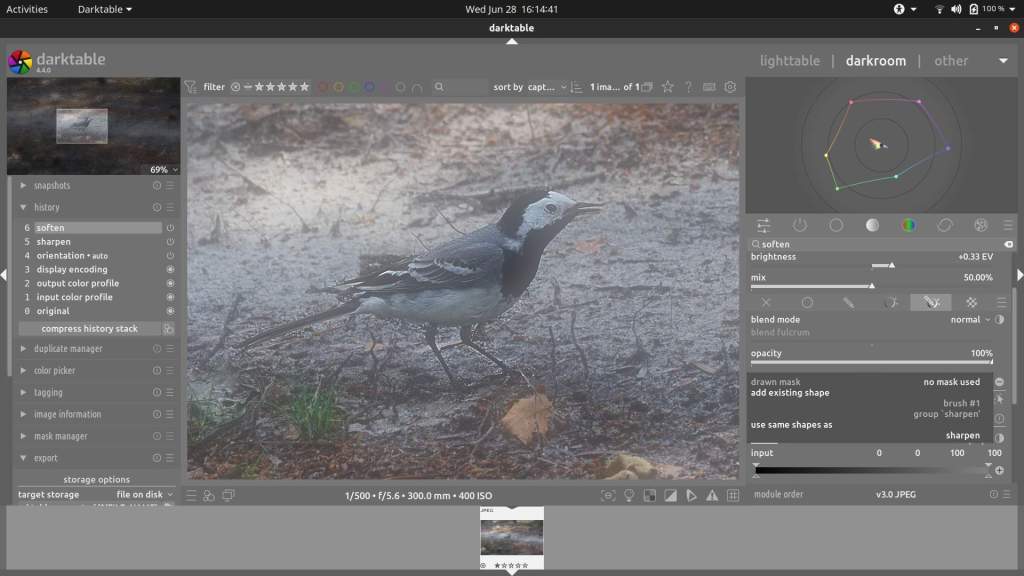
- Click -> Drawn & Parametric Mask
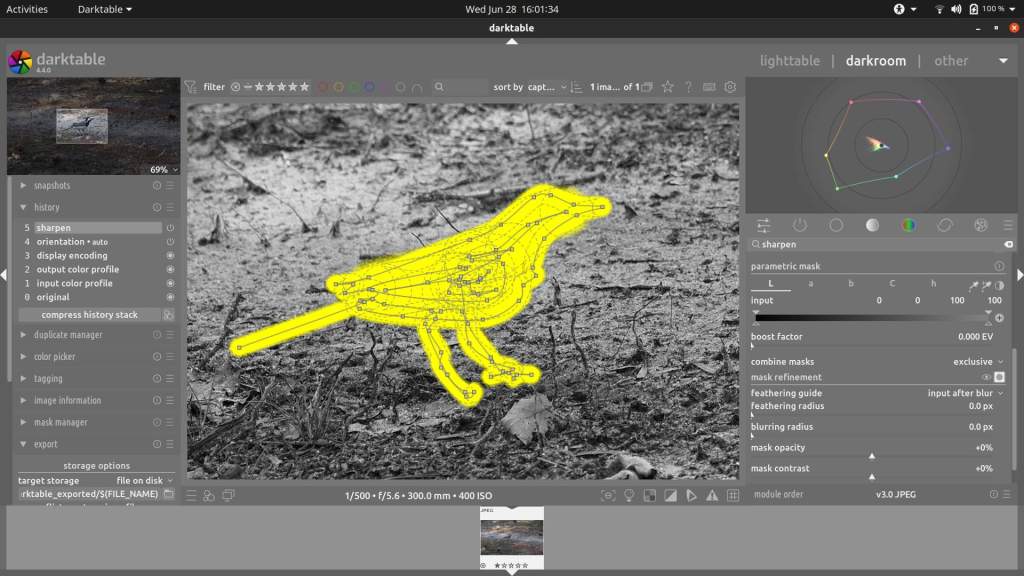
- Click -> Add Brush -> paint the subject with it – scroll to enlarge/shrink brush while painting
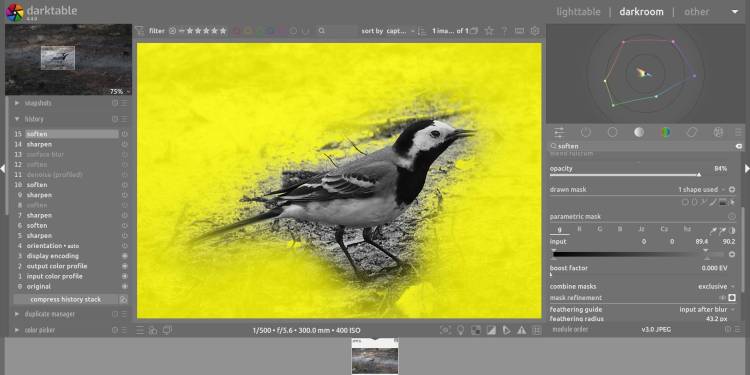
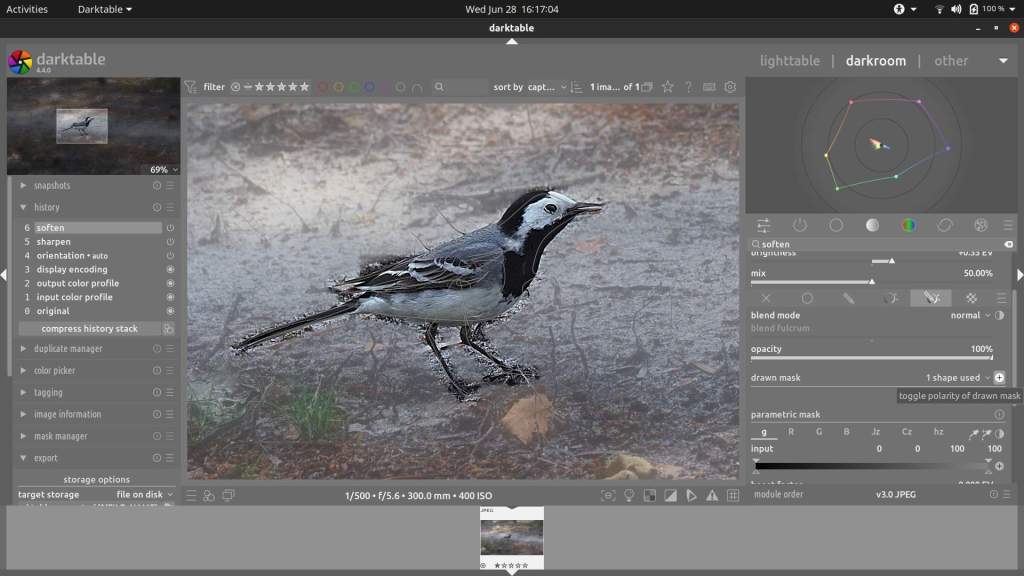
- When done scroll down in Sharpen Module to Mask Refinement -> click on right side -> Display Mask icon
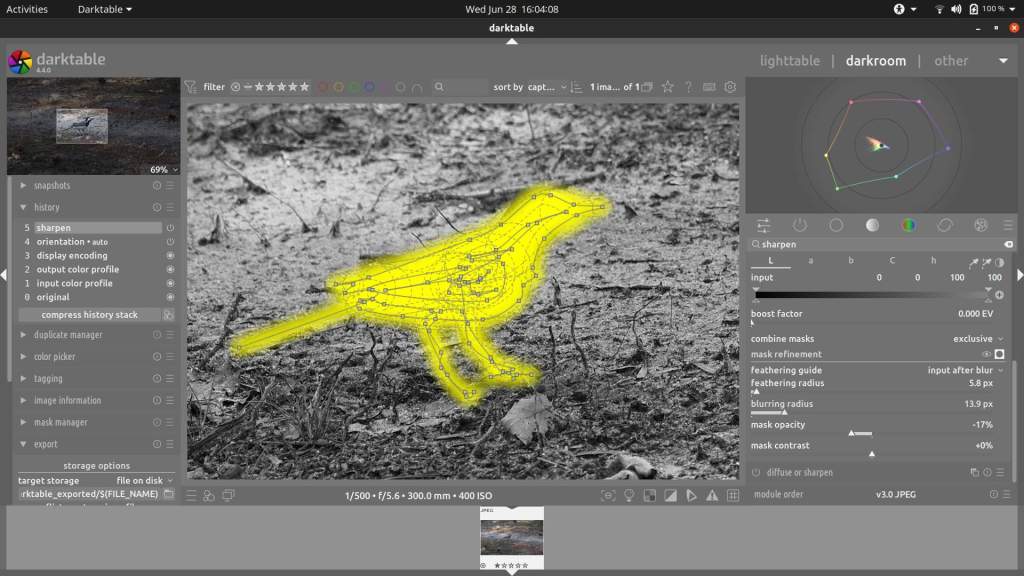
- In Mask Refinement below, adjust : Feathering Radius + Bluring Radius + Mask Opacity + Mask Contrast -> all to taste – Just fiddle with the sliders, you’ll see what happens, and that’s how you learn the fastest !
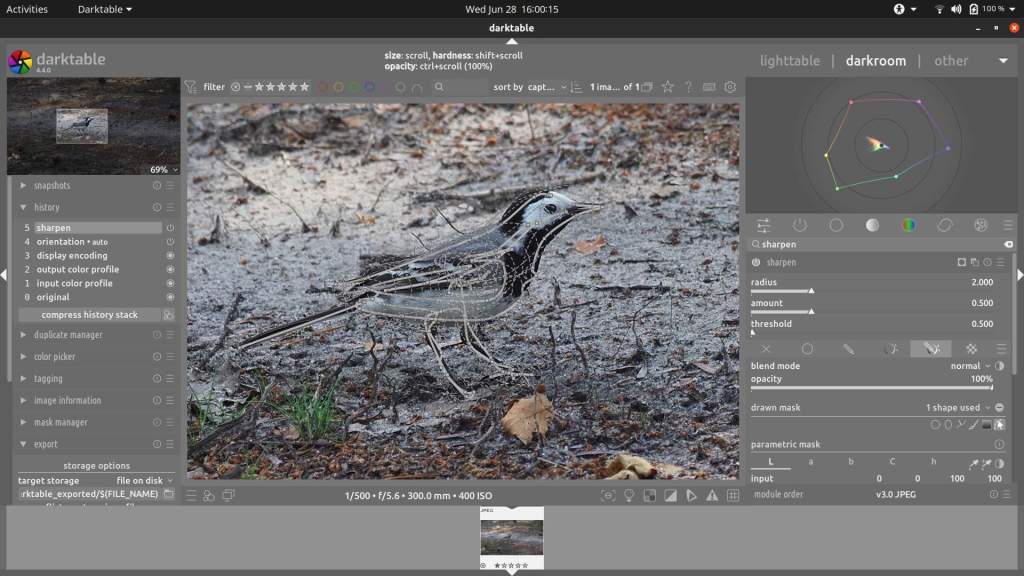
- When done, switch off -> Display Mask (nr.6) -> Go To -> Sharpen -> Change : Amount + Radius + Treshold -> all to taste. If needed, go back to step 6 and 7 to adjust mask
- Open Soften Module – all will be soften now, if you want you can change settings softening now or later
- Click -> Drawn & Parametric Mask – and Click -> Drawn Mask on left side and choose same as sharpen from list
- Toggle polarity of Drawn Mask -> icon on right side
- If not already adjusted, adjust soften settings now in Soften Module + If needed adjust mask again
That wasn’t that hard, was it?
Now, while the intention may be to sharpen the subject very narrowly, and completely blur the background next to your subject, in other cases you may want to sharpen and soften a certain area more, that goes the same way of course.
Just make your mask bigger, the rest of the procedure is as before.
Using a mask in Darktable is not that hard at all, just use your imagination and try to think of other uses for it.
Have Fun !
PS
If you’re not a big fan of Darktable because of its use of libraries and databases,
then know that there is an easy way to use Darktable without these annoyances.
Read my article Darktable – Part I & Darktable – Part II
and use Darktable like a regular editor without all the hassle.
The photo gallery of Open Source Photography, Olympus micro 4/3 system, Vintage Lens Photograpy, Film Simulation, PictureFX, HDR – Photographer : Marc R.
Discover more from Open Source Photography
Subscribe to get the latest posts sent to your email.


Bedankt voor deze zeer duidelijke toelichtingen 🙂
LikeLiked by 1 person
Dankjewel Rudi, altijd fijn om te horen !
LikeLiked by 1 person
Thanks for sharing this idea. So interesting. I follow yours but Can you follow my blog. Anita
LikeLike