
6 minutes read + video
Once you’ve downloaded your latest photos to your computer and given them proper names, it’s time to sort them and delete any unusable shots right away. Since we shoot in RAW, we’ll do this directly in RawTherapee.
A quick note: if you shoot in both RAW and JPEG, you can still manage all your photos in RawTherapee. Just make sure to enable the file extension setting in Preferences—this way, you can delete both the RAW and JPEG versions simultaneously.
Overview of Browser Options in RawTherapee:
In RawTherapee, the browser section provides various options for managing your photos, including sorting and deleting them. Below is an overview of the available features:
Thumbnail View and Navigation:
- Open a folder: Double-click on a desired folder to display thumbnails of the photos. The first time a folder is opened, thumbnails are generated and cached for faster access in the future.
- Adjust thumbnails: Use the buttons to decrease or increase the size of the thumbnails, also, when clicking the info icon ‘i’, you can also view filename and some exif info – if set in preferences -> browser.
- Navigate thumbnail folder: You can scroll up and down through the thumbnails in the file browser using your mouse wheel or the scroll bar on the right.
- Browser pannel and Inspect window: In RawTherapee, you can hide or show the file browser panel by clicking the Show/Hide Left Panel icon. This allows you to maximize or minimize the file browser as needed.
- To adjust the size of the right panel, which contains the Inspect window, click and drag the divider to make it larger or smaller. Expanding this panel gives you a better view for evaluating image details.

Sorting and Inspecting
The most important tool in the RT file browser for managing your photos—even before assigning stars, color tags, or deciding to delete an image—is the Inspect Tab.
The Inspect tab in the RawTherapee browser is used to examine images in more detail before opening them in the editor. It allows you to check image sharpness, noise levels, and other details without fully loading the file into the editing workspace.
Features of the Inspect Tab:
- Zoomed-In Preview: When you hover over an image in the browser, the inspect tab shows a magnified section of the image, helping you quickly assess sharpness and focus.
- Comparison Tool: You can use it to compare different images by selecting them in the browser and checking their details side by side.
- Focus and Noise Check: The inspect tab is useful for reviewing high-ISO images, ensuring focus accuracy, and spotting unwanted noise or artifacts before starting the editing process.
This feature helps speed up your workflow by allowing you to preview important details without opening each file individually.
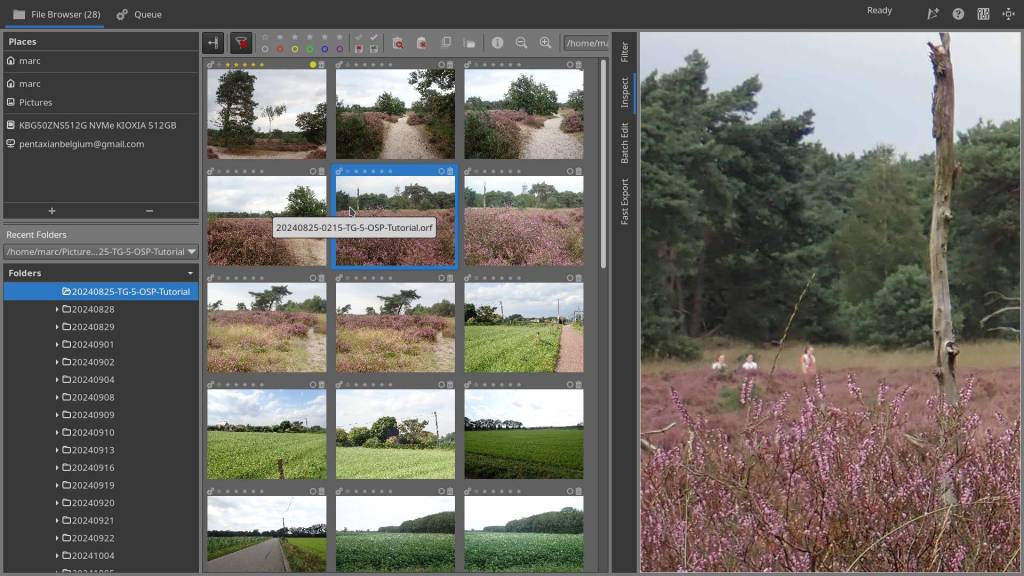
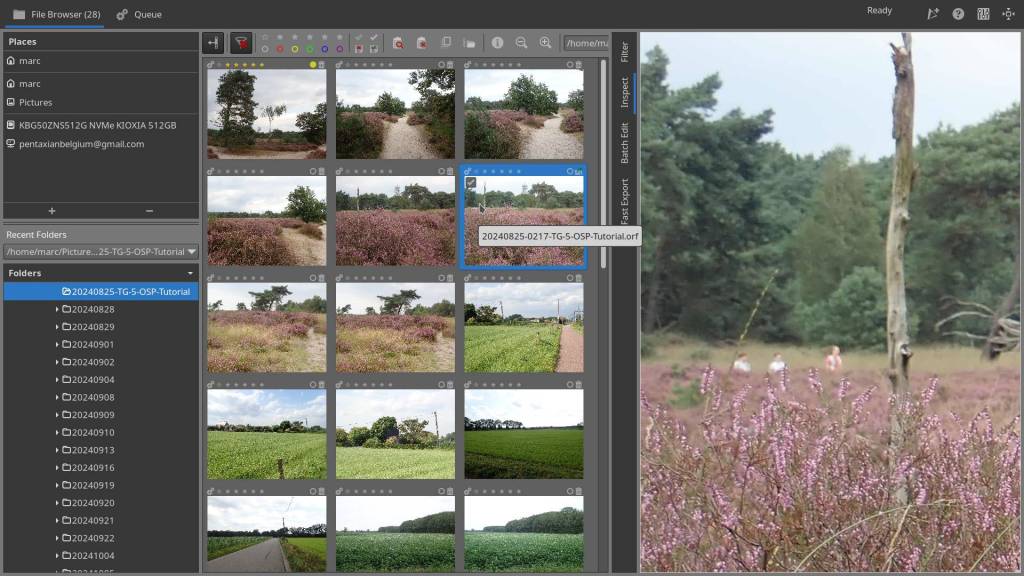
In the Inspect window, it is clearly visible that the left photo is sharper than the right one. Just above the thumbnail of the right photo, I clicked the trash icon to delete it. The Inspect window allows you to evaluate and sort photos before tagging, keeping, or deleting them.
Rating and Tagging:
- Assign star or color ratings: You can assign a star rating (from 1 to 5 stars) by clicking on the respective star above each thumbnail – Color ratings can be found to the right of the star ratings. Click on the empty circle next to the trash bin and choose a color.
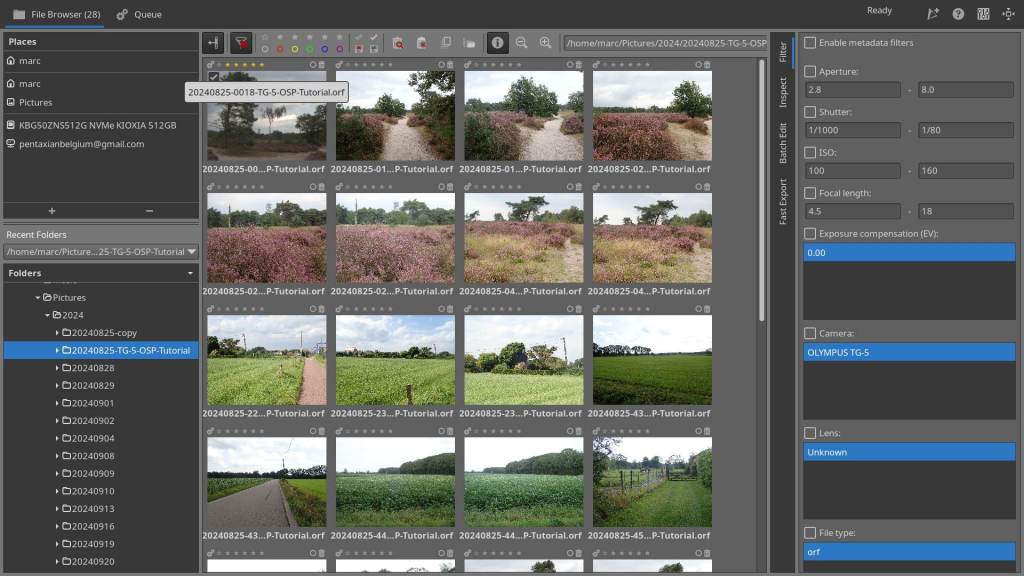
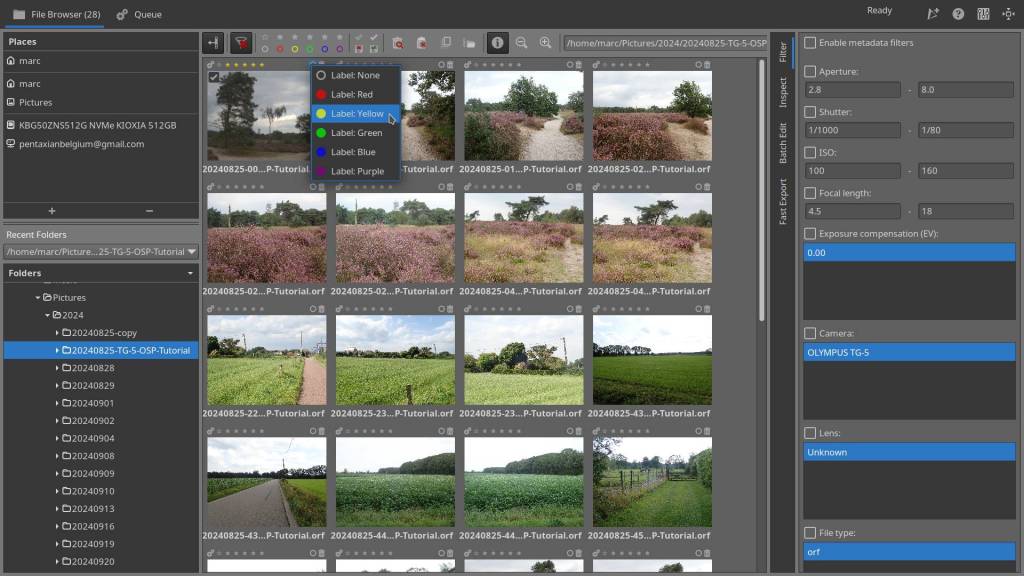
Sorting and Filtering:
- Filter by star or color rating: At the top of the file browser, icons allow you to filter images based on their star or color ratings, from zero to five stars and five different colors.
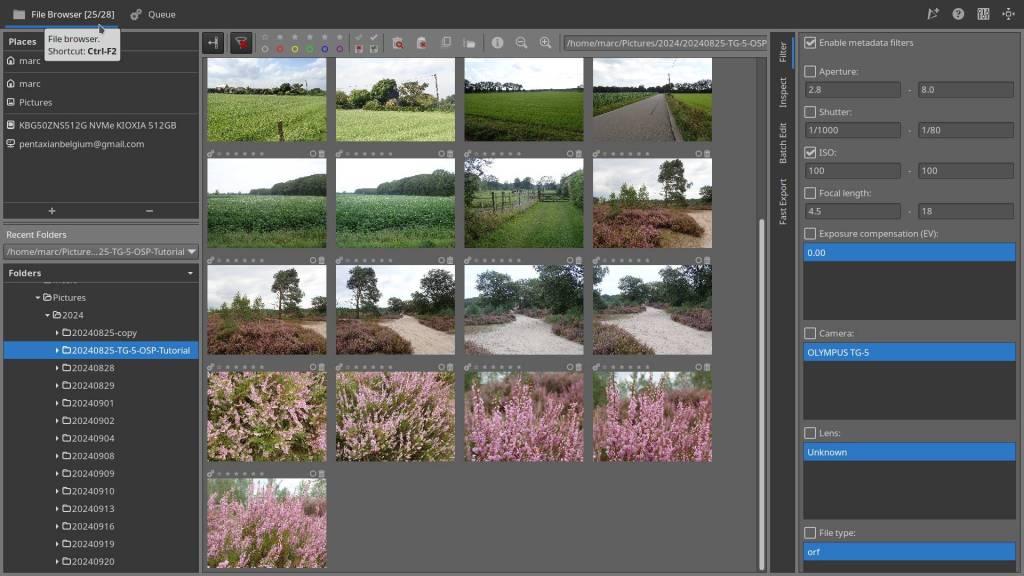
- Filter by EXIF data: You can filter photos based on specific EXIF data, such as ISO value or lens used. Activate this feature by checking the ‘Enable’ box and setting the desired criteria. (I personally find this less useful)


Deleting and Restoring:
- Move to Trash: To move a photo to the internal trash, click on the trash icon above the thumbnail.
- Restore from Trash: Photos in the trash can be recovered by clicking the restore icon.
- Empty Trash: To permanently delete photos, click on the ‘Empty Trash’ button : Top file browser -> click ‘show contents of trash’ icon -> left side, ‘permanently delete all files in trash’
Instruction Video:
In the video below, all the steps are reviewed live once again.
Additional Features:
- Batch Edit Tab: You can add one, multiple selections, or all photos directly to the processing queue without opening them individually, for example, by applying auto exposure to all and generating a basic series of JPEGs. However, I personally never use this function. A better approach is to open a single photo in the Editor, adjust it to your liking, and then copy and paste that profile onto a series or all photos before sending them to the queue for processing. That said, opening images in the Editor is always the best method, allowing you to add them to the queue one by one or simply save them directly.
- More about Batch Editing in the section on the Editor in part 3.
In this article, I haven’t covered all the tools, but I have gone over the most important and commonly used ones for managing your freshly downloaded photos. As always, there are multiple ways to achieve the same result – like the shortcuts available for certain actions – but diving even deeper into RawTherapee would make the article too long and complex, and much of it you’d probably never use. If you’re new to RT, the key is to simply experiment—try things out on a test series of photos, for example.
For those who like step-by-step guides, below is an example of a workflow to help you master photo management in RawTherapee:
What You Need:
✔ A set of test photos (10-20 images RAW and JPG) with different exposures, sharpness, and colors – The best approach is to quickly shoot a test series at home specifically for this purpose.
✔ RawTherapee installed.
✔ This guide as a reference.
Step 1: Exploring the Browser and Inspect Tab (30-60 min)
✅ Open a folder with your test photos and view the thumbnails.
✅ Use the Inspect Tab to check sharpness and details.
✅ Rate and sort:
- Assign 3-5 stars to sharp and well-exposed photos.
- Use color tags for uncertain shots.
- Delete blurry or poor-quality images.
Tips:
- Remember to enable RAW and JPG/JPEG in your ‘Preferences’!
- If you have selected thumbnails for deletion, don’t forget to click the ‘Show contents of trash’ icon on top afterward and then click the ‘Permanently delete trash’ icon left of the thumbnails!
Step 2: First Experience with Batch Editing (45-60 min)
✅ Select 5-10 photos and apply ‘Auto Exposure.’
✅ Send them to the Processing Queue and export as JPEG.
✅ Compare the exported images with the original RAW files in an image viewer.
If this is your first time using RT and batch editing, you might need some guidance. Here are a few tips:
- Select multiple photos by holding the Ctrl key and clicking with the mouse.
- Find the ‘Exposure’ tab on the right and click on ‘Auto Levels.’
- You can add images to the queue by clicking the gear icon in the top left of the thumbnail, or by right-clicking on one of the selected photos and choosing ‘Put to Queue’ from the menu.
Have Fun !
This article was written by Marc R.
While I primarily speak Dutch and have some knowledge of English and a little French, ChatGPT helps ensure my writing is grammatically correct. I often mix Dutch and English in my drafts, and ChatGPT steps in to translate and correct.
I don’t have any Sponsoring Companies, Patreon support, or Follower Donations.
I don’t drink Coffee, well, I do … but not the financial form you sometimes find on other websites, like ‘buy me a coffee’ 😊
However, what I truly need to keep going is Motivation, and the best part is, it won’t cost you a thing. You can offer it for free – just hit the Like button and Subscribe !
Discover more from Open Source Photography
Subscribe to get the latest posts sent to your email.

