

4 minutes read time.
The tool, initially called “Local Adjustment Tool” in RawTherapee 5.10, was renamed “Selective Editing” in version 5.11, likely reflecting expanded capabilities.
It took me a while to realize the true potential of this tool. I first noticed it in RawTherapee 5.10 but didn’t grasp what a fantastic feature it is for fine-tuning photo details! Initially, I stuck to my usual editing methods and barely gave it any attention. To be honest, I did try it briefly back then, but I couldn’t quite get it to work as intended.
That changed after watching a short tutorial by Jacob Swing, where he demonstrated its use by adjusting the color of a human eye. You can check out the video here if you’re curious: https://youtu.be/O2W8UYds4bQ. Five minutes into the tutorial and another 10 minutes of testing on my computer, I was hooked!
Many people say RawTherapee is complex and lacks tutorials, but honestly, YouTube is full of helpful guides. A quick video is often all you need to get started, and before you know it, you’ll feel like an expert. Learning any software takes effort—Lightroom included—so investing a bit of time is always worth it.
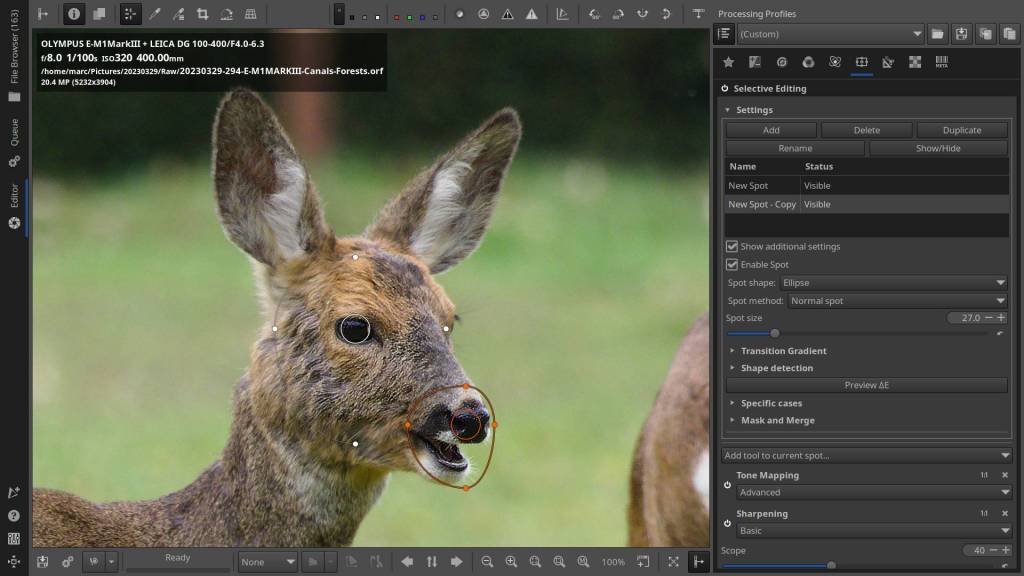
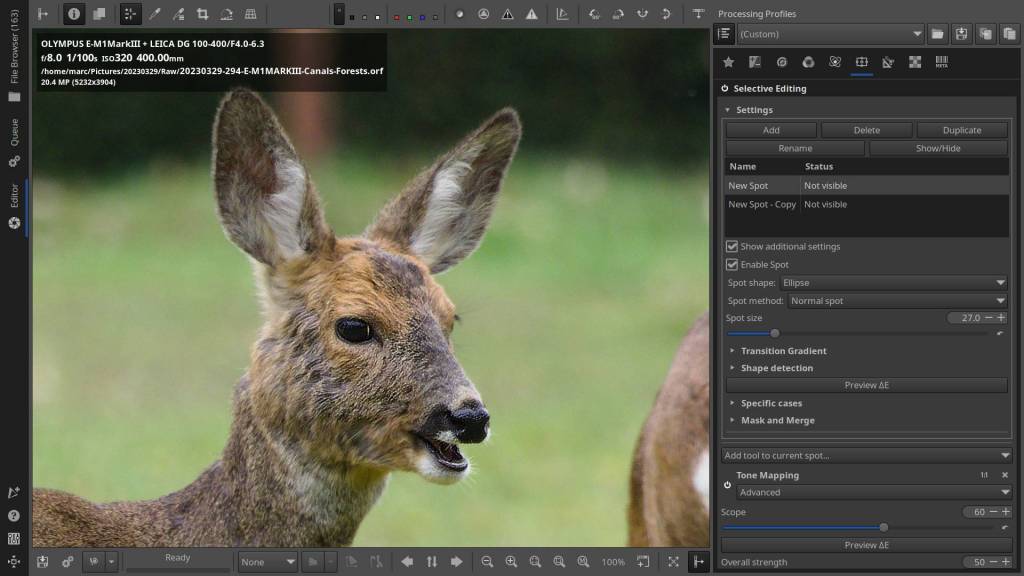
Ok, back to the tool – Instead of sharpening the entire image, I can apply it to specific areas, like in the example below, where I focused on the head of a female roe deer. The original shot was slightly blurry due to a low shutter speed, but with this selective editing tool, I managed to save the photo.


It’s similar to Lightroom’s brush-based approach, but instead of painting the effect on, you select a specific area of your photo. This makes it perfect for bird and wildlife photography. Rather than applying an effect to the entire image, you can make precise local adjustments. You can fine-tune sharpness, color, contrast, or brightness in selected areas. Plus, you can apply the tool to multiple parts of the same image, with each adjustment independently customizable.
The tool can be set to either elliptical or rectangular shapes but is fully customizable to fit other forms, such as a human eye. Each spot or tool can be named, making it easy to track its application in complex edits. Spot tools can be added, removed, or duplicated, with each one independently adjustable. Multiple adjustments can be applied to each spot for precise control.
I can already hear skeptical readers thinking, “Painting on is much easier.” And yes, when you’re used to something and enjoy it, it always feels that way. But trying a different approach can open up a whole new world. A major advantage of using selections is the flexibility: you can adjust and fine-tune them at any time. In contrast, painting on requires precision and is harder—sometimes even impossible—to modify afterward. Plus, with multiple selections, you can apply various effects simultaneously and instantly see and tweak the overall result to your liking.


How to Use the Local Adjustment (Selective Editing) Tool in RawTherapee:
- Open a RAW image in RawTherapee.
- In RawTherapee 5.10: Go to the right panel, under the “Tools” tab, and select the Hand icon. In RawTherapee 5.11: Go to the “Tools” tab in the right panel and select the “Selective Editing” icon (between Advanced and Transform).
- Activate Selective Editing.
- Click “Add” in the settings.
- A new elliptical spot will appear on your photo.
- In “Settings,” you can duplicate, rename, delete, or toggle visibility of the spot.
- Under “Spot Shape,” choose between Ellipse or Rectangle.
- In “Spot Method,” select how the adjustment should apply: inside the spot, outside the spot, or to the entire image – usually you choose Normal Spot.
- Adjust the “Spot Size” to your preference.
- At the bottom, click “Add Tool to Current Spot” and choose an effect to apply to the selection.
- Optionally, check “Additional Settings” to fine-tune options like strength, gradient, shape detection, and more.
Note:
The photos haven’t been edited as they should be; for example, there’s still noticeable noise. I used them only to demonstrate the tool’s application. If this were a photo I wanted to present in my gallery, I’d first apply global editing, then sharpen locally where needed.
Look at the example on ‘La Gallerie’ how I applied it to a buzzard :
Discover Open Source Photography Podcasts
Many readers access my articles on their smartphones, often skimming for just a few minutes before moving on. Podcasts, however, offer a unique advantage—they’re perfect for those moments when you’re stuck with nothing else to do, like during a train commute. Even better, you can listen while multitasking!
That’s why I’ve introduced podcasts as a new feature for Open Source Photography (OSP). I hope they spark your interest and maybe even inspire you to revisit the full articles later.
The Buzzard in “La Gallerie” :
Discover more from Open Source Photography
Subscribe to get the latest posts sent to your email.


These are great tips. Very helpful for those of us starting to use rawtherapee.
LikeLiked by 1 person