
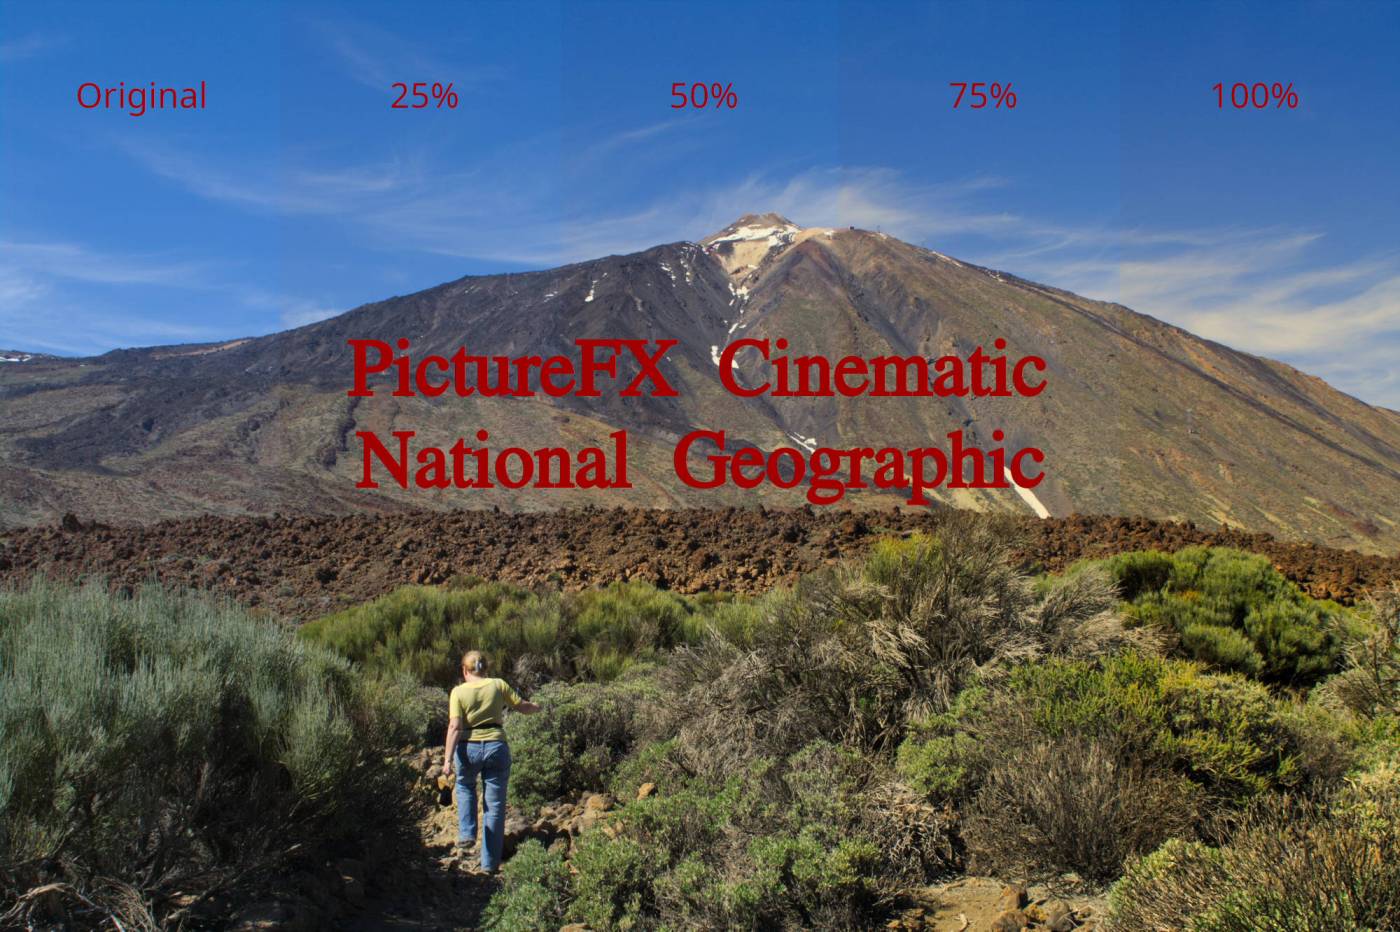
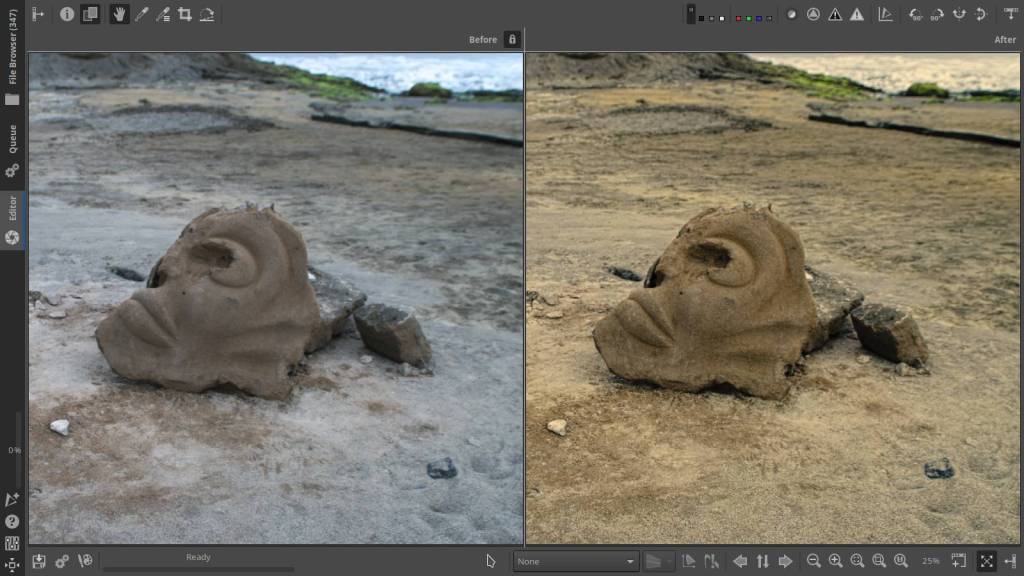
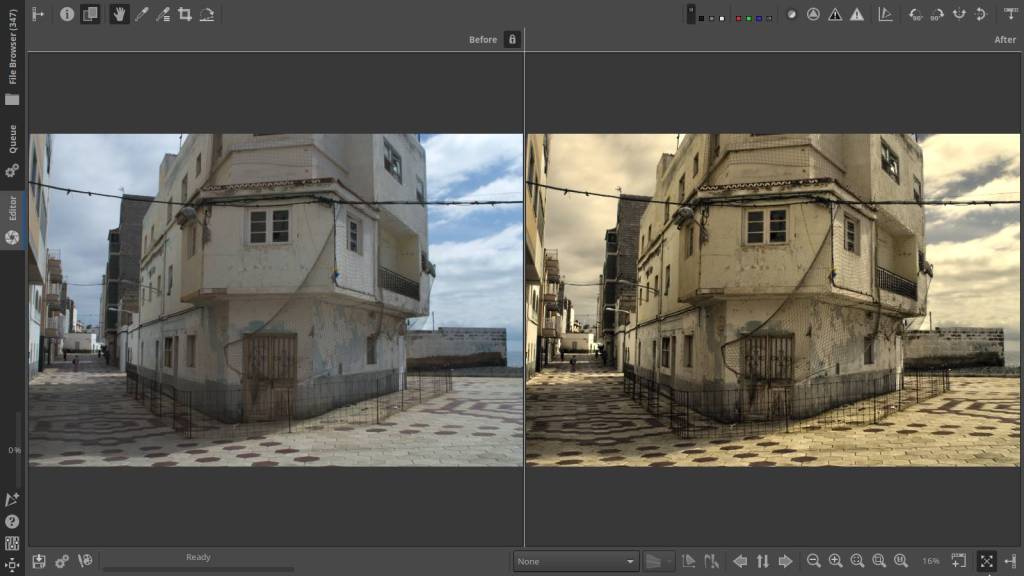
National Geographic, a new PictureFX Film Simulation in the Cinematic series.
The previous Cinematic Simulation called “Crime Scene” was published in November 2020, so it’s high time for a new one !
This one (and another one) actually stayed in the drawer for a long time, on one hand because I was also working on other simulations, on the other hand because I didn’t know what name I was going to give it and to which category of simulation it belonged.
Anyway, the presets for these Luts were inspired by several ideas:
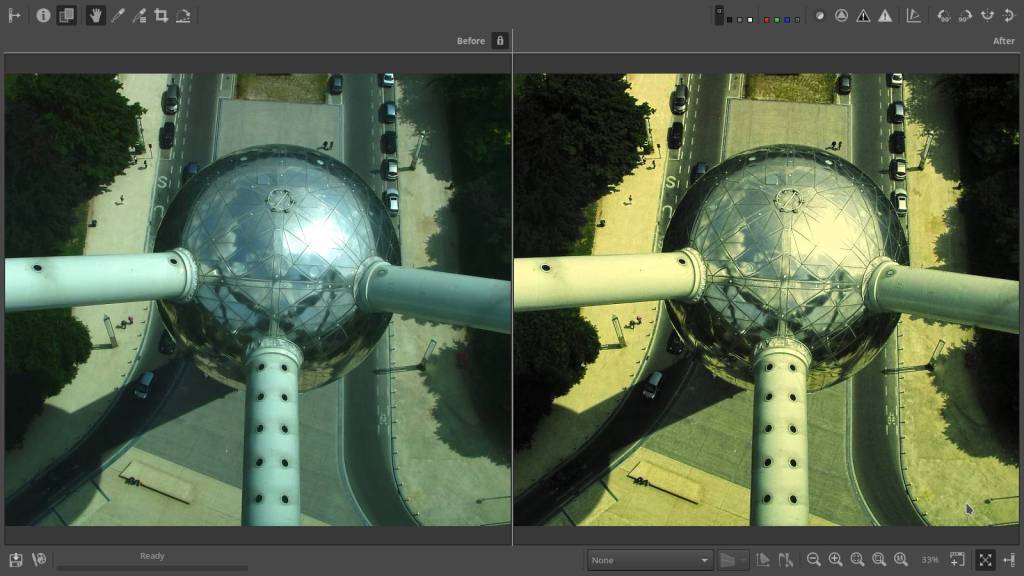
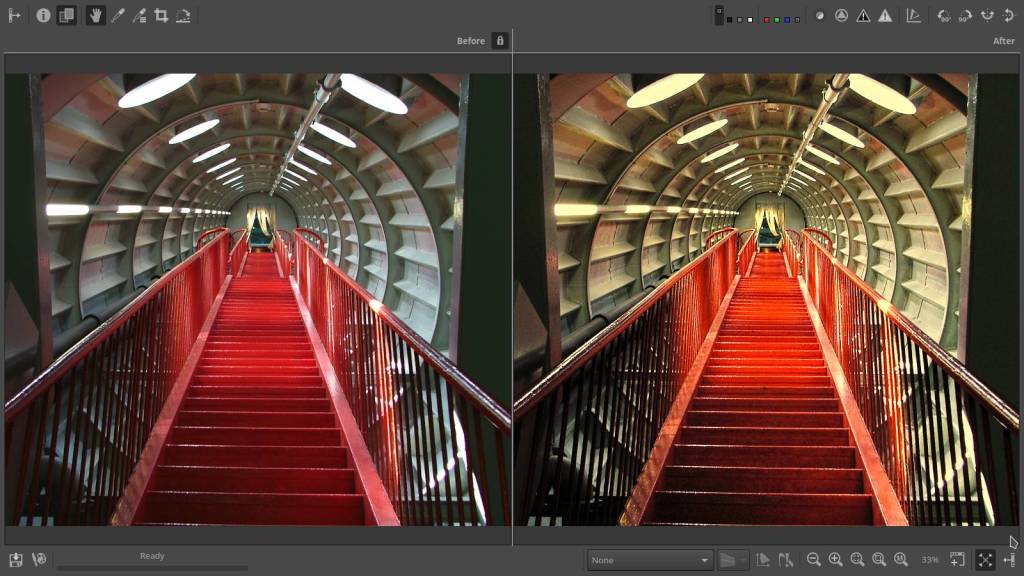
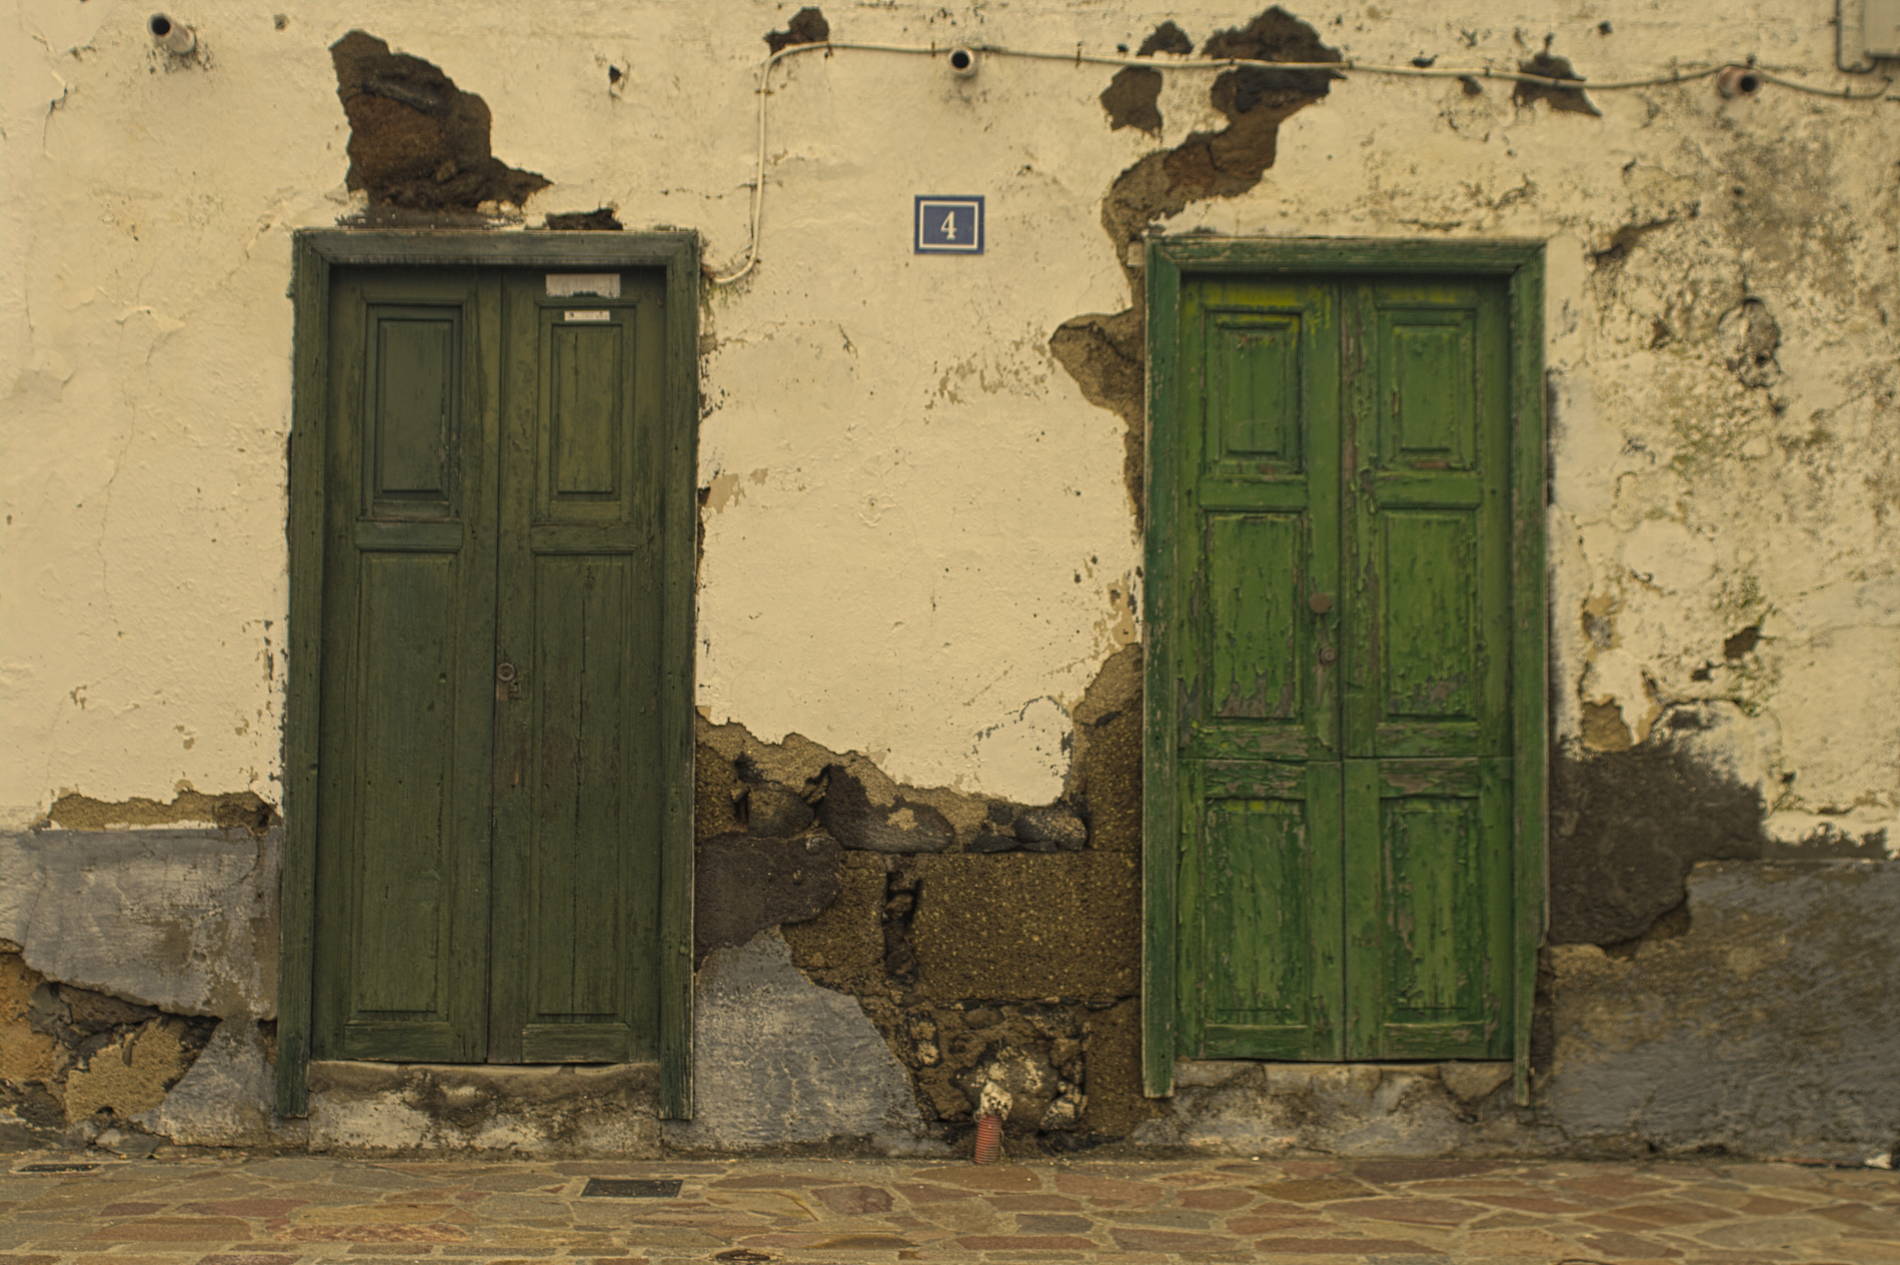
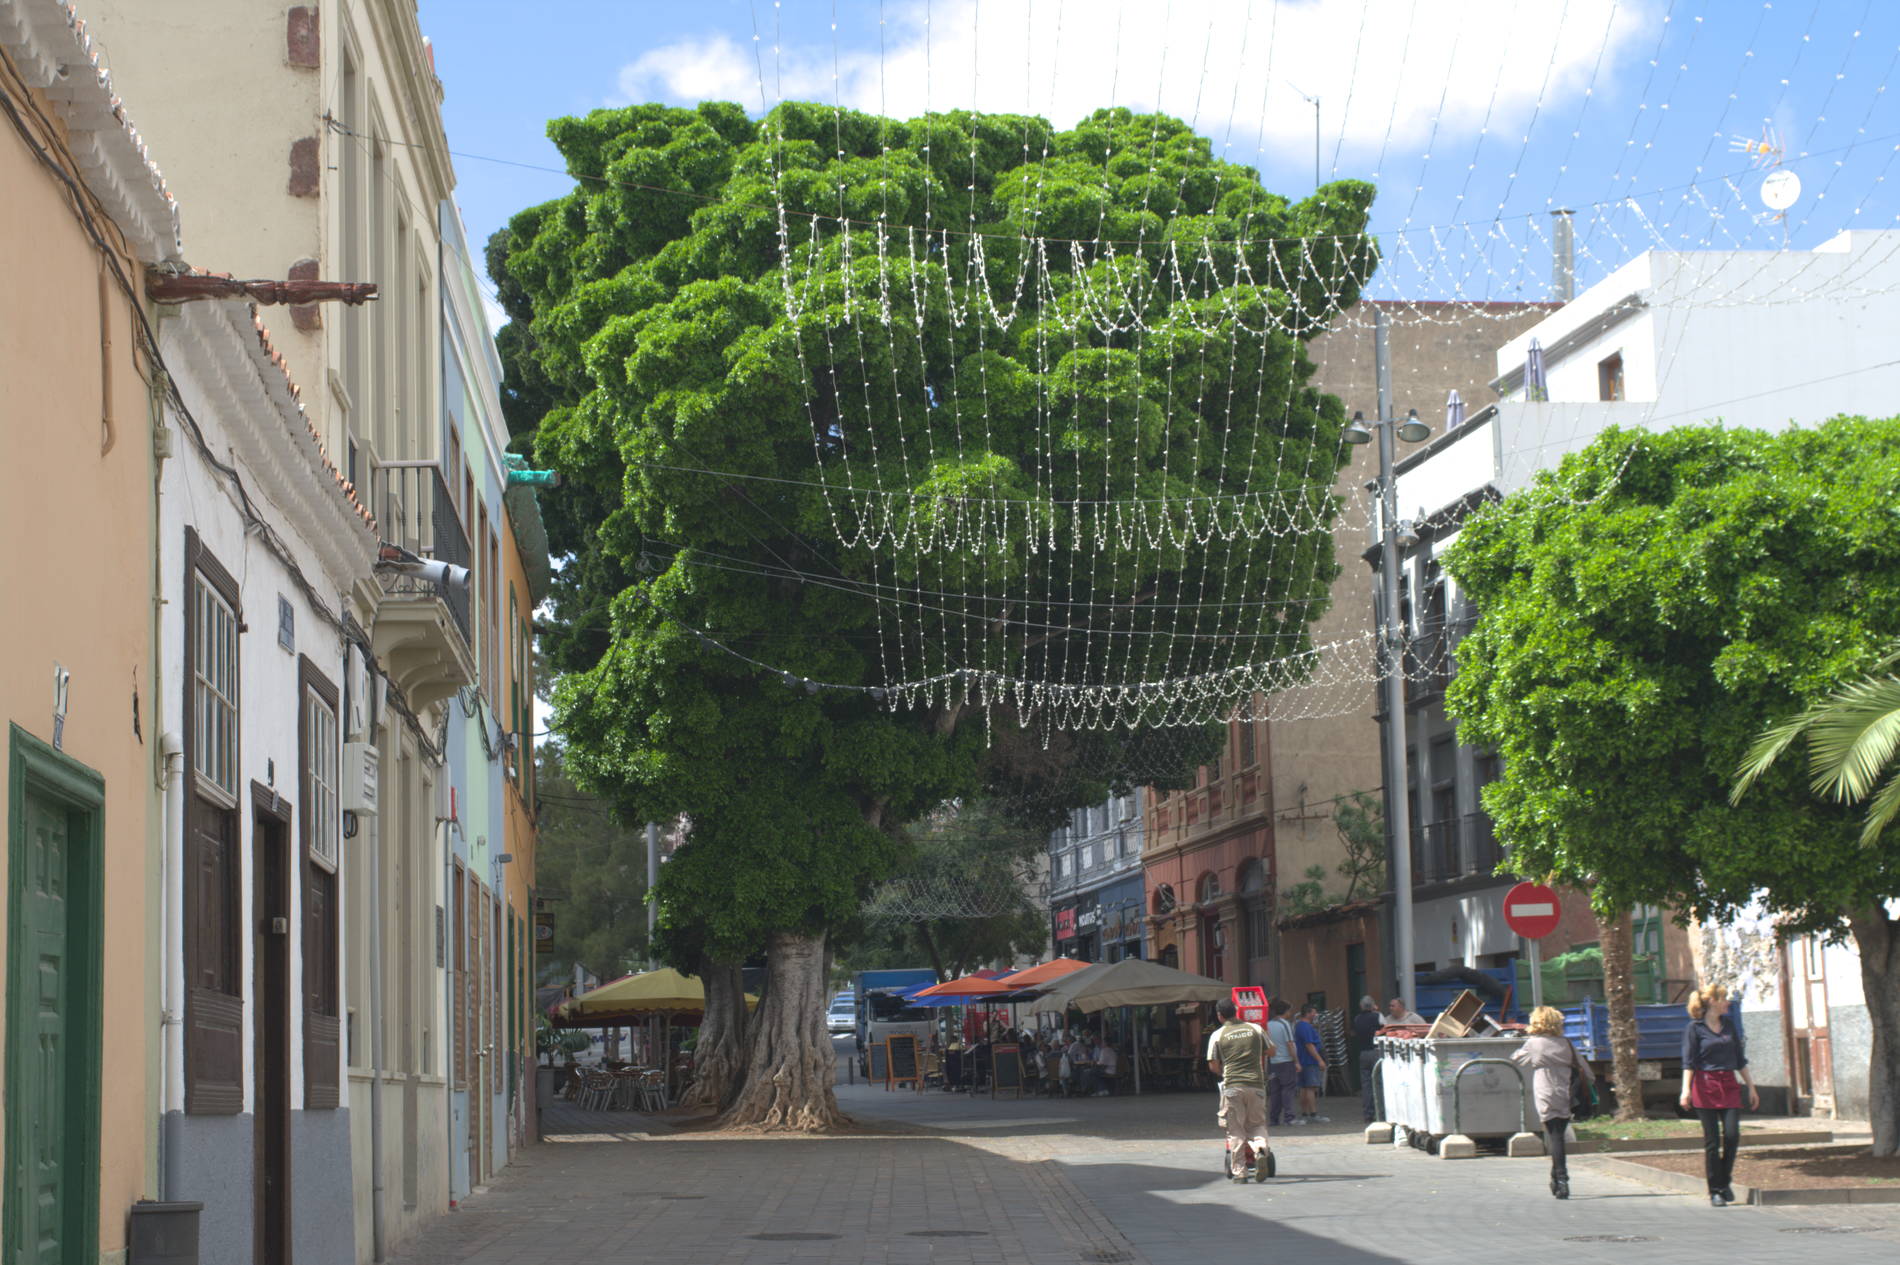
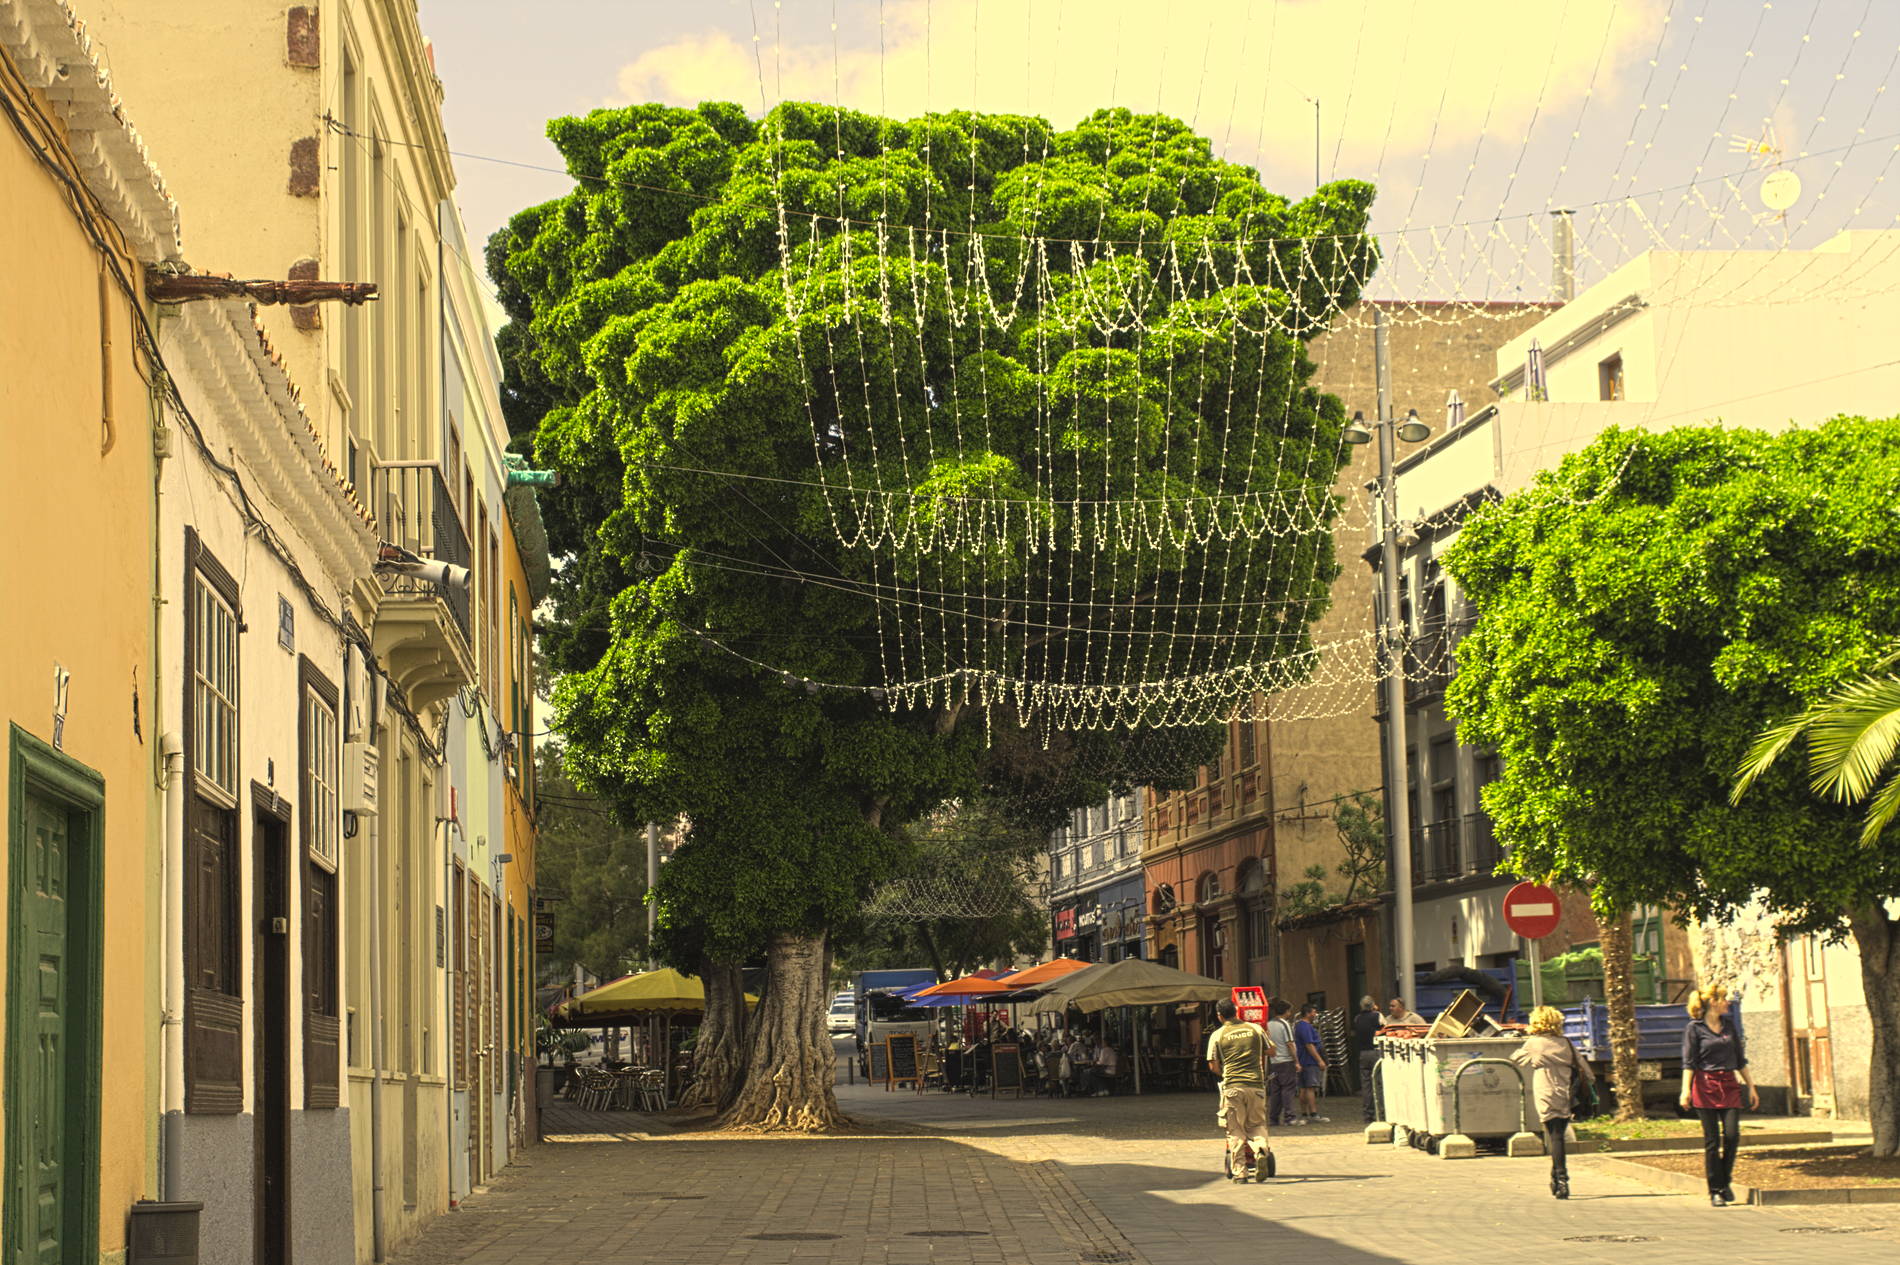
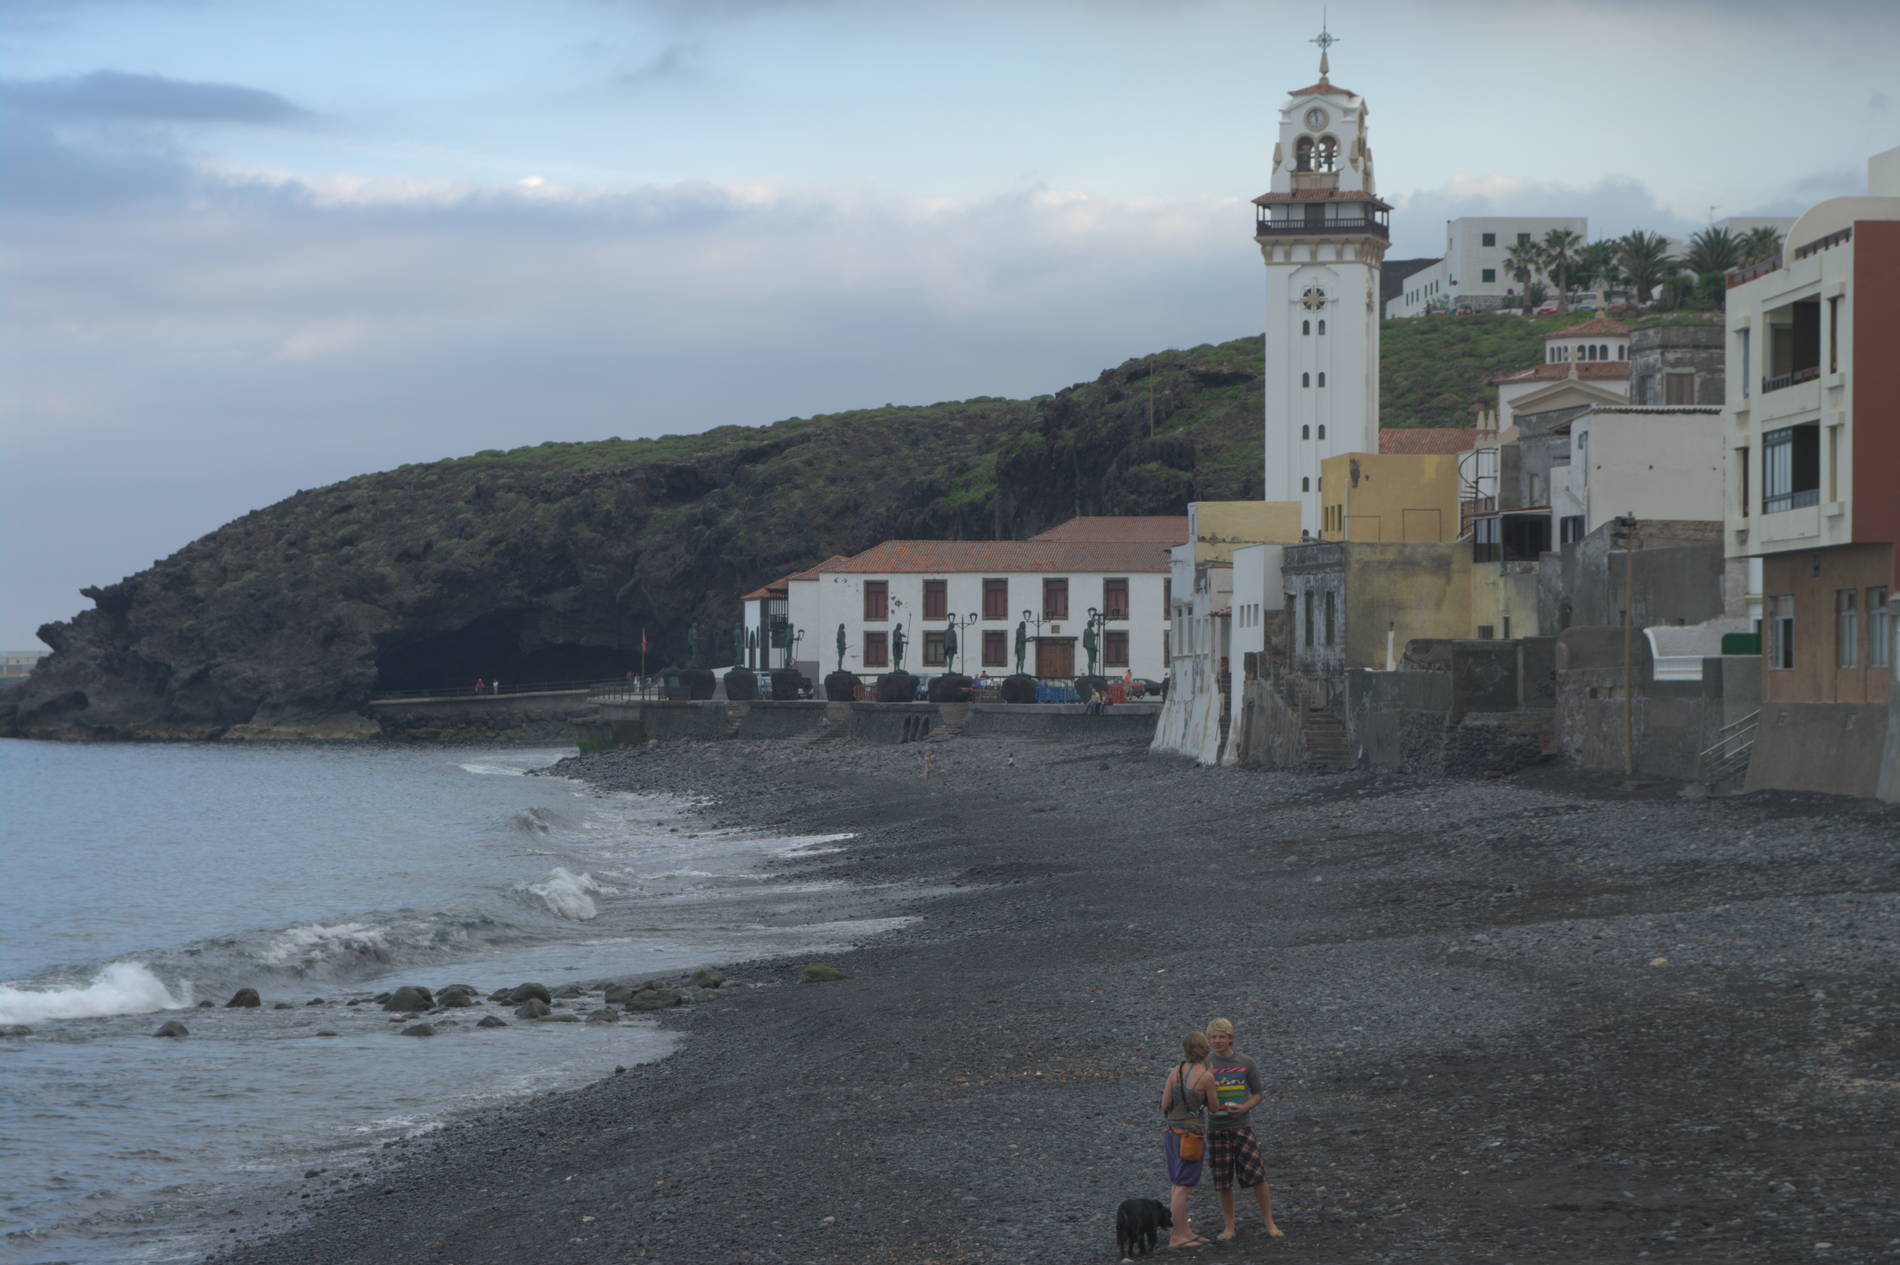
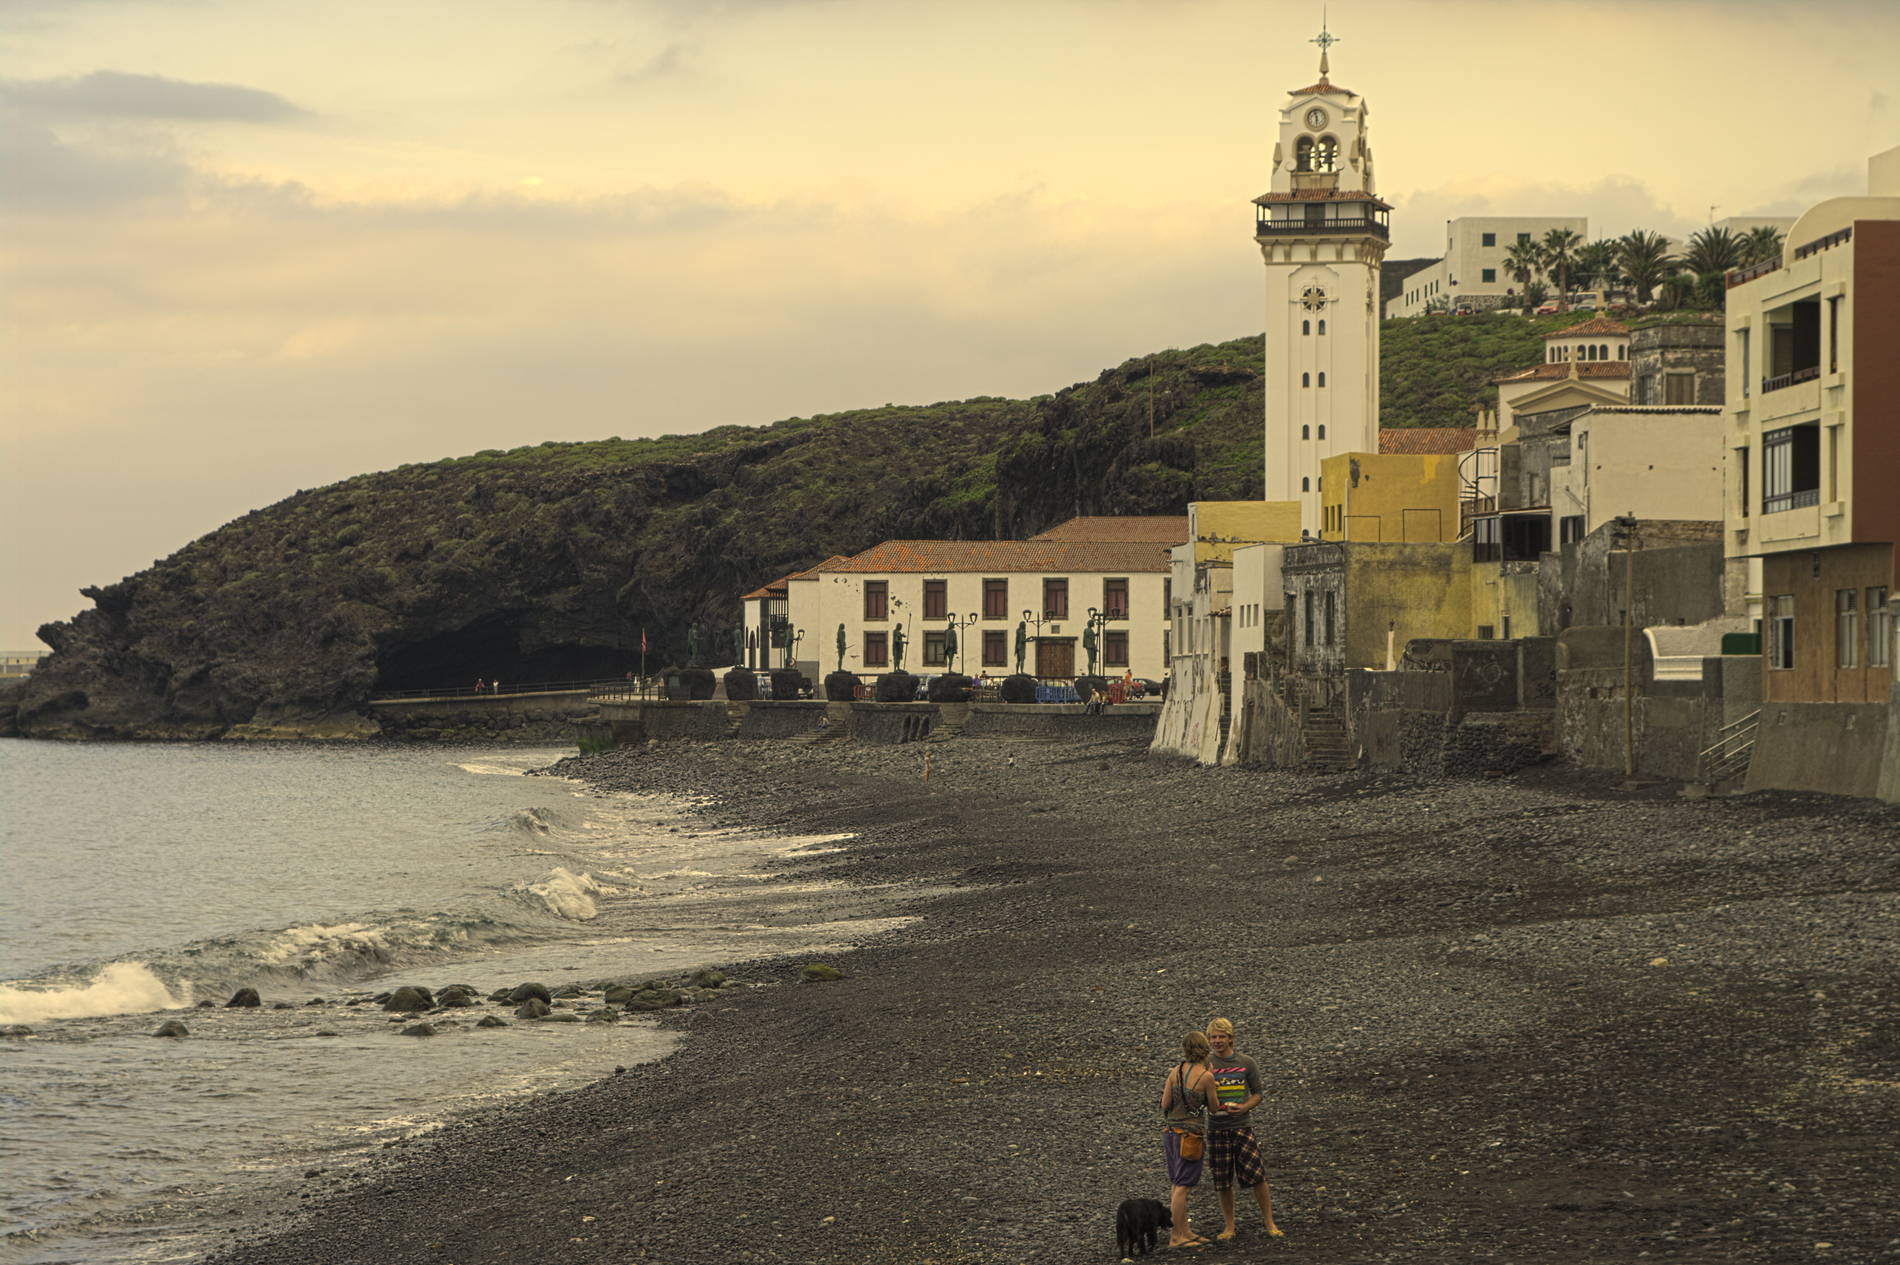
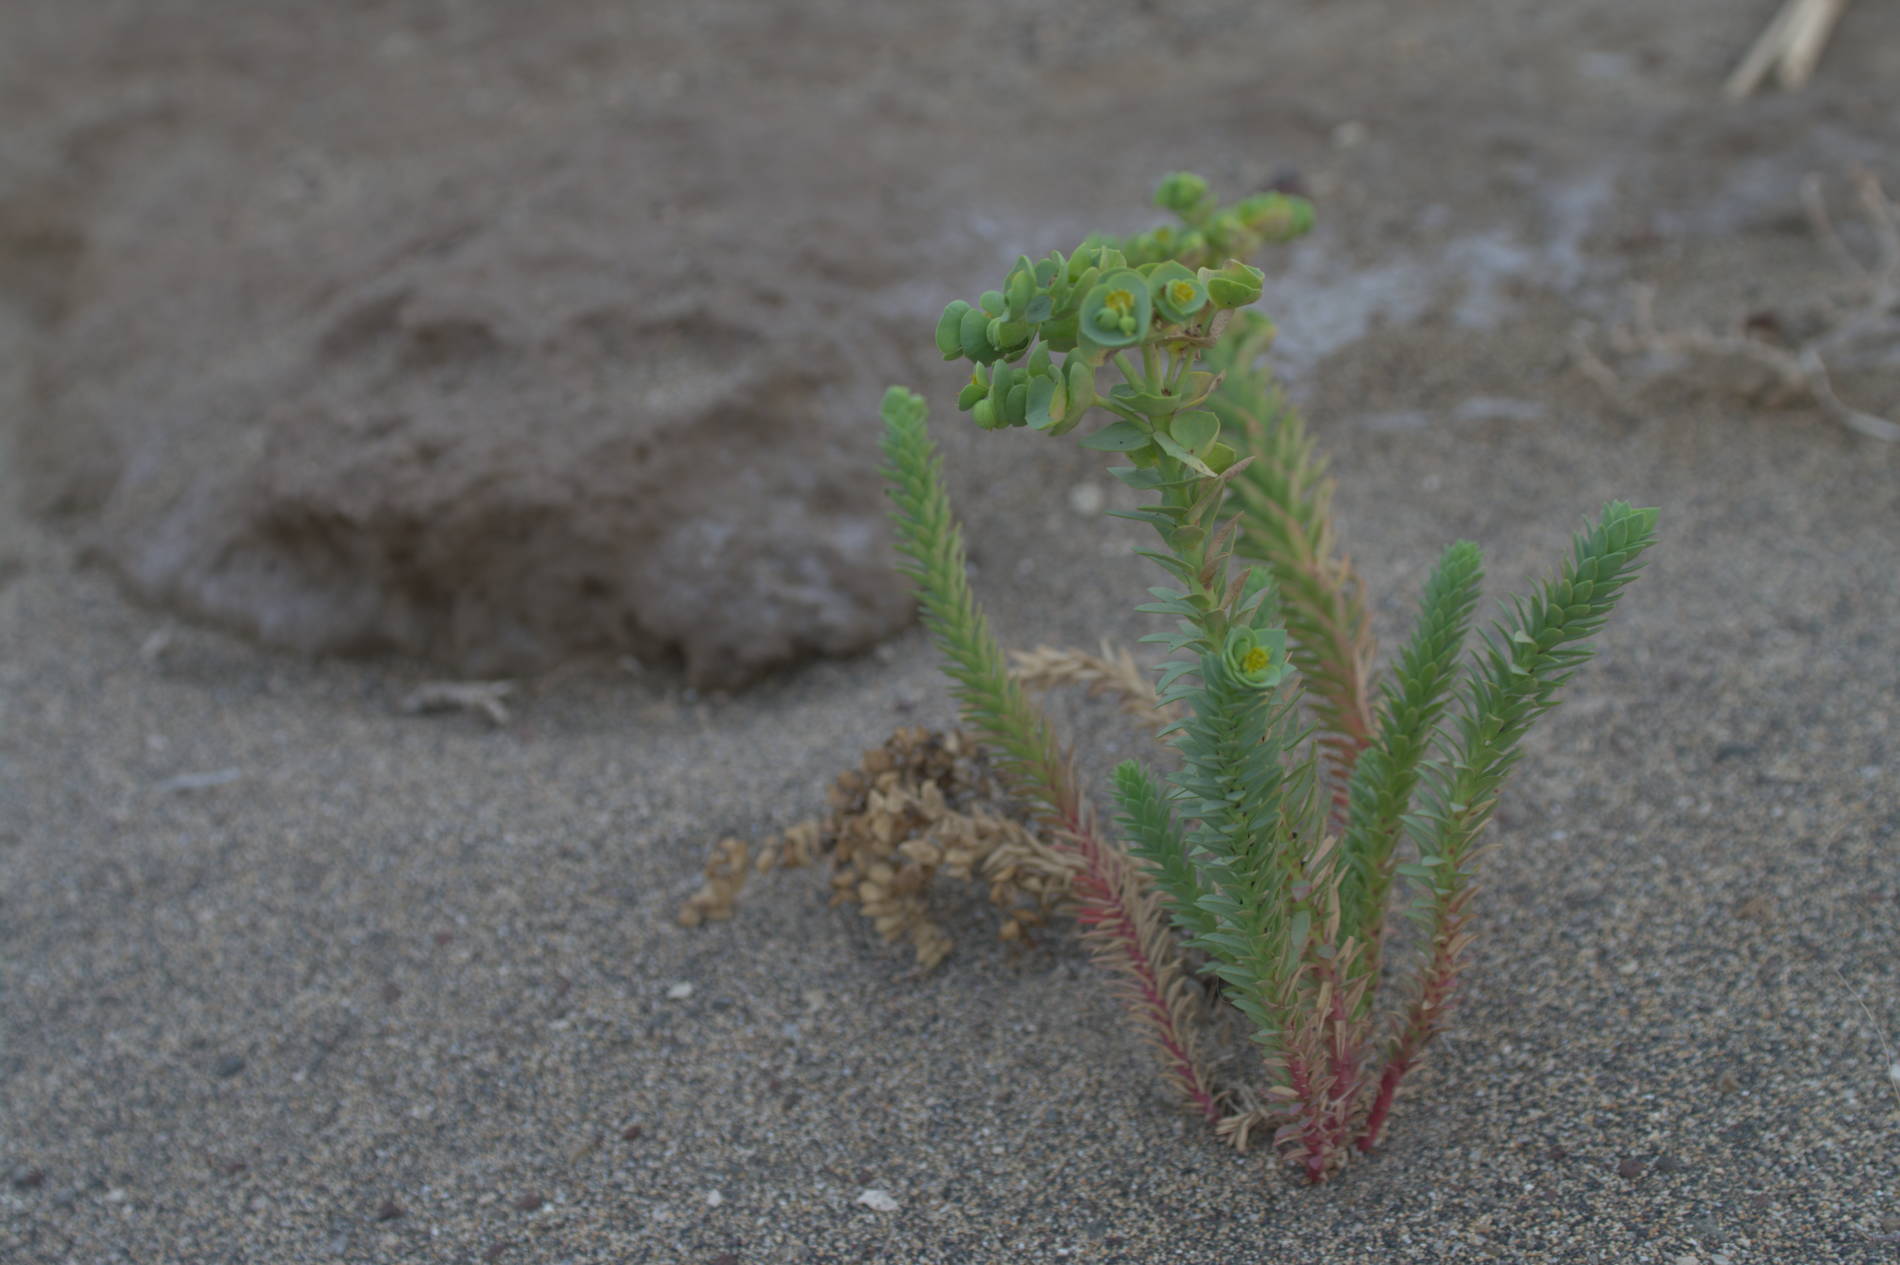
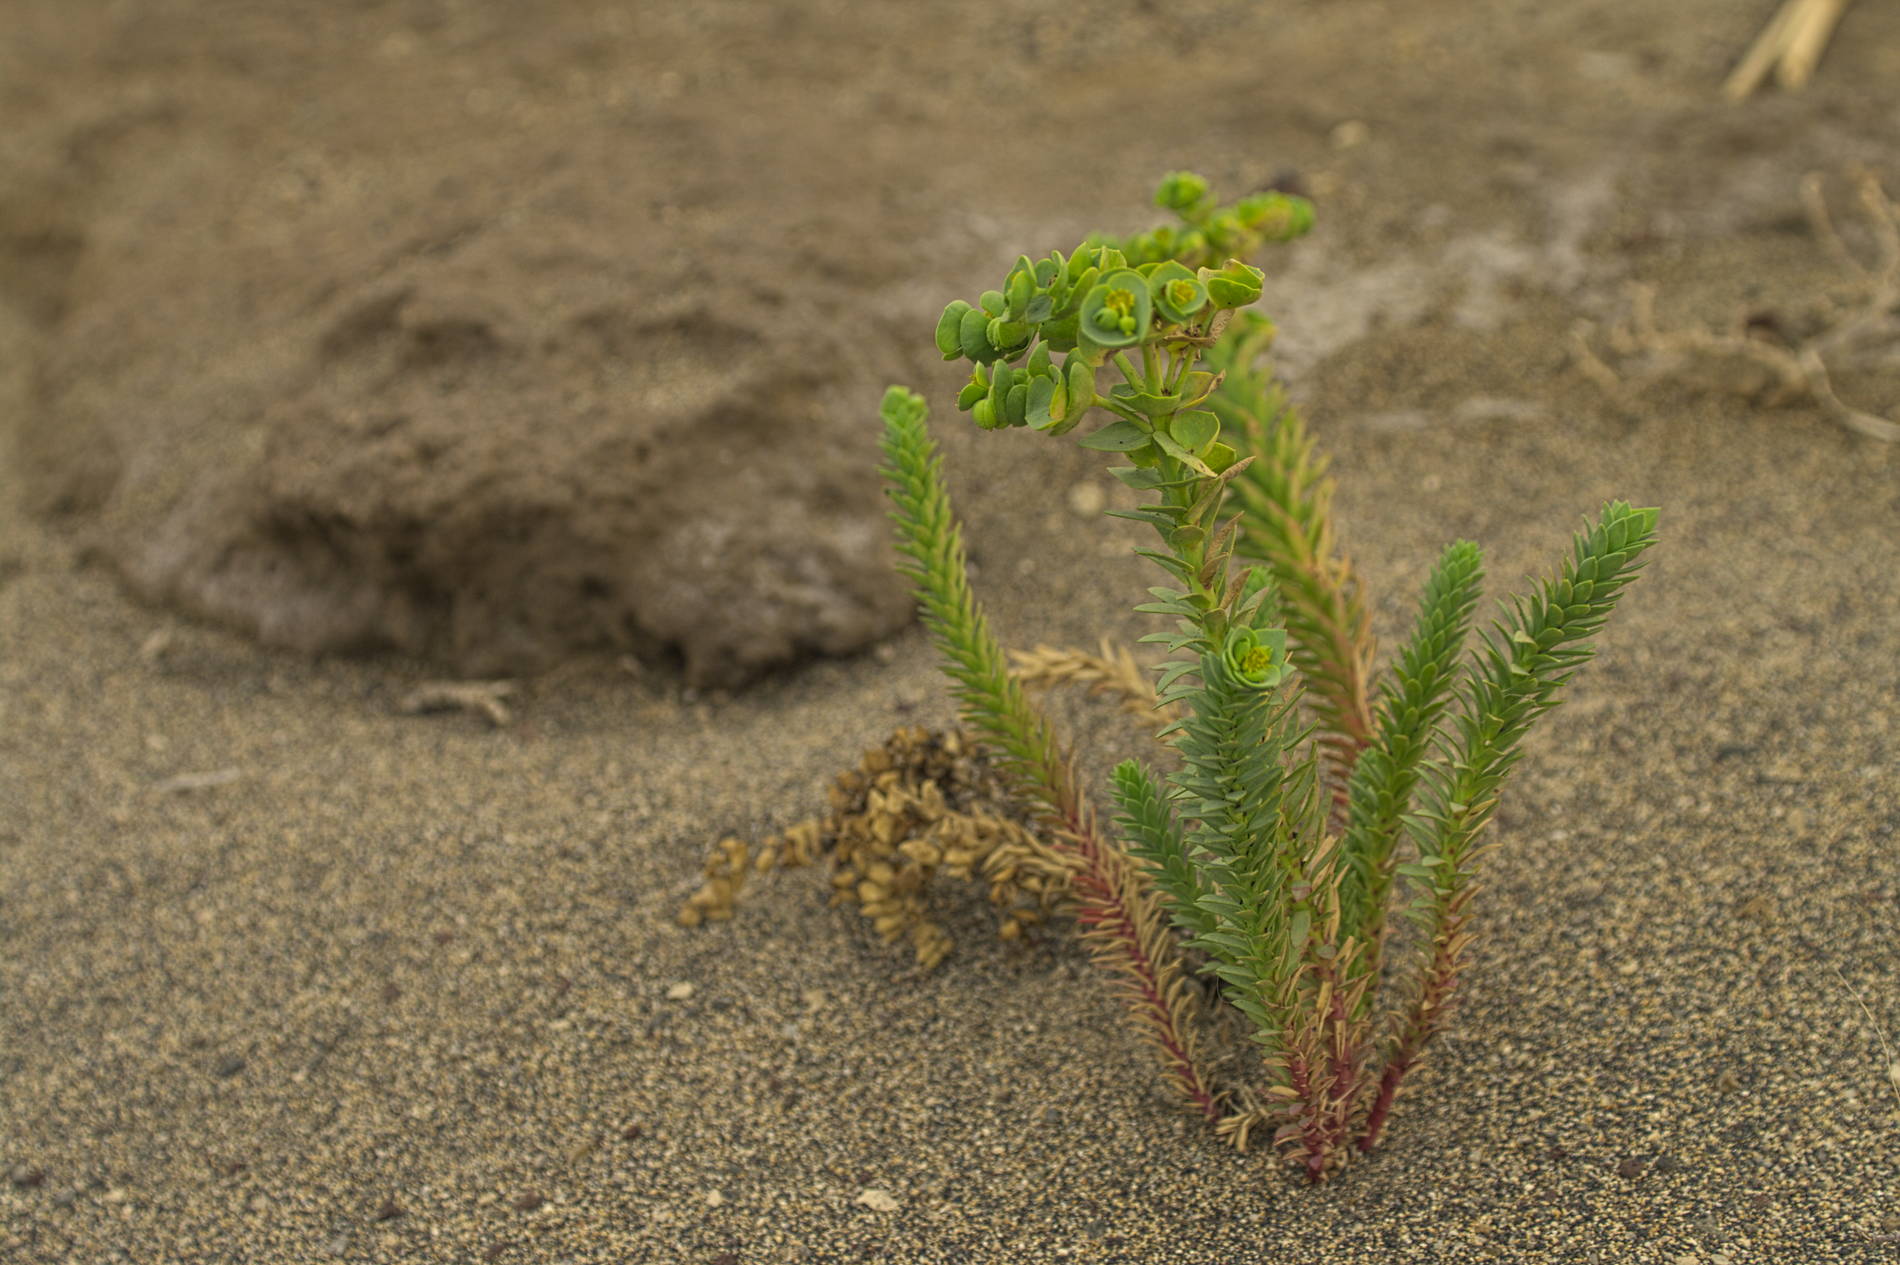
Trey Ratcliff and his amazing pictures taken at Burning Man, Black Rock, Nevada, US – Mad Max Fury road with Theron and Hardy, an apocalyptic film – National Geographic nature films and Bear Grylls and other survival series …, a mix of Event/SF/Nature/Action, so I ended up placing it in the Cinematic Adventure category.
I wanted earthy colors: Sahara sands – Rainforest greens, golden Sunsets, but also dramatic tones and a festival atmosphere. So one Lut wouldn’t work – and actually, not everything could be done in a Lut due to its limitations.
In the end I chose to create more than one simulation. Today I present here the “PictureFX Cinematic National Geographic” Film Simulation Lut and next time the “Burning Man” Simulation, I am still in doubt for a third.
The PictureFX Cinematic National Geographic Film Simulation : a preset and three Luts extracted from parts of that preset. The Luts can be used on their own or enhanced by one or two settings from the preset, and of course to taste and strength.
About the Preset : At the very bottom of this article you will find the Preset written in text (script) on which the Luts – which can be downloaded in this article – are based. This script is made in RawTherapee and can therefore only be used there (or in its counterpart Artherapee). However, most Software packages have a similar interface and/or the same modules.
If you want to apply the settings in other software, use the examples and settings below to obtain a similar setting.
The preset contains 3 tool modules:
Exposure, Tone Mapping & Color Toning
The basic Lut only contains the Color Toning, the other Lut is more complete but without the Tone Mapping, which you can add afterwards via the preset or manually to taste.
Preset Settings :

Exposure :
Black : 500 – Contrast : 25
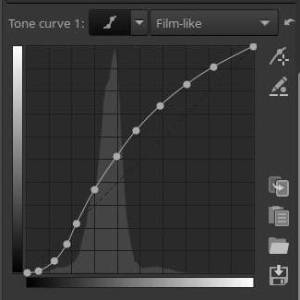
Tone Curve :
CatmullRom0 00.05 0.007531730.12 0.05188510.17551 0.1265310.218 0.2169440.297959 0.3673470.396016 0.5143450.481633 0.6285710.588096 0.7375980.706122 0.8326530.824355 0.9096331 1
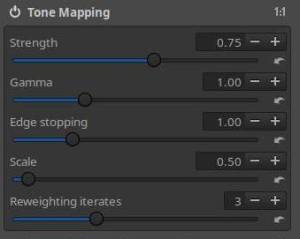
Tone Mapping :
[EPD]Enabled=trueStrength=0.75Gamma=1EdgeStopping=1Scale=0.5ReweightingIterates=3
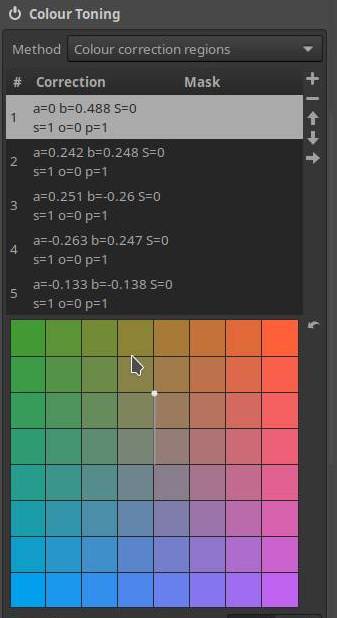
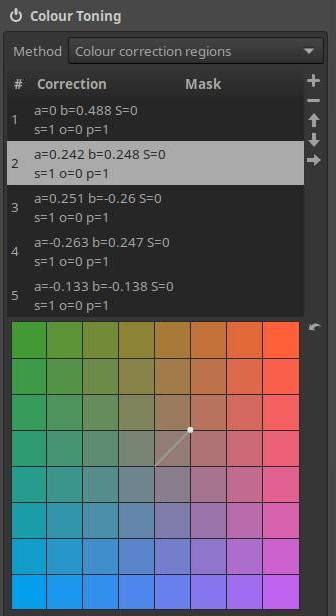
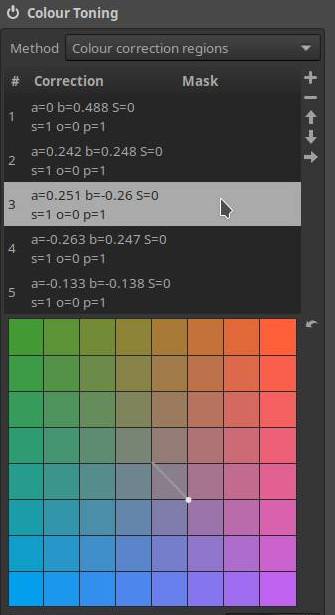
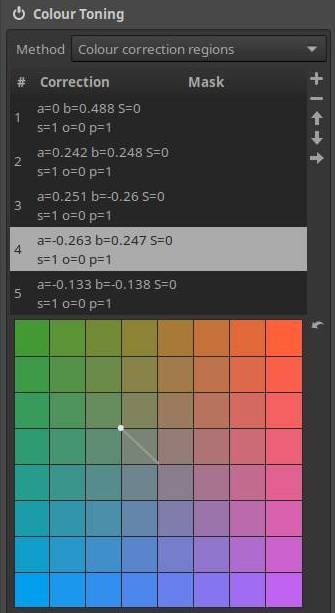
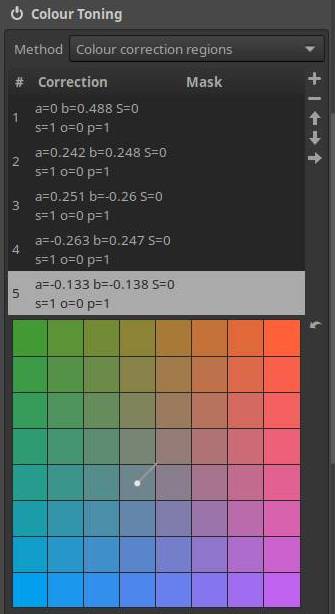
Color Toning :
Teal (green+1 and blue+0.5), Purple+1, Orange+1 and Yellow+2
The presets Exposure “Black” setting is set to “500”, but I have done tests with settings up to “5000” which are also quite good, so experiment depending on the picture. Contrast set to +25.
The setting of the “Tone Mapping” is also purely a choice of taste, in the Luts it is of course not present – that is not possible either – but you can add it manually based on the settings in the preset, or apply the preset partially, or just the preset without Lut – anything is possible.
Downloads:
The Luts can be downloaded in three different formats: PNG as for RawTherapee, Artherapee but also many others – CUBE such as for Darktable, Luminar, Adobe CS6 and up, … – and CUBE for standard image profile (Rec.709 and sRGB) 64x64x64 which can be used in various photo and video image software.
If it does not work in your software, or if you do not know how, it is best to consult the manual of your software or video camera.
Using the script : copy the full script to a text editor like notepad, save as .pp3 for Rawtherapee or .arp for Artherapee – use the “load profile from file button” and select the new script.
[Version]
AppVersion=5.8
Version=346
[Exposure]
Auto=false
Clip=0.02
Compensation=0
Brightness=0
Contrast=25
Saturation=0
Black=500
HighlightCompr=0
HighlightComprThreshold=0
ShadowCompr=50
HistogramMatching=false
CurveFromHistogramMatching=false
ClampOOG=true
CurveMode=FilmLike
CurveMode2=Standard
Curve=4;0;0;0.050000000000000003;0.0075317300000000004;0.12;0.051885100000000003;0.17551;0.126531;0.218;0.216944;0.29795899999999997;0.36734699999999998;0.39601599999999998;0.51434500000000005;0.48163299999999998;0.62857099999999999;0.58809599999999995;0.73759799999999998;0.70612200000000003;0.83265299999999998;0.82435499999999995;0.90963300000000002;1;1;
Curve2=0;
[HLRecovery]
Enabled=false
Method=Blend
[EPD]
Enabled=true
Strength=0.75
Gamma=1
EdgeStopping=1
Scale=0.5
ReweightingIterates=3
[ColorToning]
Enabled=true
Method=LabRegions
Lumamode=true
Twocolor=Std
Redlow=0
Greenlow=0
Bluelow=0
Satlow=0
Balance=0
Sathigh=0
Redmed=0
Greenmed=0
Bluemed=0
Redhigh=0
Greenhigh=0
Bluehigh=0
Autosat=true
OpacityCurve=1;0;0.29999999999999999;0.34999999999999998;0;0.25;0.80000000000000004;0.34999999999999998;0.34999999999999998;0.69999999999999996;0.80000000000000004;0.34999999999999998;0.34999999999999998;1;0.29999999999999999;0;0;
ColorCurve=1;0.050000000000000003;0.62;0.25;0.25;0.58499999999999996;0.11;0.25;0.25;
SatProtectionThreshold=15
SaturatedOpacity=6
Strength=50
HighlightsColorSaturation=60;80;
ShadowsColorSaturation=80;208;
ClCurve=3;0;0;0.34999999999999998;0.65000000000000002;1;1;
Cl2Curve=3;0;0;0.34999999999999998;0.65000000000000002;1;1;
LabGridALow=0
LabGridBLow=0
LabGridAHigh=0
LabGridBHigh=0
LabRegionA_1=0.0032418812625110149
LabRegionB_1=0.50153630971908569
LabRegionSaturation_1=0
LabRegionSlope_1=1
LabRegionOffset_1=0
LabRegionPower_1=1
LabRegionHueMask_1=1;0.16666666699999999;1;0.34999999999999998;0.34999999999999998;0.82877752459999998;1;0.34999999999999998;0.34999999999999998;
LabRegionChromaticityMask_1=1;0;1;0.34999999999999998;0.34999999999999998;1;1;0.34999999999999998;0.34999999999999998;
LabRegionLightnessMask_1=1;0;1;0.34999999999999998;0.34999999999999998;1;1;0.34999999999999998;0.34999999999999998;
LabRegionMaskBlur_1=0
LabRegionChannel_1=-1
LabRegionA_2=0.24237719178199768
LabRegionB_2=0.24884310364723206
LabRegionSaturation_2=0
LabRegionSlope_2=1
LabRegionOffset_2=0
LabRegionPower_2=1
LabRegionHueMask_2=1;0.16666666699999999;1;0.34999999999999998;0.34999999999999998;0.82877752459999998;1;0.34999999999999998;0.34999999999999998;
LabRegionChromaticityMask_2=1;0;1;0.34999999999999998;0.34999999999999998;1;1;0.34999999999999998;0.34999999999999998;
LabRegionLightnessMask_2=1;0;1;0.34999999999999998;0.34999999999999998;1;1;0.34999999999999998;0.34999999999999998;
LabRegionMaskBlur_2=0
LabRegionChannel_2=-1
LabRegionA_3=0.25115436315536499
LabRegionB_3=-0.26081278920173645
LabRegionSaturation_3=0
LabRegionSlope_3=1
LabRegionOffset_3=0
LabRegionPower_3=1
LabRegionHueMask_3=1;0.16666666699999999;1;0.34999999999999998;0.34999999999999998;0.82877752459999998;1;0.34999999999999998;0.34999999999999998;
LabRegionChromaticityMask_3=1;0;1;0.34999999999999998;0.34999999999999998;1;1;0.34999999999999998;0.34999999999999998;
LabRegionLightnessMask_3=1;0;1;0.34999999999999998;0.34999999999999998;1;1;0.34999999999999998;0.34999999999999998;
LabRegionMaskBlur_3=0
LabRegionChannel_3=-1
LabRegionA_4=-0.26315638422966003
LabRegionB_4=0.24760240316390991
LabRegionSaturation_4=0
LabRegionSlope_4=1
LabRegionOffset_4=0
LabRegionPower_4=1
LabRegionHueMask_4=1;0.16666666699999999;1;0.34999999999999998;0.34999999999999998;0.82877752459999998;1;0.34999999999999998;0.34999999999999998;
LabRegionChromaticityMask_4=1;0;1;0.34999999999999998;0.34999999999999998;1;1;0.34999999999999998;0.34999999999999998;
LabRegionLightnessMask_4=1;0;1;0.34999999999999998;0.34999999999999998;1;1;0.34999999999999998;0.34999999999999998;
LabRegionMaskBlur_4=0
LabRegionChannel_4=-1
LabRegionA_5=-0.13388858735561371
LabRegionB_5=-0.1385638415813446
LabRegionSaturation_5=0
LabRegionSlope_5=1
LabRegionOffset_5=0
LabRegionPower_5=1
LabRegionHueMask_5=1;0.16666666699999999;1;0.34999999999999998;0.34999999999999998;0.82877752459999998;1;0.34999999999999998;0.34999999999999998;
LabRegionChromaticityMask_5=1;0;1;0.34999999999999998;0.34999999999999998;1;1;0.34999999999999998;0.34999999999999998;
LabRegionLightnessMask_5=1;0;1;0.34999999999999998;0.34999999999999998;1;1;0.34999999999999998;0.34999999999999998;
LabRegionMaskBlur_5=0
LabRegionChannel_5=-1
LabRegionsShowMask=-1
Disclaimer: The trademarked names which may appear in the filenames of the HaldCLUT, CUBE or Preset are there for informational purposes only. They serve only to inform the user which film stock the given LUT image is designed to approximate. As there is no way to convey this information other than by using the trademarked name, we believe this constitutes fair use. Neither the publisher nor the authors are affiliated with or endorsed by the companies that own the trademarks.
And as always, for good photography articles, Fujifilm related stuff or those who prefer camera recipes, be sure to visit the website of my good friend Mark G. Adams :
Discover more from Open Source Photography
Subscribe to get the latest posts sent to your email.

