
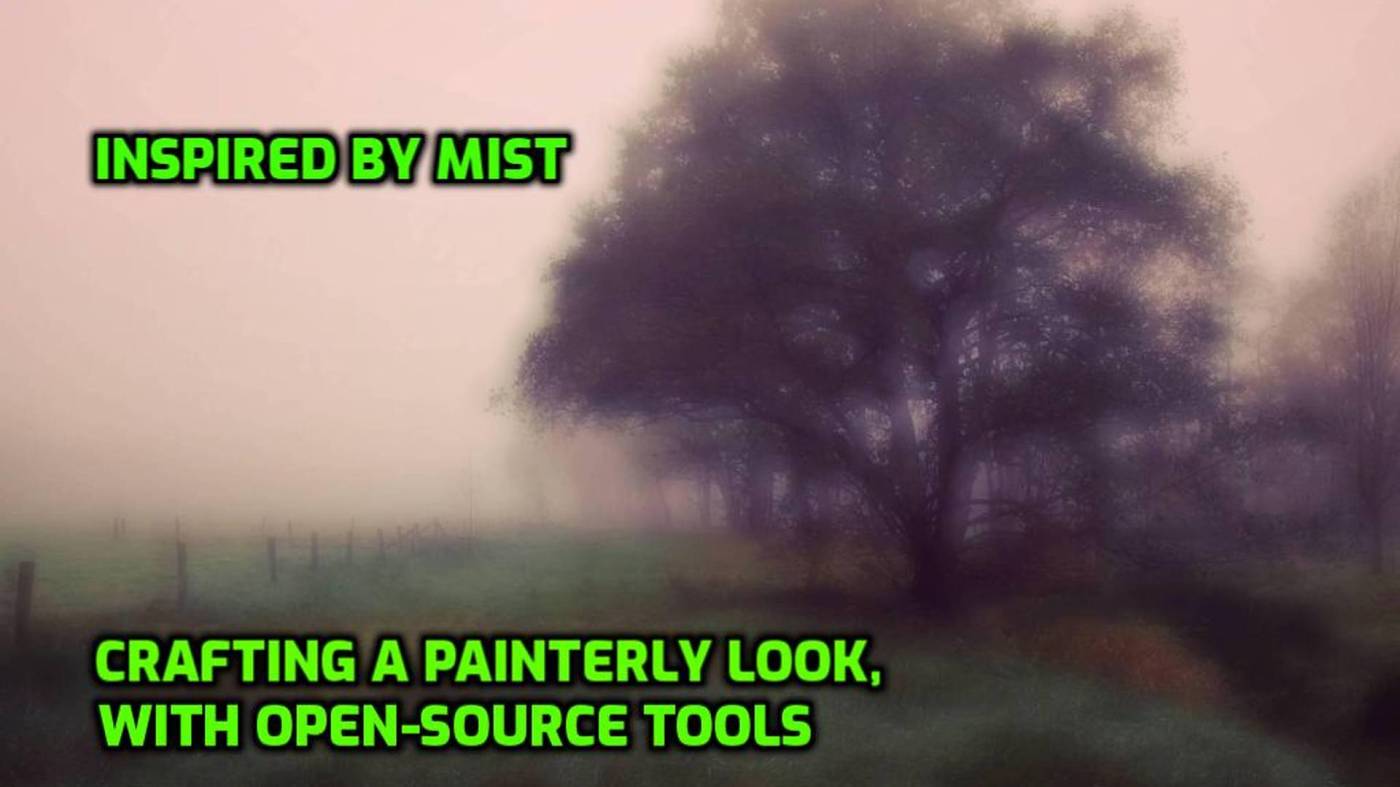
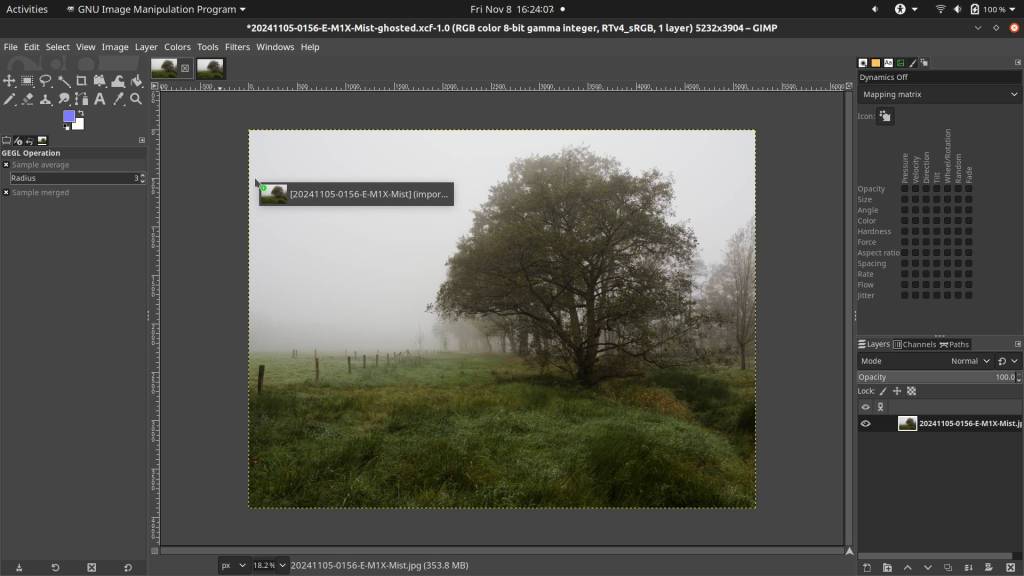
Did you happen to see the header photo on the main page? It’s a misty landscape, a bit blurry and painterly. The idea was to create an image that feels like a dreamy, perhaps even slightly ethereal, painting.
Some time ago, I experimented with this style, inspired by the techniques of Jo Stephen, a photographer based in North Dorset. Jo often uses ICM (Intentional Camera Movement) to create her artistic shots. I’ve yet to produce a piece that I feel satisfied with using this technique, so I decided to try a different approach.
Once again, I returned to that misty day I’ve written about a few times here and posted photos from—it was clearly an inspiring day, as I’ve never had so many interesting images and ideas from a single outing! At one point, I quickly took a shot without pressing the back-button focus, resulting in a blurry image. That’s when it struck me: what if I combined this with a sharp photo?
When I got home, my mind was already buzzing with ways to experiment. I considered merging the photos with Enfuse or maybe using Digikam’s “Blend Stacked Images” feature—it could even work with Hugin. But at the last minute, I thought of a simpler solution.
Why not create a blurred effect in my photo editing software instead of taking two separate shots? This way, I could blend the sharp and blurred layers together directly.
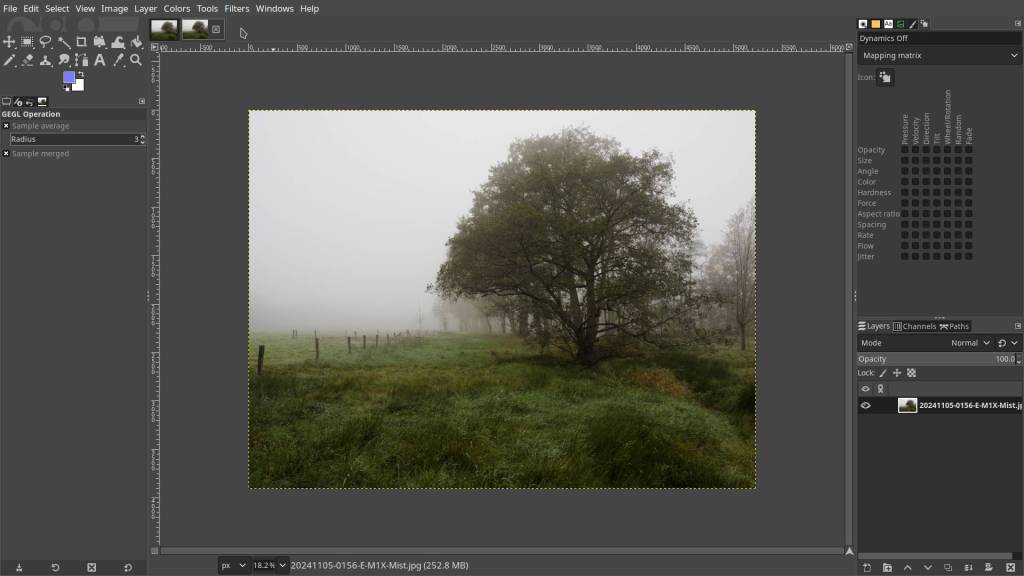
So, I fired up the best tool for the job—not Photoshop, but GIMP! After all, this is Open Source Photography—what else would I use?
- Open GIMP and load the photo you want to edit.
- Load the same photo again so you have two copies open.
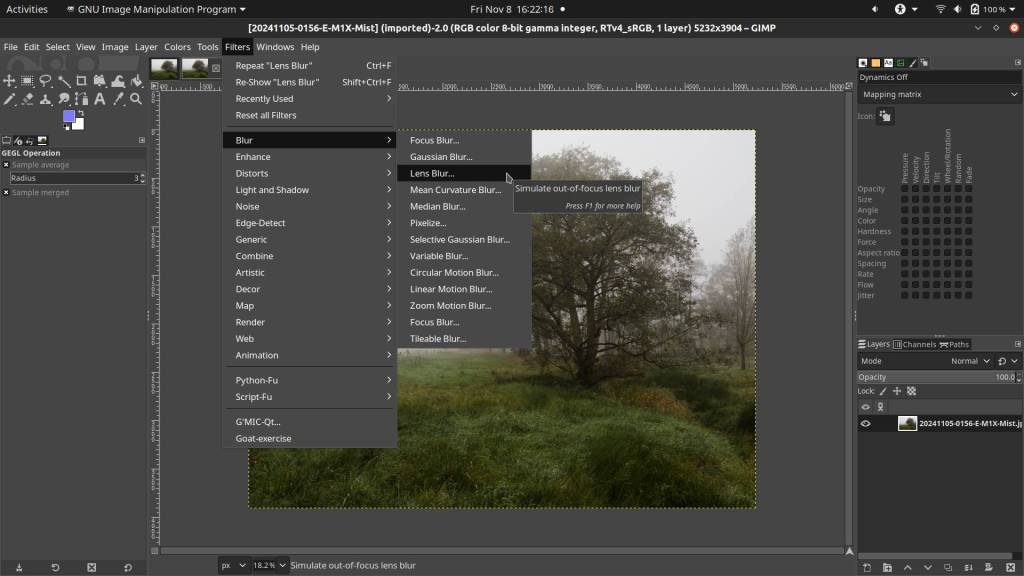
- In the second photo, go to Filters > Blur > Lens Blur.
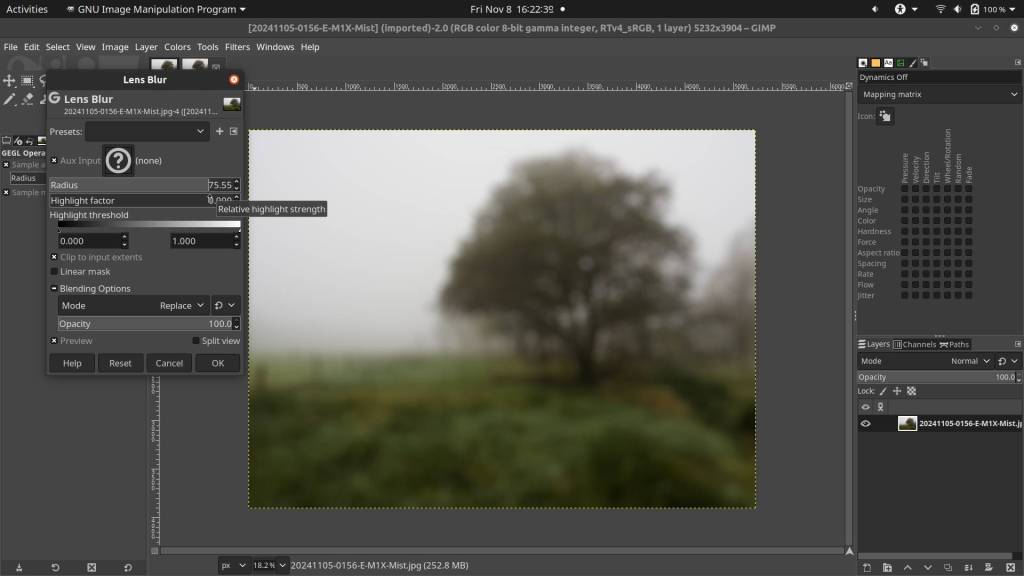
- Adjust the Radius to about 75%, or set it to your preference.
This approach lets you keep one version untouched while applying the blur effect to the other, giving you more control over the final look.
Next steps :
- Layer Alignment:
- Click and hold the icon of the blurry layer at the top of the layer stack.
- Drag it over the icon of the sharp, untouched layer.
- Drop the blurry layer on top of the sharp layer in the active window.
- If my explanation isn’t quite clear, you can check out the instructional video I created years ago about working with layers. It’s available here: GIMP tutorial – Using Textures.
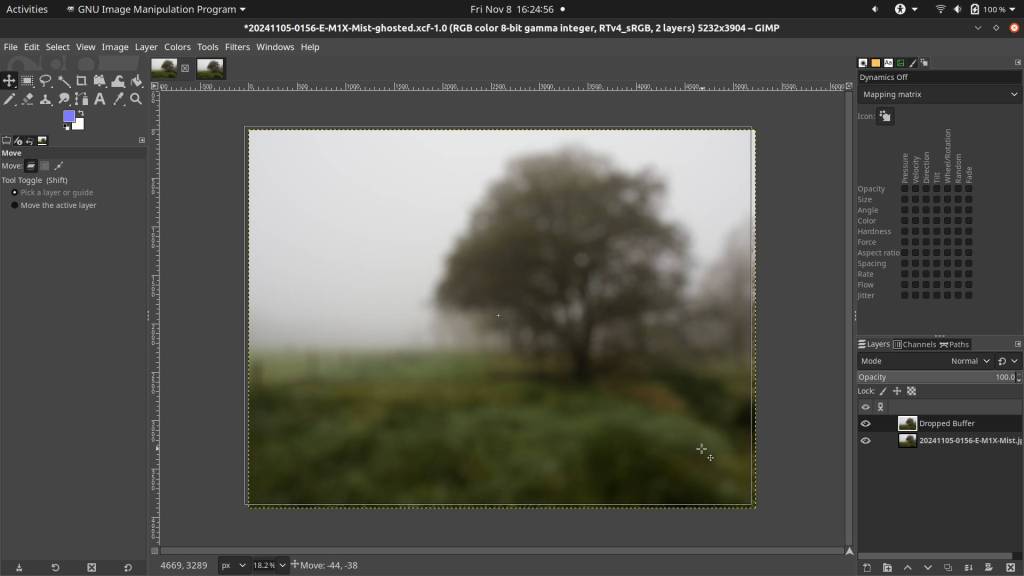
- Move the Layer:
- Select the Move Tool at the top left of the toolbar.
- In the active window, grab the top layer (the blurry one) and move it slightly up and to the left by a few millimeters.
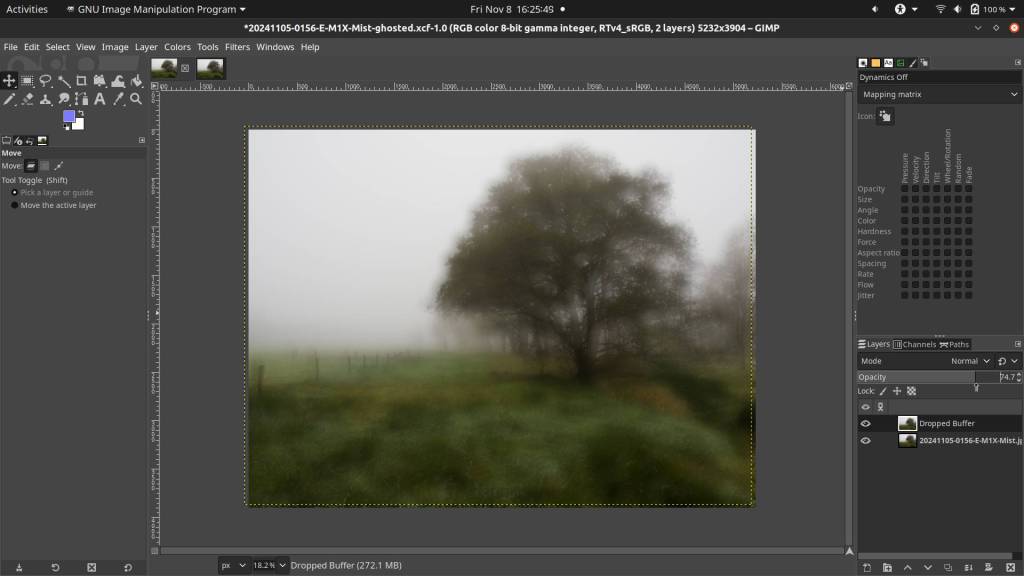
- Adjust Opacity:
- In the Opacity setting on the right (in the Layers panel), reduce the opacity of the active layer to around 75%, or adjust to your taste.
- This step helps blend the images together, creating a balanced mix of sharpness and blur.
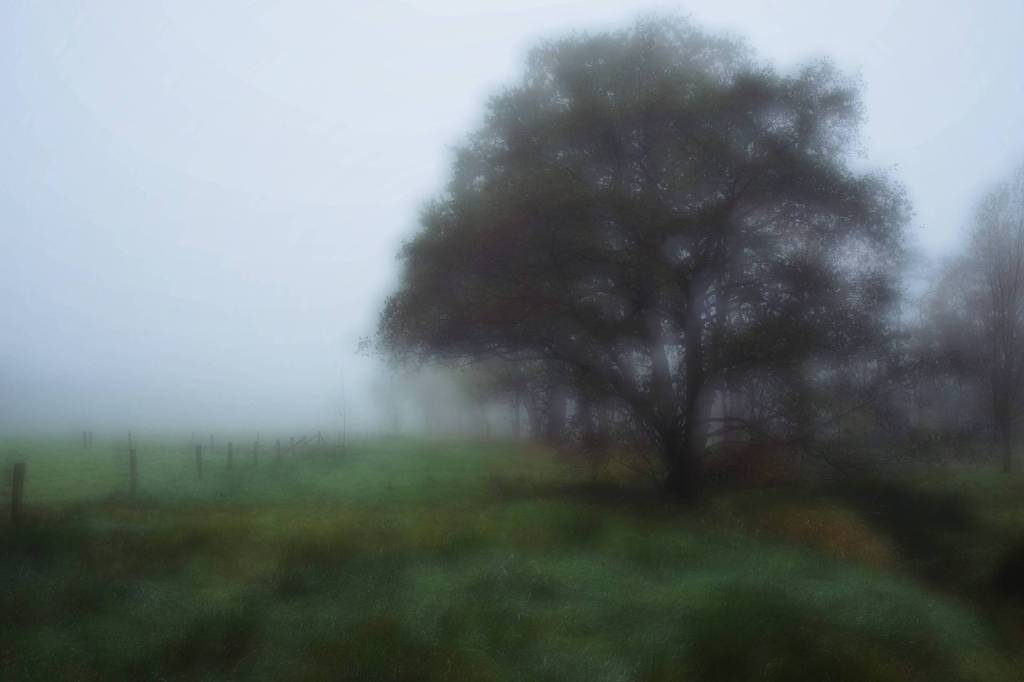
The result will give your image a unique “painted” effect, thanks to the subtle “double” vision effect created by layering sharpness and blur. The key here is to find the right balance for a visually pleasing blend!
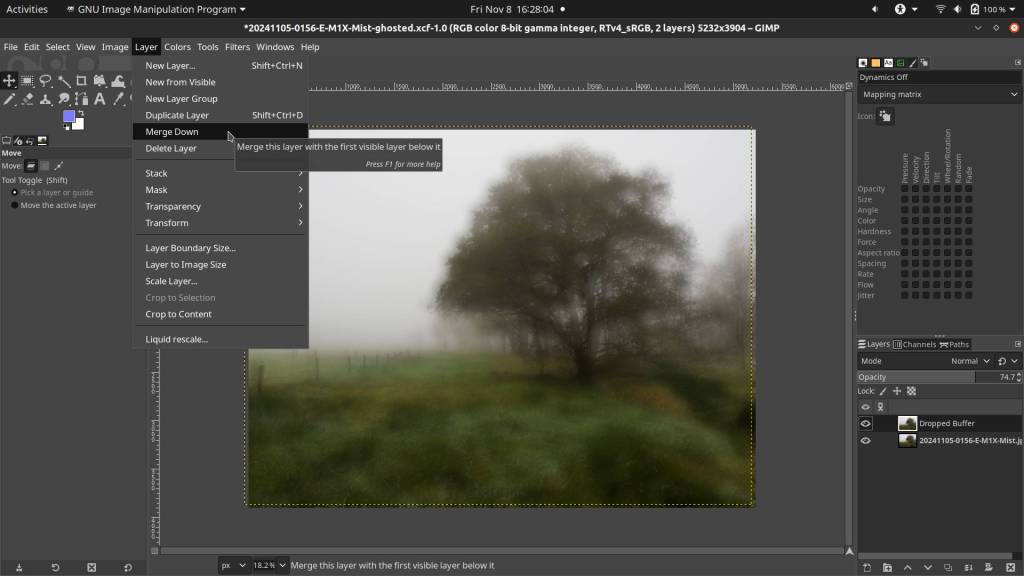
Once you’re happy with the result, you can merge the layers by selecting Layer -> Merge Down. For a better outcome, use Layer -> Layer to Image Size.
You can then continue editing your image in GIMP, or open it in RawTherapee or Darktable to add more effects.
In my case, I opened the photo in RawTherapee and applied a Cherry LUT. Here’s the result, click on the picture to view larger :

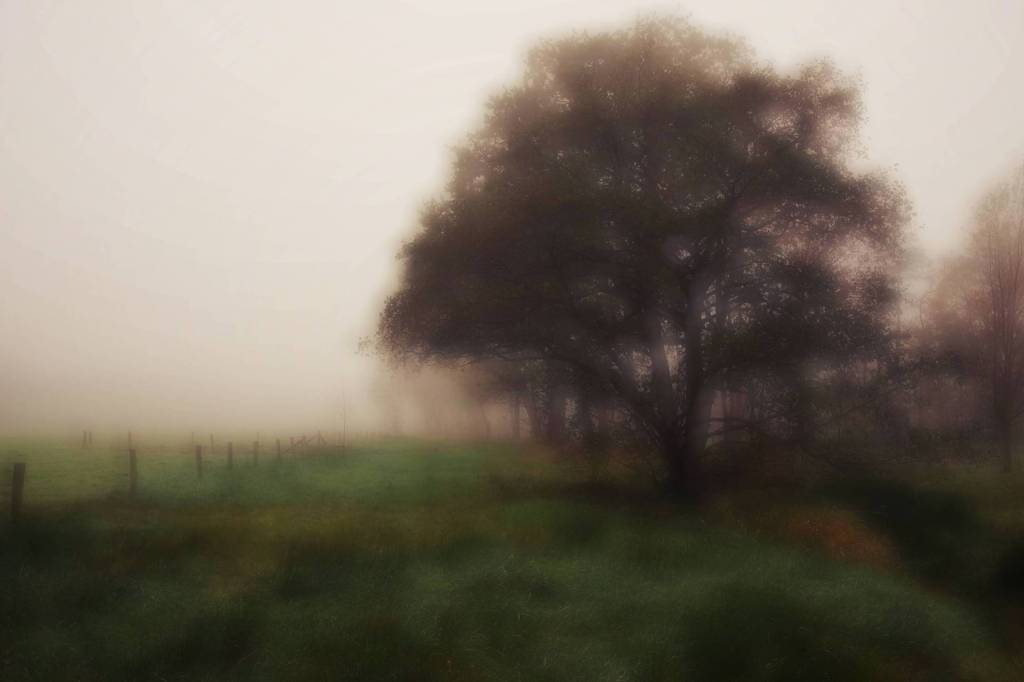
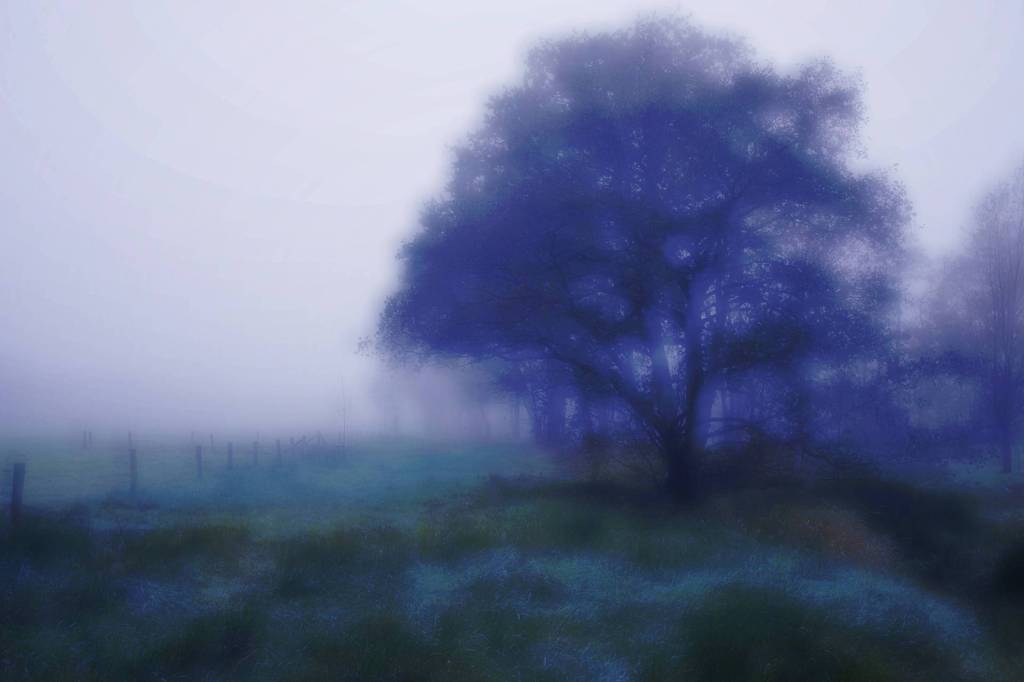
Is Cherry not your thing? No worries, you can apply any LUT you like. Here are three options to try :
You might still feel that “something isn’t quite right”—and that’s completely normal! We each have our own tastes and preferences. Maybe you’d prefer less blurring, or find the ghosting effect a bit too strong, or maybe you’d like everything to pop a bit more. There’s nothing stopping you from experimenting with color, intensity, shifting layers, and more. You’re in control!
It’s been a while since I last worked with Open Source Software, but I hope this will make up for it and spark some new inspiration. Who knows what you might do with this idea next, right?
I look forward to seeing you all again in the next article on Open Source Photography!
Goodbye for now!
Marc.
Discover more from Open Source Photography
Subscribe to get the latest posts sent to your email.


Thank you for excellent tutorial! AND thank you for sharing your ideas! Downloading GIMP to try it out. 🙂
LikeLiked by 1 person
Thank you very much, Sergei, and you’re welcome! That’s the whole purpose of open-source photography—sharing knowledge and tips, all free of charge.
Have a great Monday!
All the best,
Marc
LikeLike
Excellent tutorial. Many thanks for posting this. I use the GIMP and darktable (which is becoming very confusing of late). I’m experimenting with LUTS at the moment if only to recreate the film sims from Fuji.
Kind regards
Barrie
LikeLiked by 1 person
Hello Barrie,
I understand what you mean, but it’s really a matter of habit. If you’ve never worked with Photoshop or other commercial software before, it can be confusing and challenging at first to.
Regarding LUTs, please know that I offer many free LUTs on FreshLuts.com, including several Fujifilm simulations. Just go to FreshLuts, click on ‘Search LUTs,’ and type exactly this in the name field: *PictureFX* — you’ll find plenty there!
Enjoy experimenting, and have a great Monday!
All the best,
Marc
LikeLike