
Some time ago, I stumbled upon Rin’s website, and the first thing that caught my attention was the peculiar site name, JG1VGX. As I explored further, I learned that this name has its origins in the world of Radio, particularly CW, indicating “morse over radio,” and JG1VGX is Rin’s unique call sign.
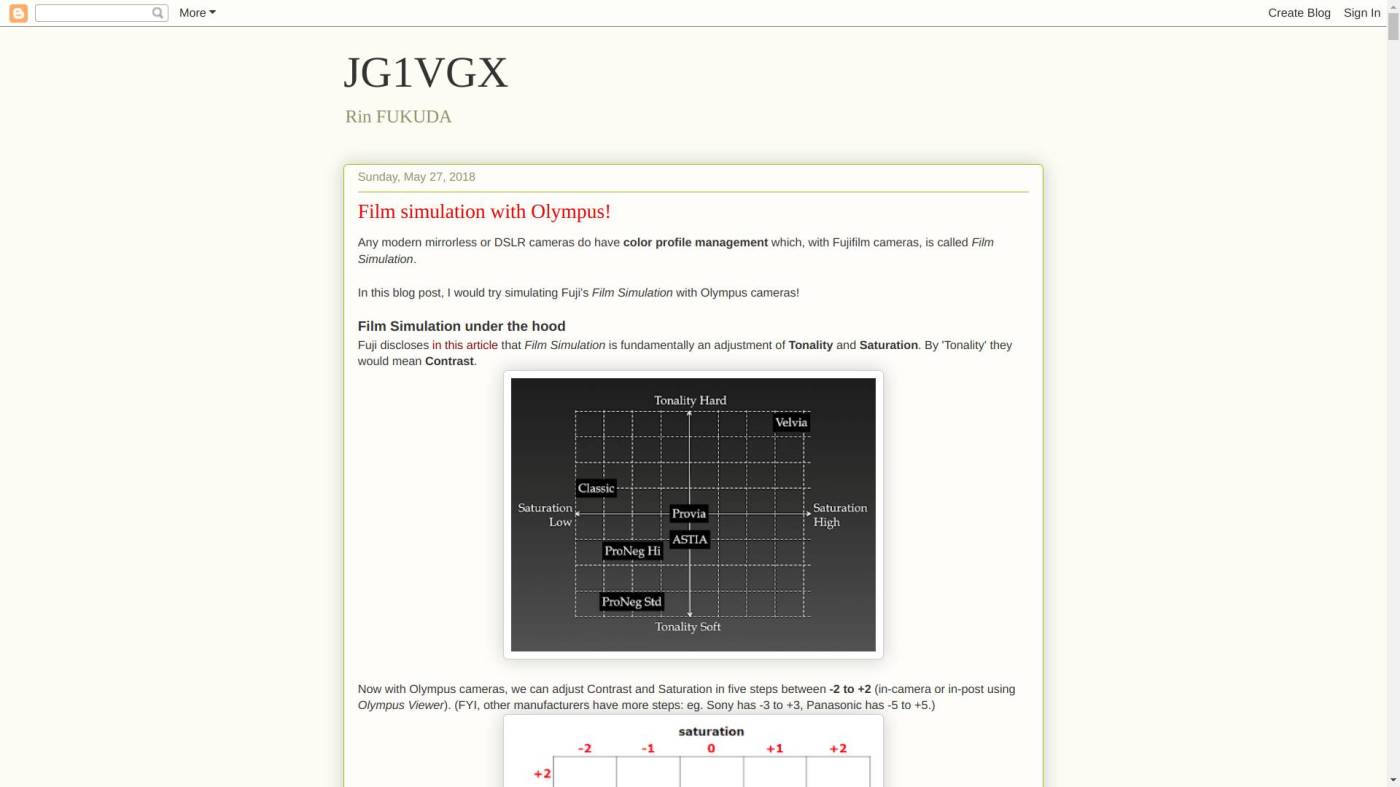
Aside from his interest in Radio, Rin is also an avid photographer, and he shares a fascinating discovery on his website. During a visit to a Fuji website (mentioned below), he made an intriguing observation: Fuji’s renowned film simulations are essentially a combination of contrast and saturation adjustments. Impressed by this finding, Rin took the Fuji graph that illustrated the proportions of their different film simulations and converted it into a more accessible five-step chart, similar to the scale used by Olympus cameras (-2 to +2). After conducting a test using this new approach, Rin seems pleased with the results. Unfortunately, I couldn’t access the photo results on my computer, but I’m inclined to believe his word on the matter.
The Original Fuji Article :
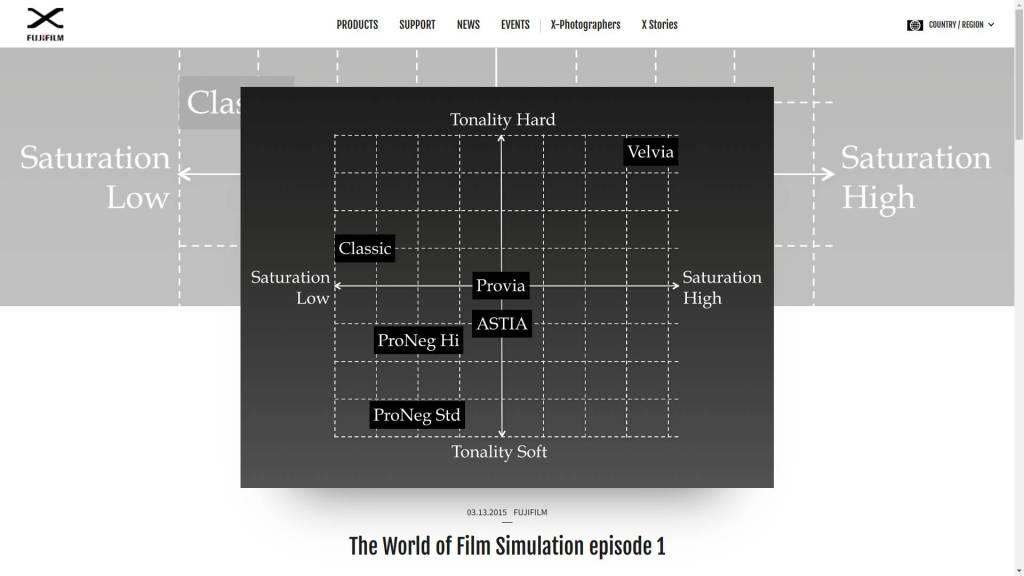
Fujifilm 2015 Article : The World of Film Simulation episode 1
Rin’s website and article :
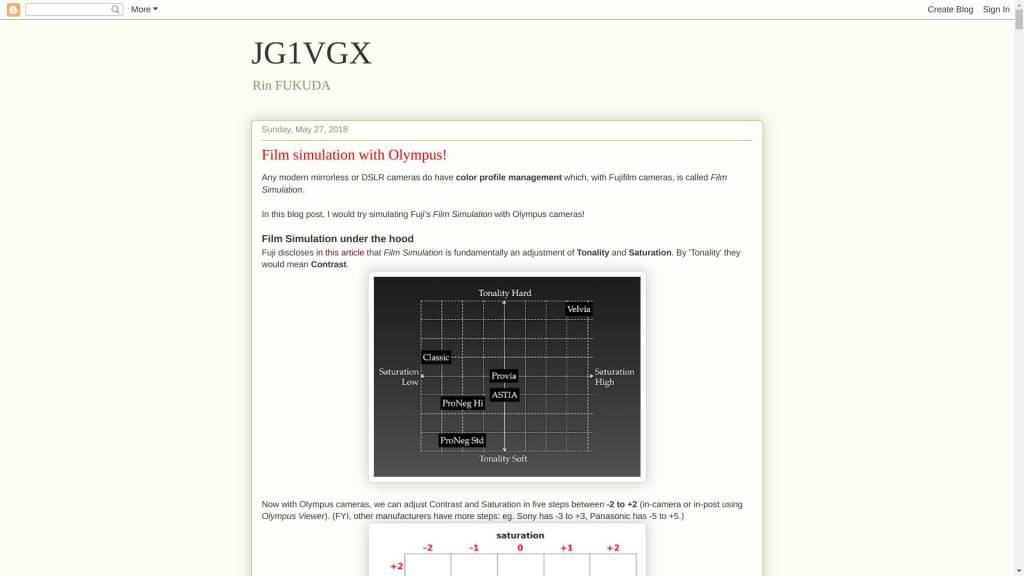
2018 Article at JG1VGX from Rin Fukuda : Film simulation with Olympus!
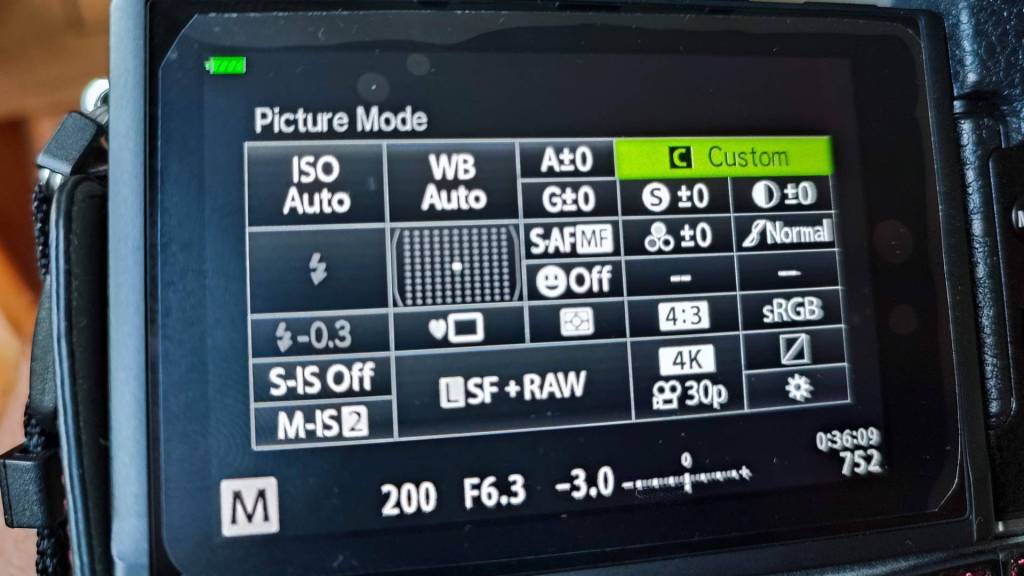
Considering the idea of contrast and saturation is actually reasonable. Fuji may have made some additional adjustments “under the hood”, but you can also apply similar modifications on your Olympus camera or any other camera that offers such features. Start with setting your cameras Picture Mode to Custom. Then select the “half moon” icon and change contrast, do the same with saturation – “three circles” icon. Check out the results, it may already be ok for you.
If not, and you want to fine tune further, go to the White Balance (WB compensation) and make specific adjustments to the A axis (Red and Blue) or G axis (Green and Magenta).
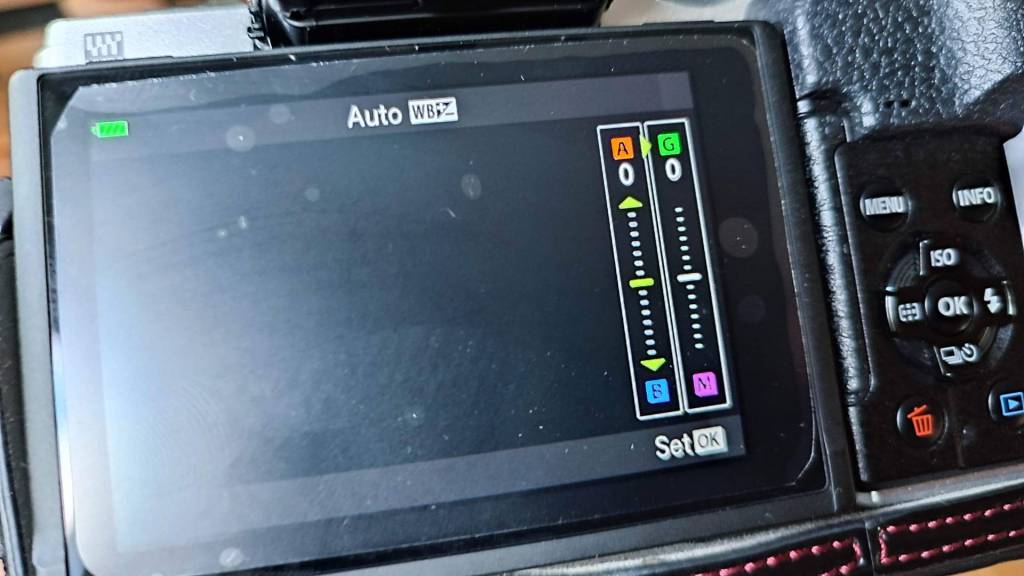
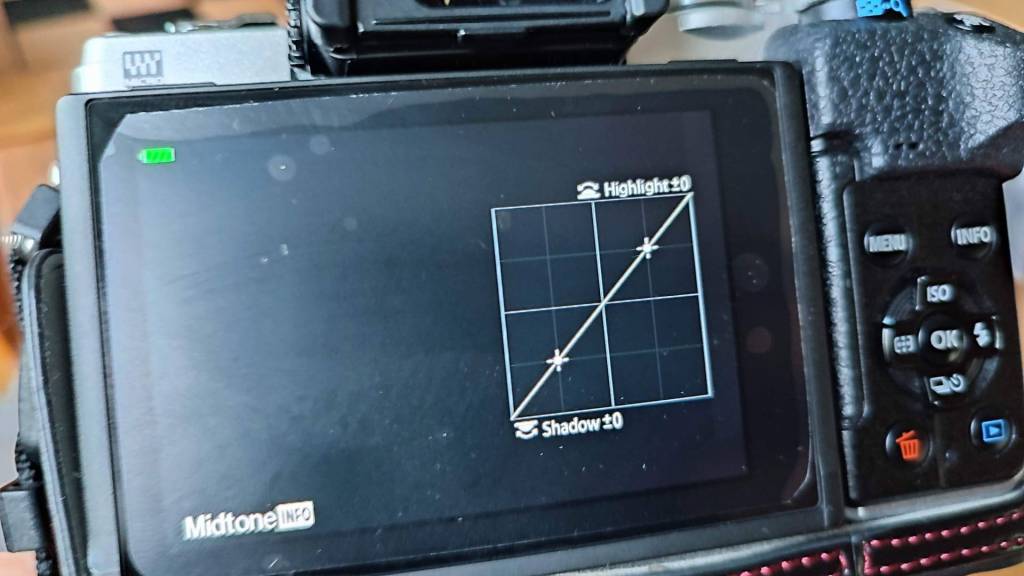
Furthermore, utilizing the Highlight and Shadows controls allows you to make subtle tweaks in the dark, mid, and light areas, which significantly impact the final color cast of your image.
I even dare to go a step further with the assumptions, because, is the difference between Fuji and Olympus colors really that big? Well, Rob Trek doesn’t think so, and he has proof of that in a video here below.
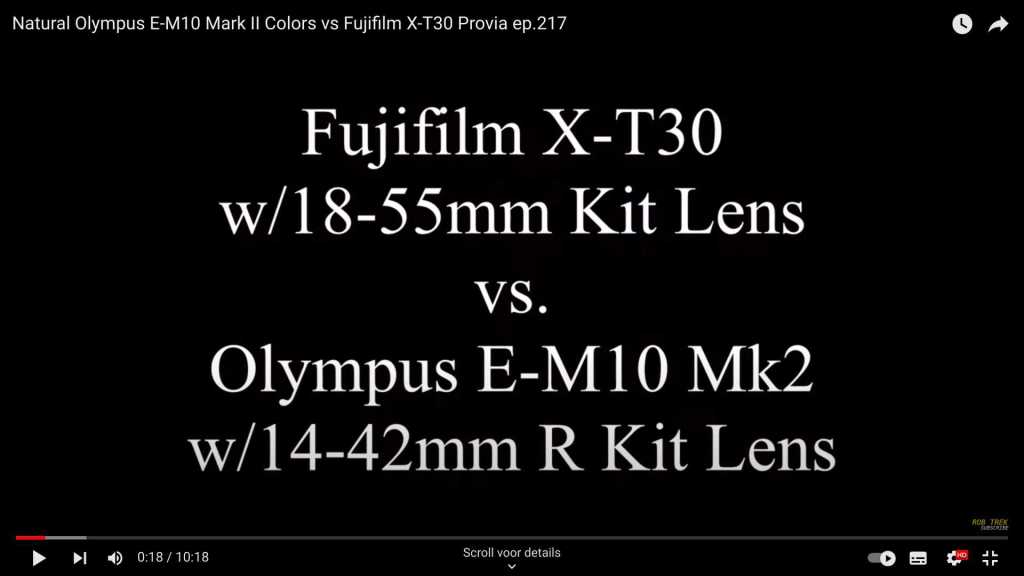
After watching the video, you will realize that the differences in color are very subtle, and then it depends on how exact you want it to be.
The distinction lies more in contrast, and that aligns with the table,
so if you truly desire that Fuji-like appearance, I believe with just a little tinkering, you can achieve a lot.
Start by reducing the contrast, and you won’t be far off.
Still unsure where and how to start, there’s an informative article here just below, by Mark G. Adams from “One Camera One Lens”, focusing on Fujifilm Film Simulations for Fuji cameras. However, the principles discussed in the guide are applicable to any camera, making it a worthwhile read for all photography enthusiasts!

The photo gallery of Open Source Photography, Olympus micro 4/3 system, Vintage Lens Photograpy, Film Simulation, PictureFX, HDR – Photographer : Marc R.
Discover more from Open Source Photography
Subscribe to get the latest posts sent to your email.


This is a great read. Funny thing is, Nikon also have a thriving film-sim community, and their cameras have everything that Fuji has in the way of adjusting colour.
I think we can assume that marketing and passion is why everyone looks up to Fujis colours. Personally, I think I stated many times that I absolutely love Olympus colour science.
LikeLiked by 1 person
I think your assumption is spot on Mark, Fuji has put a lot of effort into promoting their film simulations, so it’s hard for the other brands to play that card a second time.
I didn’t know that about Nikon.
LikeLiked by 1 person