
8 minutes reading time + video
Welcome to a new Open Source Photography Deep Dive tutorial! In this guide, we’ll focus on editing with RawTherapee, and I’ll show you the simplest ways to get great results quickly.
In RawTherapee version 5.11, the ‘Toolbox’ in the ‘Editing’ section has nine tabs. One of them is the Favorites tab, which starts out empty, but you can fill it with the tools you frequently use – it’s actually the tab I use the most. I’ve added my go-to tools in the order I normally use them when editing RAW files, so it kind of works like my personal workflow.
The other way is to just dive in and start editing using the different tabs and tools, but that’s a lot trickier because you’ll have to search for everything, and you’ll miss out on a natural flow. My advice is definitely to start with the ‘Favorites’ tab.
🔧 Setting Favorite Tools in RawTherapee
- Click the “Preferences” icon
(looks like a small equalizer panel). - Go to the “Favorites” tab
(on the left side of the Preferences window). - Check the tools you want to add from the “Available Tools” list.
- Reorder them using the ▲ and ▼ buttons next to the “Favorites Panel” list.
- Optional: Enable “Show favorite tools in their original locations” if desired (I did 🙂 )
- Click OK to save your changes.
Your favorite tools will now appear in the Star Tab on the right panel while editing.

To follow along with this ‘Deep Dive,’ and especially if you’re new to RT, I’d recommend adding the following tools to your ‘Favorites’ and arranging them in this order:
- Exposure
- Sharpening
- Noise Reduction
- Crop
- Resize
These five tools form the foundation for a ‘normal’ edit in RT, and with them, you’ll already get pretty far. In a future Deep Dive, we’ll go over some must add tools like ‘Shadows & Highlights’ and other, and you can then add them to your Favorites and arrange them in whatever order works best for you.
Getting Started with RawTherapee
- First, open RawTherapee and navigate to the folder with the photo you want to edit.
- You can add your most-used tools to the favorites for easier access – or, if you are new to RT, add the five tools recommended above
Exposure Settings – three ways:
- Always begin with your RAW image set to Neutral mode.
- Open the Exposure tab and click Auto Levels—this is usually the fastest way to fix the exposure.
- If you want to adjust things further, you can play with Exposure Compensation, Blacks, Lightness, Contrast, and Saturation – or any other setting you want to adjust.
- You can always Reset these settings if needed and start over again.
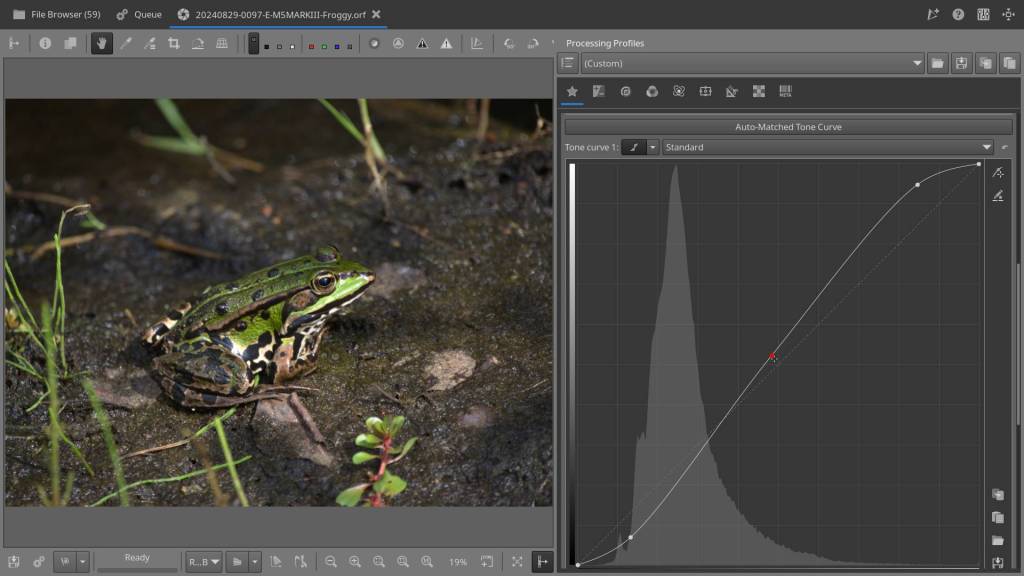
Another way to adjust exposure is using the Auto-Matched Tone Curve:
- Click the large Auto-Matched Tone Curve button to have RT set this automatically for you
- You can move the curve’s nodes (the points on the line) to make the image darker or lighter.
- You can keep fine-tuning this with the other settings in the Exposure tab.
- And remember, always start by resetting the photo to Neutral if you go back to make adjustments.
The third method is to manually create a Tone Curve:
- Click on the drop-down list next to Tone Curve 1 and choose a flexible curve. To the right of it, there’s a second drop-down list where you can select the type of curve mode; choose either Standard or Film Like.
- Create an S-curve, above the line on the right (lighter side) and below the line on the left (darker side), forming an S shape.
- Click on the curve to add nodes and reshape the S-curve.
- Adjust the shape of the curve until you’re satisfied with the result, or, on the far right, you can reset the curve to linear and start over if desired.
When you’re satisfied with the result, you can move on to the next step. I always close the tab I’m working in – or rather, collapse or compact it – that way everything stays neat and organized.
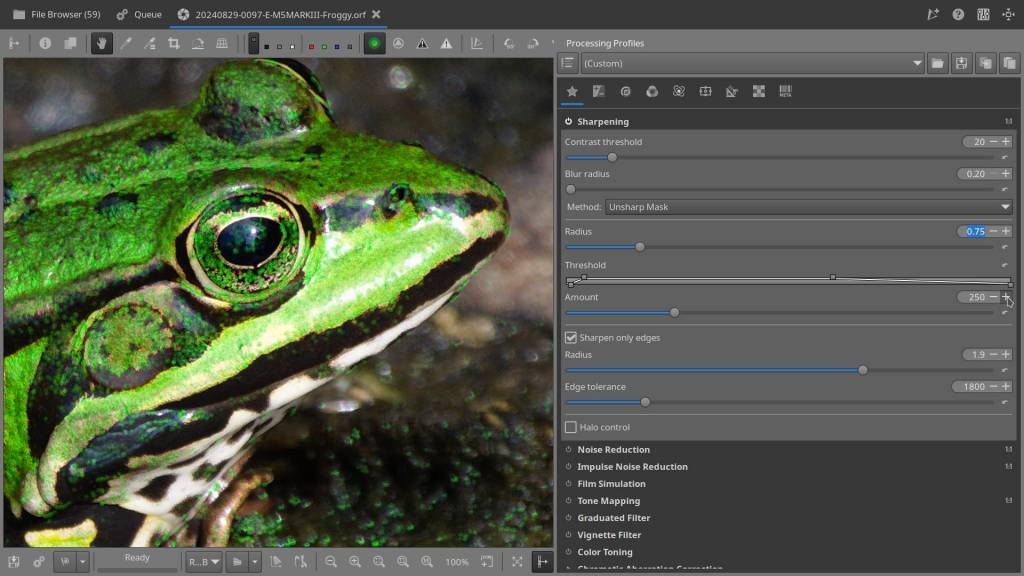
Sharpening the Image:
- Zoom into a detail at 100% using the 1:1 button.
- Enable the Focus Mask to help you find the best sharpness setting. The green areas will shrink as you sharpen, showing where the focus is best.
- For Radius, try settings between 0.5 and 1.5.
- Adjust the Amount:
- For moderate sharpening, use a setting between 200 and 250.
- For stronger sharpening, try 300–350.
- Make sure to choose Sharpen Only Edges!
More details about sharpening can be found in one of my previous tutorials here: From Good to Razor-Sharp: Mastering Sharpening in RawTherapee and definitely also here with a video: My RawTherapee Workflow – Sharpen with RawTherapee
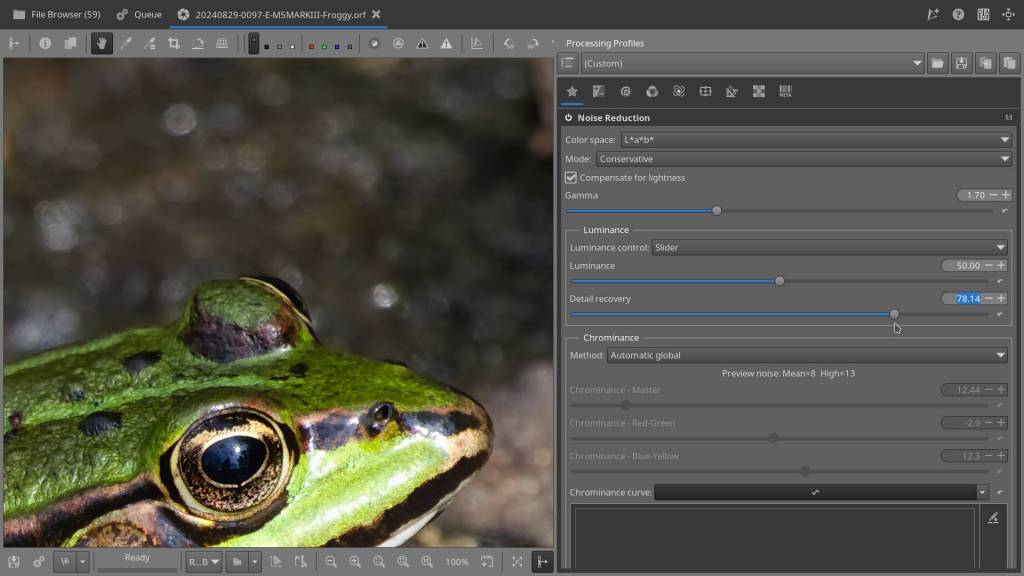
Noise Reduction:
- Set Luminance to 50 and Detail Recovery to 100.
- Reduce the Detail Recovery until the noise (usually visible in darker areas) is gone.
- Zoom in to see the noise clearly for the best results.
Mores details about noise reduction can be found here : /2024/06/21/my-rawtherapee-workflow-denoising-techniques-and-a-comparison-with-topaz-denoise-ai/ – The denoising method has improved between previous RawTherapee versions 5.9–5.10 and the current 5.11, but the workflow remains the same — so this older tutorial is still perfectly usable.
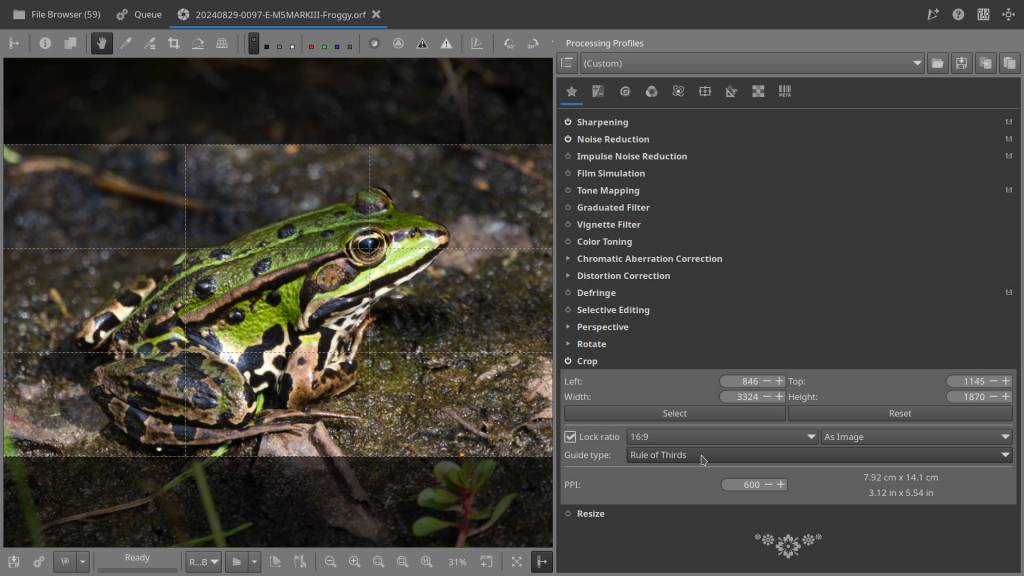
Cropping and Exporting:
- I usually crop my photos for the web in a 16:9 aspect ratio and use the rule of thirds for composition.
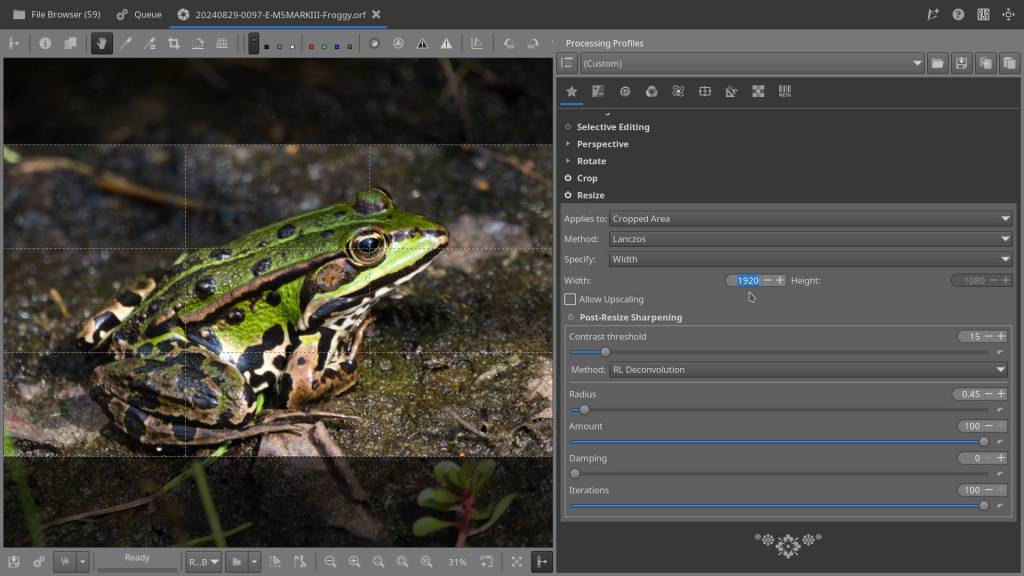
- After cropping, resize the image to 1920px, which is my preferred size for web use.
There are two main ways to export your edited images:
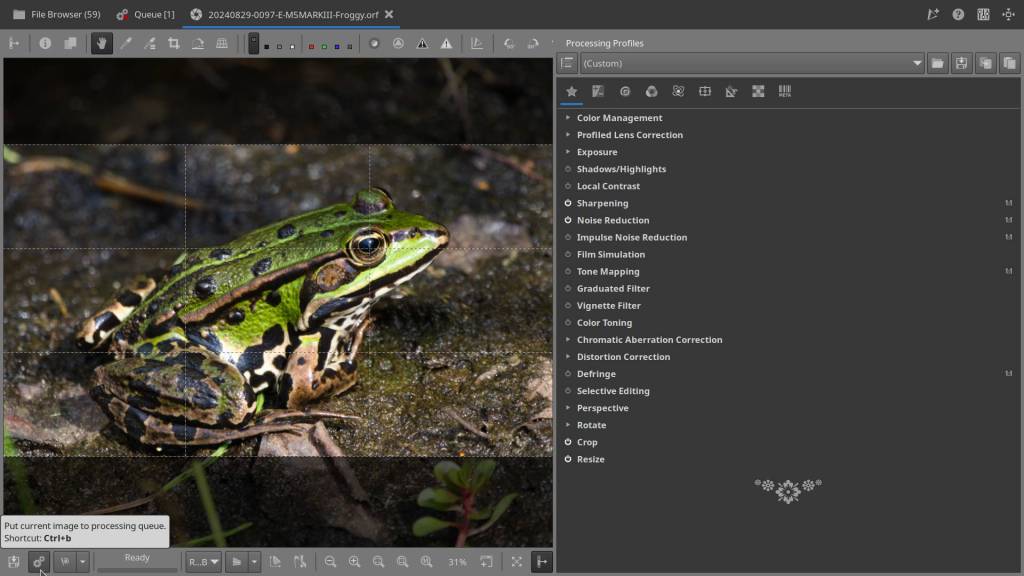
1. Save a Single Image Manually
After editing, simply click the Save Current Image icon — it looks like an old-school floppy disk. This method is perfect when you want to save just one photo manually. Once you click it, you’ll be able to choose the destination folder, file format, compression level, processing settings, and whether to auto-rename the file if it already exists. That last option is quite handy when you’re saving multiple versions of the same photo.
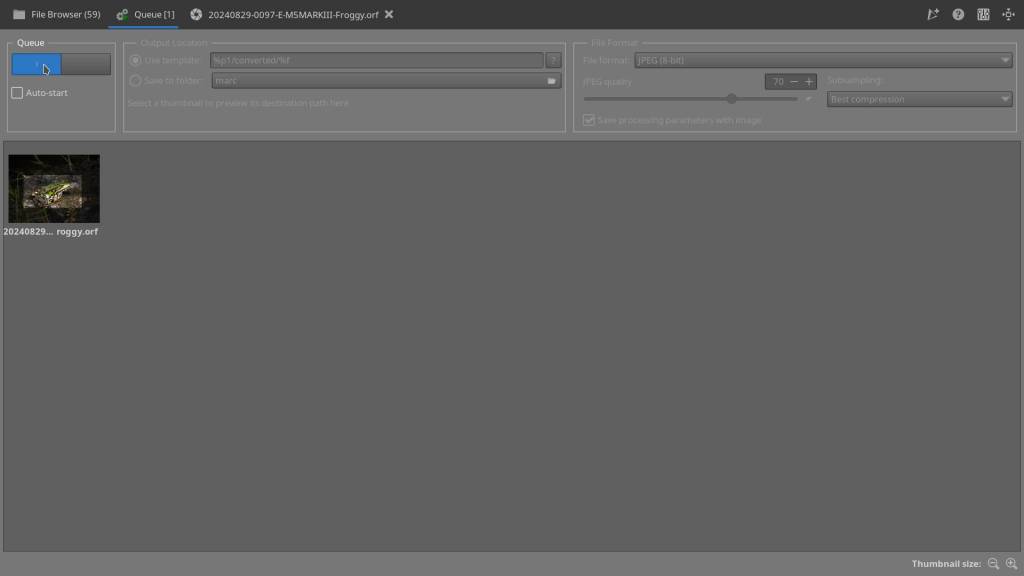
2. Use the Processing Queue
Send your image(s) to the Queue, select your file format and compression preferences, and hit the Start button. This is the go-to method when working with multiple photos, especially if they all require the same editing settings. It’s efficient and saves a lot of time.
Useful Tools for Reusing Settings
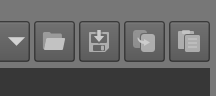
You’ll find four handy icons in the top-right corner (usually):
- Load a Processing Profile – Reuse a previously saved set of editing adjustments.
- Save a Processing Profile – Save your current settings for later use.
- Copy the Current Profile – Grab the settings from your current photo.
- Paste the Profile – Apply those copied settings to another image.
If you’ve saved a processing profile before, or just copied one from a recently edited photo, you can apply it to multiple images in one go. In the file browser, select several photos (hold Ctrl and click), then right-click and choose the profile from the drop-down menu to apply it.
Using Partial Profiles in RawTherapee:
All the way to the left of the four processing profile icons, right next to the “Last Saved” or “Neutral” bar, you’ll find the Processing Profile Fill Mode icon. This icon determines how a profile is applied:
- Full: The selected profile will completely overwrite any existing settings.
- Partial: Only specific parts of the profile will be applied, leaving other adjustments untouched.
Using Partial mode allows you to combine multiple saved profiles on a single image — for example, one profile just for sharpening and another just for denoising.
To save only specific adjustments into a profile, use Ctrl + Click on the Save Current Profile icon.
A Typical Workflow Example
Here’s how I usually work:
I edit a single photo first. If I have other, similar images, I copy that profile and apply it to the selected group. Then I send them all to the queue. I move on to the next batch and repeat the process. Some photos get unique edits, but overall, I go through an entire set this way.
All exported images go into a Converted folder located in the root of the original RAW folder. If I do further edits — for example, in GIMP or another program — I save those in an Edit folder. And the camera-generated JPEGs go in a Camera folder, also under the same root.
Of course, folder structure is a personal thing. This just happens to be the way I like to keep things organized.
My Folder Structure
Here’s how I organize photos from a single day, moment, or event — typically imported via Rapid Photo Downloader:
- RAW folder – Contains all original RAW files.
- Camera – All original JPEGs straight from the camera.
- Converted – All images exported from RawTherapee.
- Edit – Any specially edited images, from GIMP, Luminance, etc.
And that’s it! 🚀Simple, efficient, and great for web-ready photos.
And to make sure everything is clear, below you’ll find a video about the basic steps above applied to a photo once more. I’m going through them rather quickly here to keep it from getting too long — nobody likes that — but an edit can definitely take more time than four minutes before you’re truly happy with the colors, sharpness, and noise – Especially if you apply the additional steps or options mentioned above, such as using partial or full profiles, or mixing different processing profiles.
For advanced photographers and those used to Lightroom or Photoshop, this video tutorial might seem very basic – and it is, but don’t be fooled—RawTherapee is capable of a lot more. Still, since many people are intimidated by a steep learning curve or think it’s too complex to use, we’re starting off simple.
This makes it the perfect beginner’s intro to RawTherapee: straightforward steps, solid results.
I hope you enjoyed the tutorial and feel fully motivated to dive into RawTherapee yourself!
This article was written by Marc R.
While I primarily speak Dutch and have some knowledge of English and a little French, ChatGPT helps ensure my writing is grammatically correct. I often mix Dutch and English in my drafts, and ChatGPT steps in to translate and correct.
I don’t have any Sponsoring Companies, Patreon support, or Follower Donations.
I don’t drink Coffee, well, I do … but not the financial form you sometimes find on other websites, like ‘buy me a coffee’ 😊
However, what I truly need to keep going is Motivation, and the best part is, it won’t cost you a thing. You can offer it for free – just hit the Like button and Subscribe !
Discover more from Open Source Photography
Subscribe to get the latest posts sent to your email.

