
Some time ago, I bought a Leica T camera, which was initially advertised as using the Leica T mount. However, it turned out that, for some strange reason, Leica had simply given the L mount a different name, likely to prioritize their own lenses. In any case, the fact that it’s actually an L mount is good news because Panasonic makes many L mount lenses for their full-frame Lumix S system.
Unfortunately, there are fewer options available from other, more affordable brands.
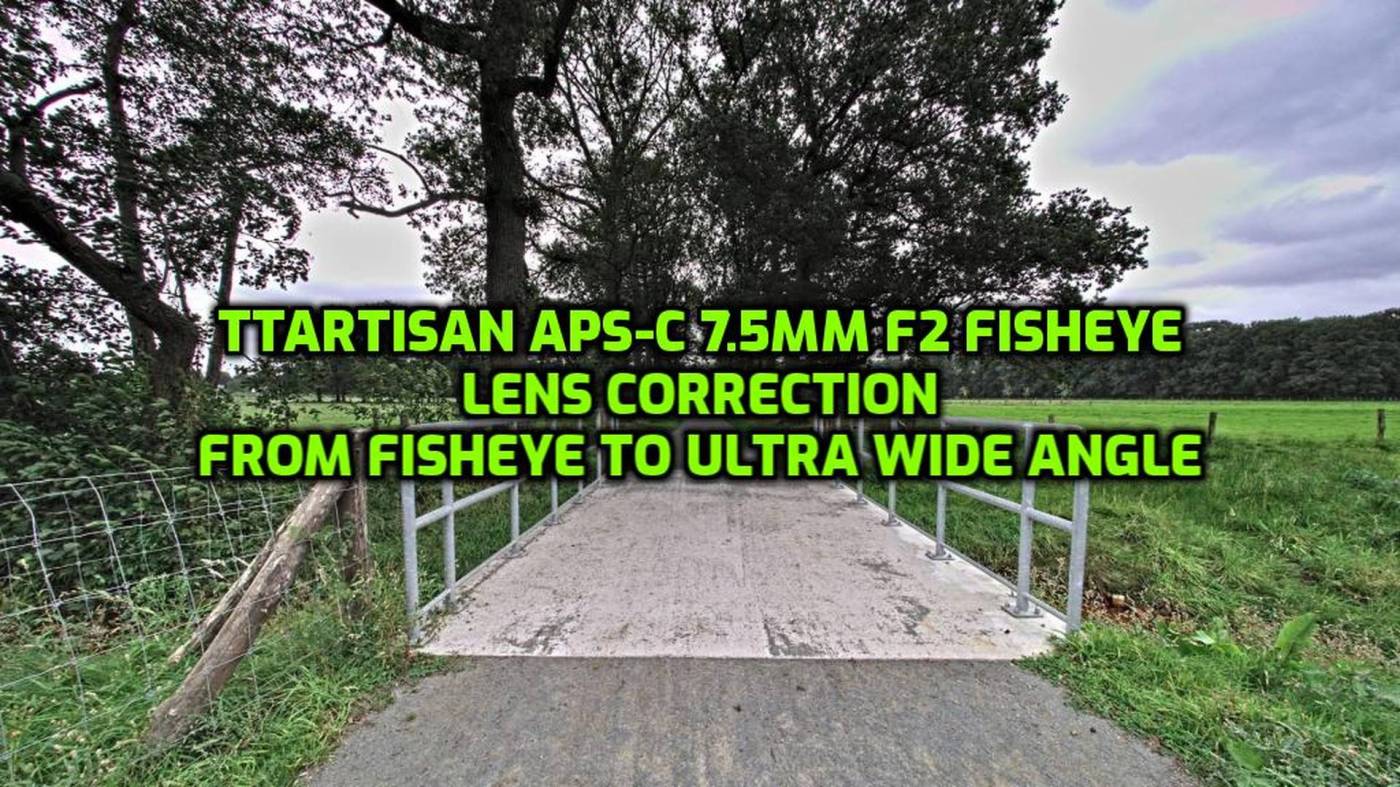
I already own several lenses for the Leica, but I wanted a super wide-angle lens with an L mount. After a lot of searching, I found that the TTArtisan 7.5mm f2 is one of the few fisheye lenses with an L mount at an affordable price.
Fisheye lenses aren’t for everyone. You have to be a fan of the extreme distortion they cause. Personally, I like them, but only under certain conditions. I mean, shooting an entire series of photos with a fisheye lens isn’t something I’d enjoy. However, I do love extreme wide-angle lenses, although they tend to be much more expensive. For example, the TTArtisan 7.5mm f/2 fisheye lens costs around €125, while the Venus Optics Laowa Zero-D 7.5mm T/2.9 Cine Lens will set you back about €850. That’s quite a difference, especially if you’re only using an ultra-wide-angle lens occasionally. But there’s a solution: de-fishing. This technique involves using a lens profile to correct fisheye distortion, transforming it into a near-zero distortion ultra-wide-angle image.
Here’s how to do it in RawTherapee :
Step 1: Download the lens profile
You can get the lens profile from the TTArtisan website here. It comes as a zip file, which you’ll need to extract – Keep in mind that the download from the TTArtisan website is extremely slow ! Also, note that the file is in RAR format, and I found that the default Linux archiver didn’t handle it well. However, 7zip, which is available for Windows, Linux and MacOS, worked perfectly.
Step 2: Understanding the file contents
Inside the extracted folder, you’ll find a DOC file explaining how to use the profile in Lightroom and Photoshop, along with two JPG files that provide instructions for Mac and Windows users. Most importantly, you’ll find the LCP file, which is the lens correction profile itself.
Note: The LCP file was originally developed for the Sony ILCE 6500 camera.
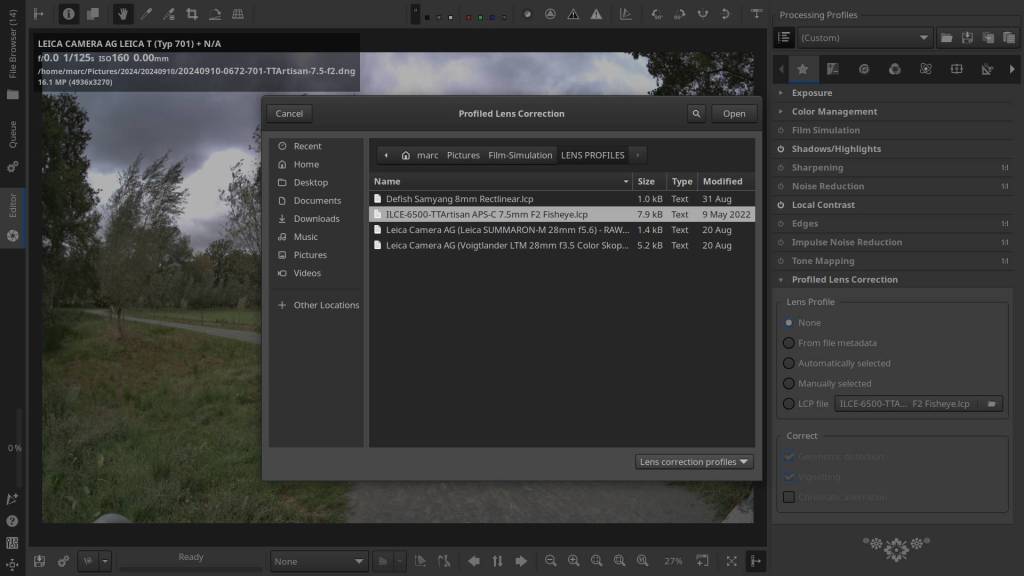
Step 3: Using the lens profile in RawTherapee
I don’t use Photoshop myself, but here’s how you can apply the lens profile using RawTherapee:
- Download the file from the TTArtisan website.
- Extract the file using an archive program like 7zip.
- Optionally, move the LCP file to a folder that’s easy to find.
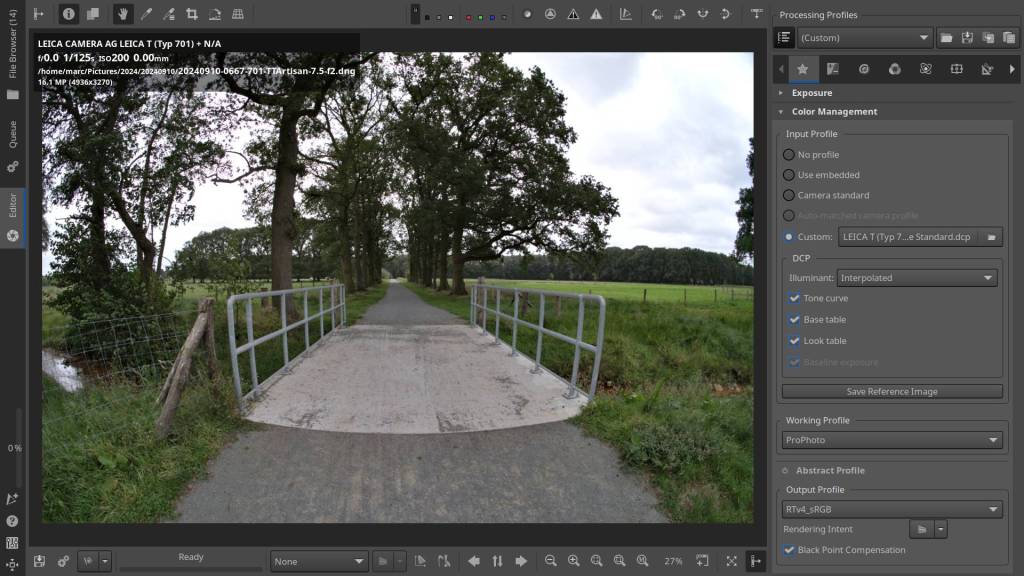
- Open RawTherapee and load the photo you want to correct.
- Go to the Transform tab -> Profiled Lens Correction -> Lens Profile.
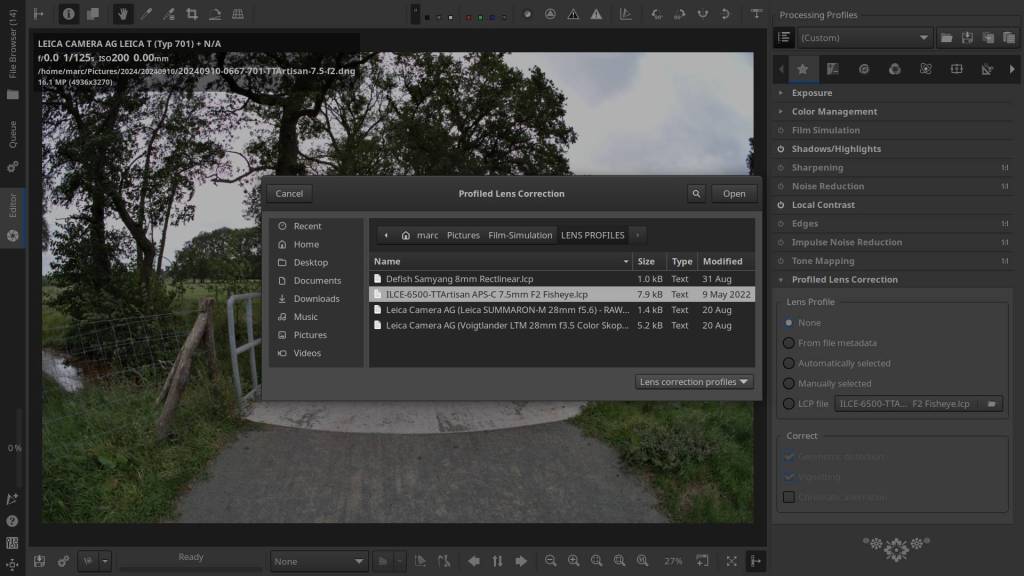
- Click on LCP file and navigate to the downloaded lens profile, select it, and open it.
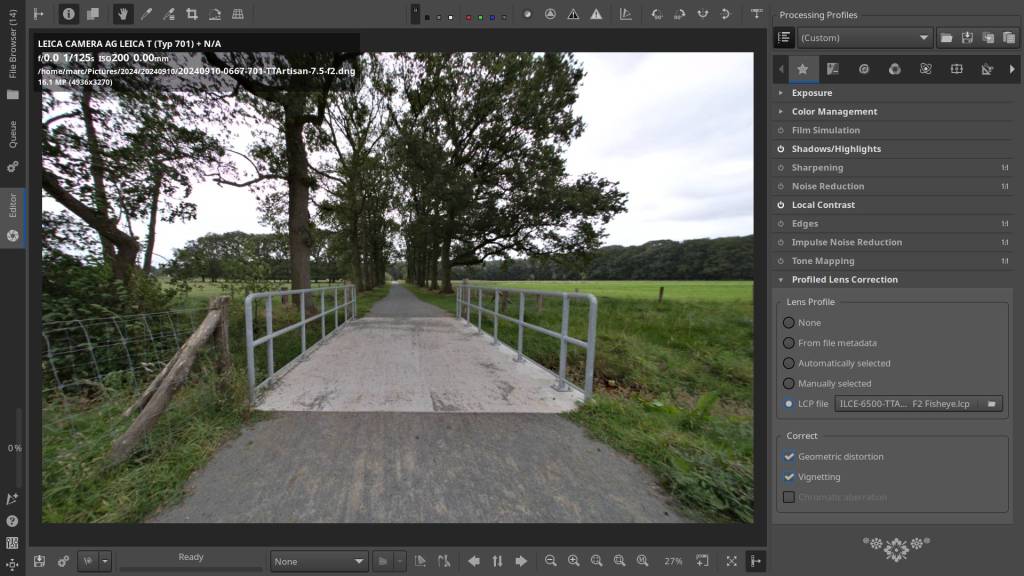
- Make sure Geometric Distortion correction is enabled under Correct.
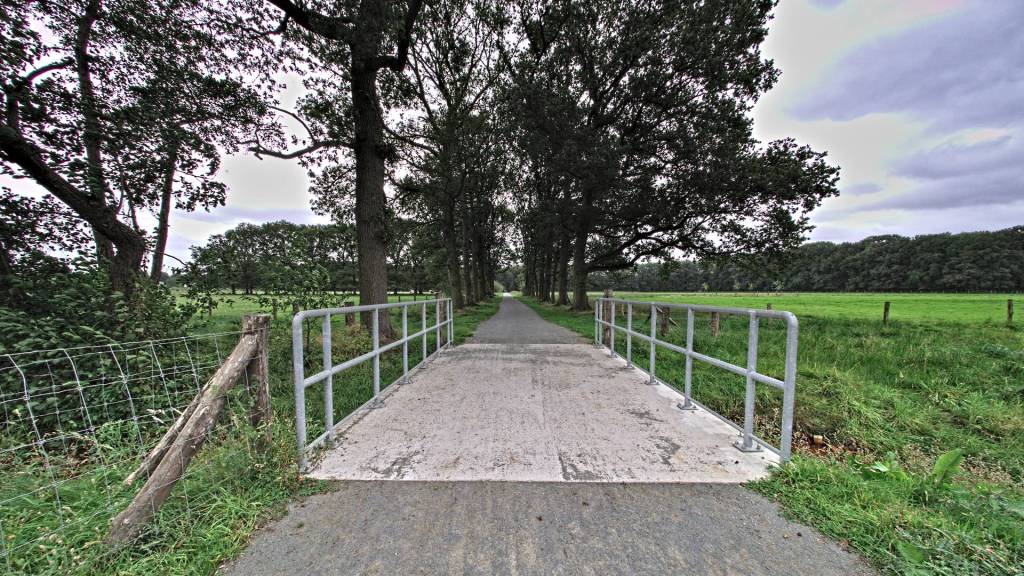
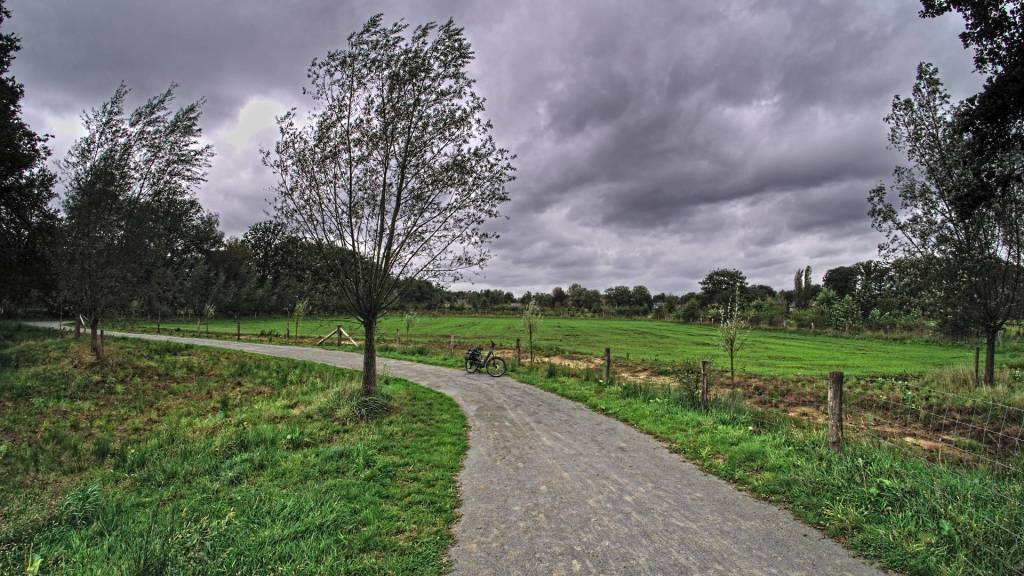
The weather conditions weren’t that great that day, but nowadays with the ever changing and more extreme weather you can’t be too picky – Below is another example, pay special attention to the tree to the left of the gravel path, where the branches of the tree lean to the right in the original photo, and after correction they are nice and straight.

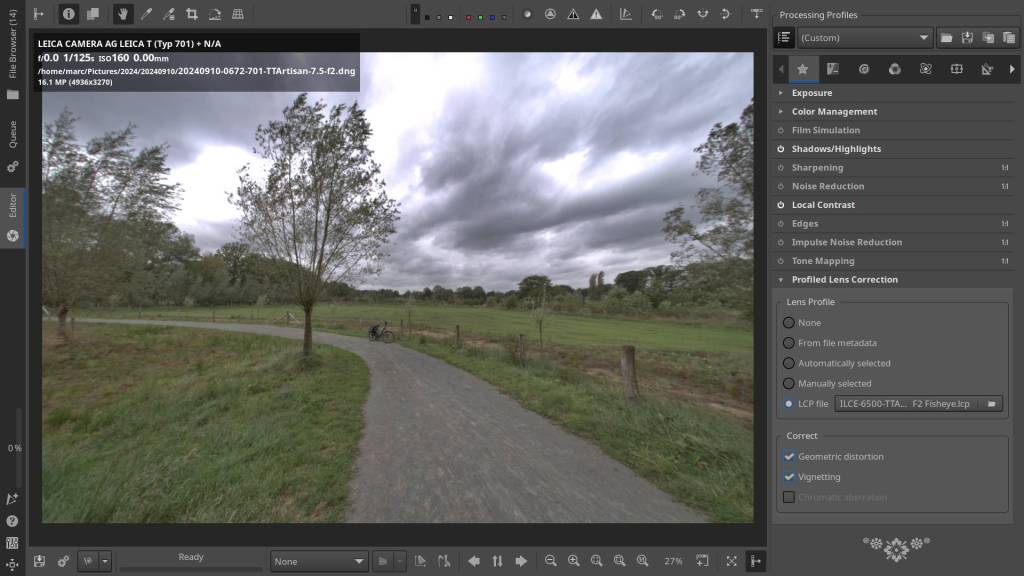
After activation, the photo will be corrected. Keep in mind that, at least when using the profile with my Leica T camera, the edges of the photo may not be perfectly corrected. You can fine-tune this by adjusting the Distortion Correction or simply cropping the edges if needed.
Conclusion:
Perhaps you’re not immediately convinced by the results. To be honest, I wasn’t at first either. But, considering the extreme wide-angle — and it really is incredibly wide! — it’s no surprise that it’s not perfect. That being said, depending on the subject (as this also plays a role) and how you hold the camera (as holding it even slightly off-horizontal can cause more distortion), you can still achieve some amazing results.
Also, when you take into account that this lens can deliver reasonably sharp images, and at a price that’s five times lower than corrected lenses like those from Laowa, it’s a lens that really shouldn’t be missing from anyone’s kit.
In fact, because of the insane wide-angle, you’d be surprised at how versatile this lens can be. Landscapes and architecture — maybe even astrophotography — are probably the first things that come to mind for this type of lens. But have you ever tried it for street photography? Surprisingly, it can produce some really fun and unique shots.
Thanks to the extreme field of view, zone focusing is almost unnecessary. Set your focus to infinity on the right side of the DOF scale, select f/5.6, and let auto-ISO take care of the rest. No matter how close or far your subject is, nearly everything will be in focus. The differences on the DOF scale are noticeable, so depending on your camera, you might need to fine-tune it a bit. But with one or two test shots, you’ll be good to go.
Camera used : Leica T type 701
Lens : TTArtisan 7.5mm Fish Eye f2 for L mount
RawTherapee version 5.11
Adobe DNG Converter version 16.5.0.1954 – Adobe Standard/LEICA T (Typ 701) Adobe Standard.dcp
TTArtisan APS-C 7.5mm F2 Fisheye Lens Profile
There remains one thing left for me to say:
I don’t have any Sponsoring Companies, Patreon Support, or Follower Donations. I don’t drink Coffee, so that’s not something you can assist me with either. However, what I truly need to keep going is motivation, and the best part is, it won’t cost you a thing. You can offer it for free—just hit the Like and Subscribe button !
Discover more from Open Source Photography
Subscribe to get the latest posts sent to your email.


This is what makes fisheye lenses so versatile. As you know, I love my fisheye lenses, and I don’t intend to make much more use out of my TTArtisan 11mm Fisheye.
LikeLiked by 1 person
Hey Mark,
Yes, I know, and I totally understand that if you own both the 7.5mm and the 11mm, you’d probably go for the first one. Though, I have to say, the 11mm also produces beautiful results with a bit less distortion.
In any case, TTArtisan makes high-quality lenses at affordable prices. To be honest, I was a bit hesitant at first, but thanks to your enthusiastic recommendations, I now own a few TTArtisan lenses myself, and I’m really happy with them. So, thanks for that!
LikeLiked by 1 person
That should have read “I do intend”, not “don’t intend”!
It has lovely 180° angle of view which makes for some great landscapes as you know.
Talk soon.
LikeLike
That clears everything up because I was a bit confused ! 🙂
Well, now that I’m using two different camera mounts, things are getting more complicated for me. I am quite interested in the 11mm lens, and it could be interesting on both crop factors 1.5 and 2. However, buying two separate lenses would be a bit crazy. Maybe I could use an adapter—I’ll see how it goes
Thanks for clearing things up. Take care, and have a great day, Mark!
LikeLike
Het lijkt me iets voor grote kenners als jij.
LikeLiked by 1 person
Oei – grote kenner 🙂 dat zeker niet Joke, we leren allemaal elke dag bij, en dat telt voor iedereen denk ik, is dat niet zo ?
LikeLiked by 1 person
Absoluut 👍
LikeLiked by 1 person