
The first part is about the technique of copying the Look and Feel from one picture to another in Darktable – In the second part, whe are going to create a Lut (PNG and 3DCube) from that Look and Feel.
How often do you see great pictures on the internet and wish your own pictures would look just like that ?
Well, of course it starts with the location, it will be difficult to give your pictures taken in the garden the same look as those of, for example, bamboo forest of Trey Radcliff in Kyoto.
That’s primarily due to the “exotic” feel of that place, because to someone in Kyoto, something photographed in your garden can look equally amazing, right?
Well yes and no, an exotic place or just a place that you don’t recognize is one step ahead, for the rest it’s just in your head.

The Picture Above – Bamboo Forest – All rights and credits to Trey Ratcliff – https://stuckincustoms.smugmug.com/
But of course location is not the only thing that can make a picture look – let’s say “different”.
Photographers like Trey also use HDR, Photoshop and Color Grading.
But not everyone has those skills, or they still need to be improved.
Also finding a Lut that suits your taste is not always easy, because what will your picture look like after applying a certain Lut – and which Lut would do the trick ?
It would be much easier if you see a picture on the internet that you like, and of which you could apply the color pattern to your picture.
That’s what this tutorial is about.
First this:
It’s not because you’re copying the “Look & Feel” of a picture
that your picture will look exactly the same.
That’s only possible if your photo looks almost exactly the same to begin with.
There are many factors that influence the final result, from elements in a picture, the colors, to light etc.
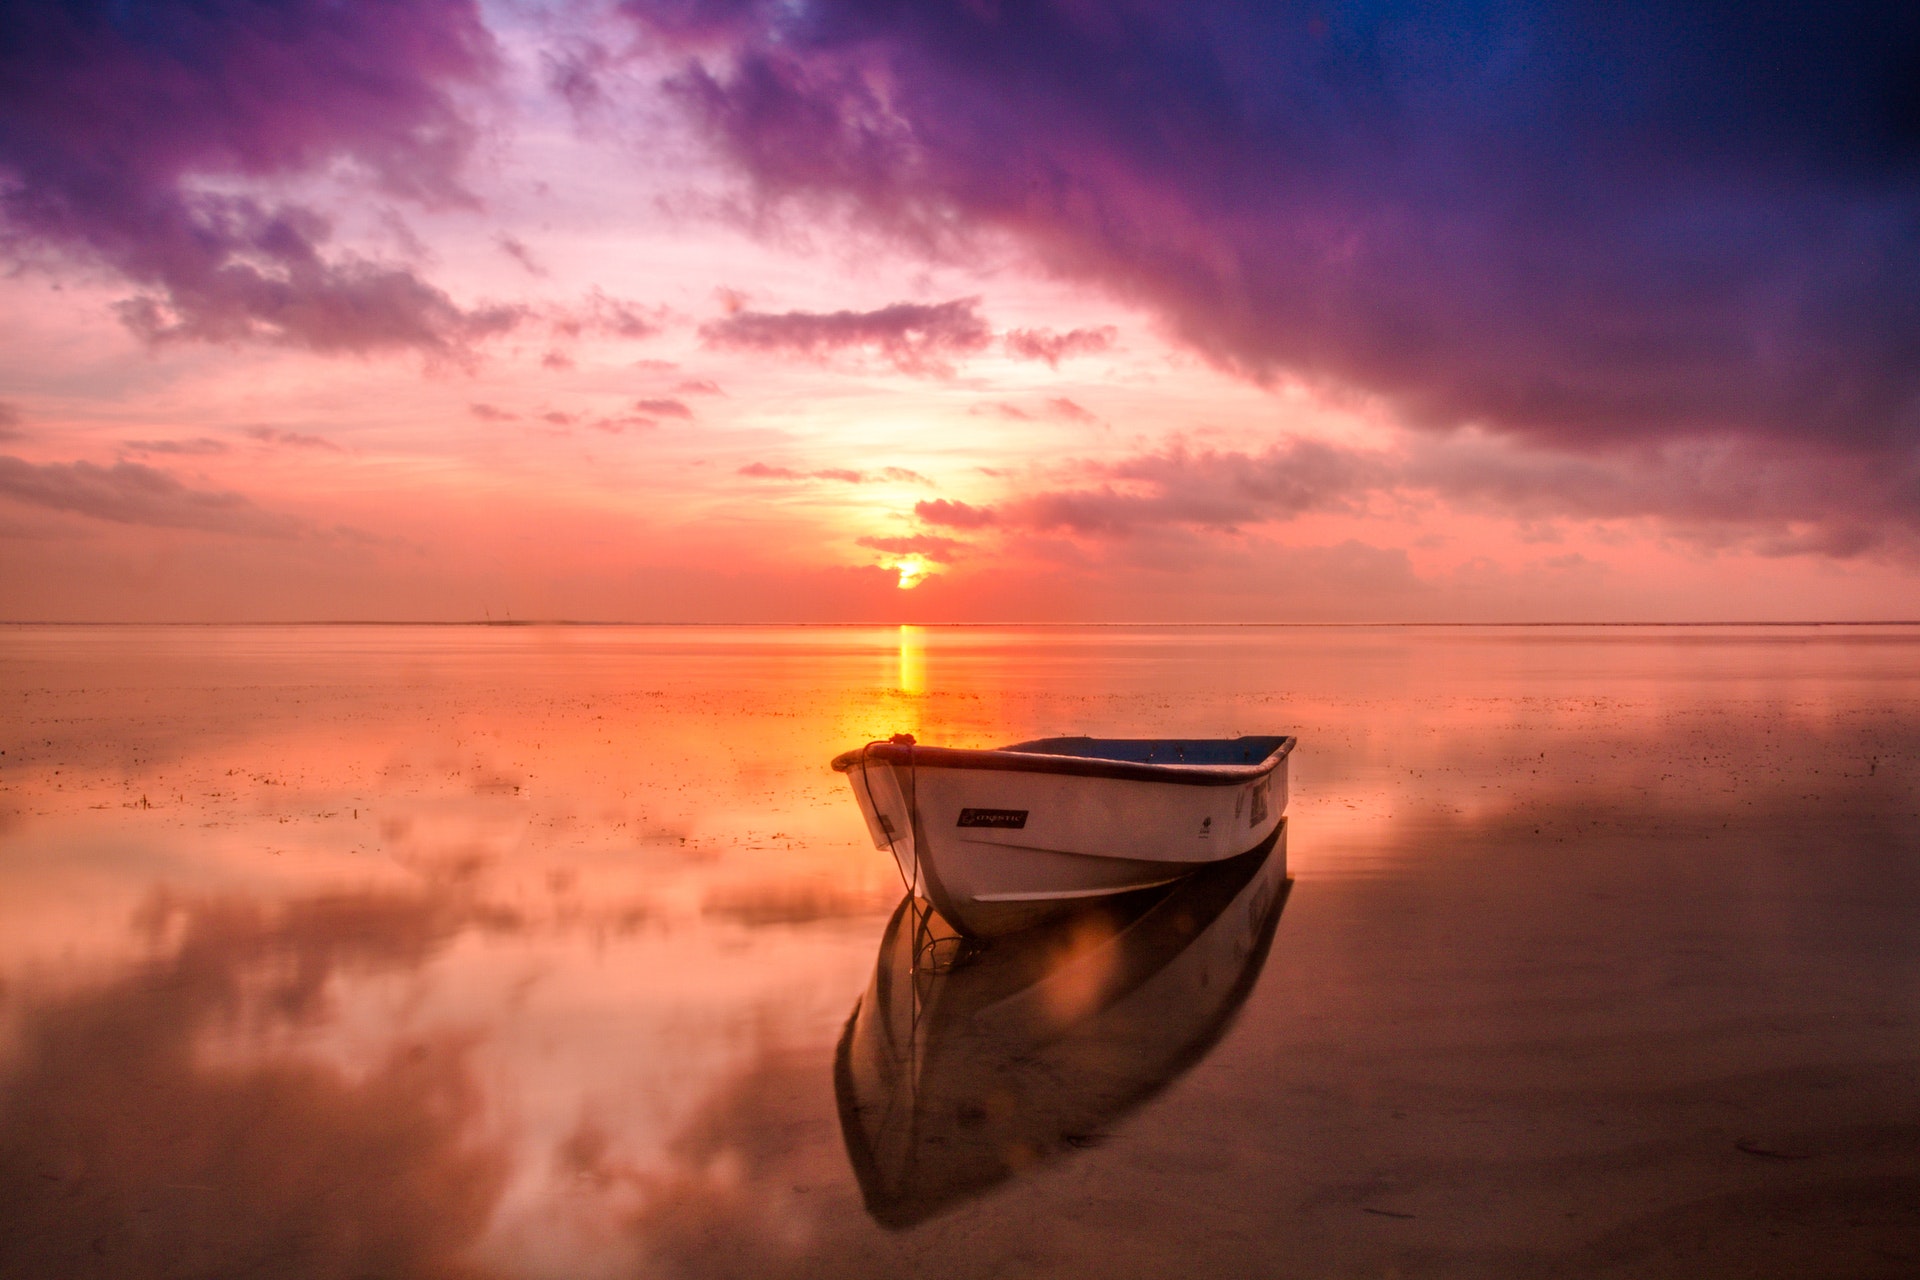
In the example below you will see a boat in the “donor” picture, dark clouds and certain color patterns that are not in my “target” picture, so it will never be exactly the same, but only “Looks Like”.
Ok, lets start with a “donor” picture : it is by Nuno Obey from West Java Indonesia (instagram nunoobey) White Rowboat @ https://www.pexels.com/ – Thank you Nuno !
Yes, you saw this name before in my NEW PictureFX Lut Update – PictureFX Perfect Sunset
This tutorial is also about how that PFX Lut has been made – we’ll get to that in part two.
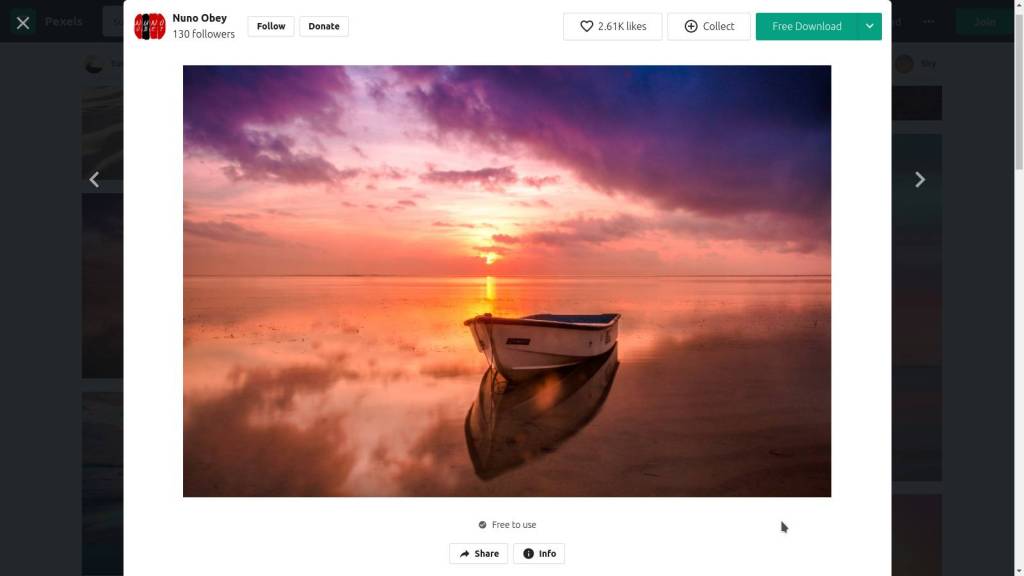
Above, the donor picture, a sunset and a boat, but for me it’s mainly about the beautiful color pattern.
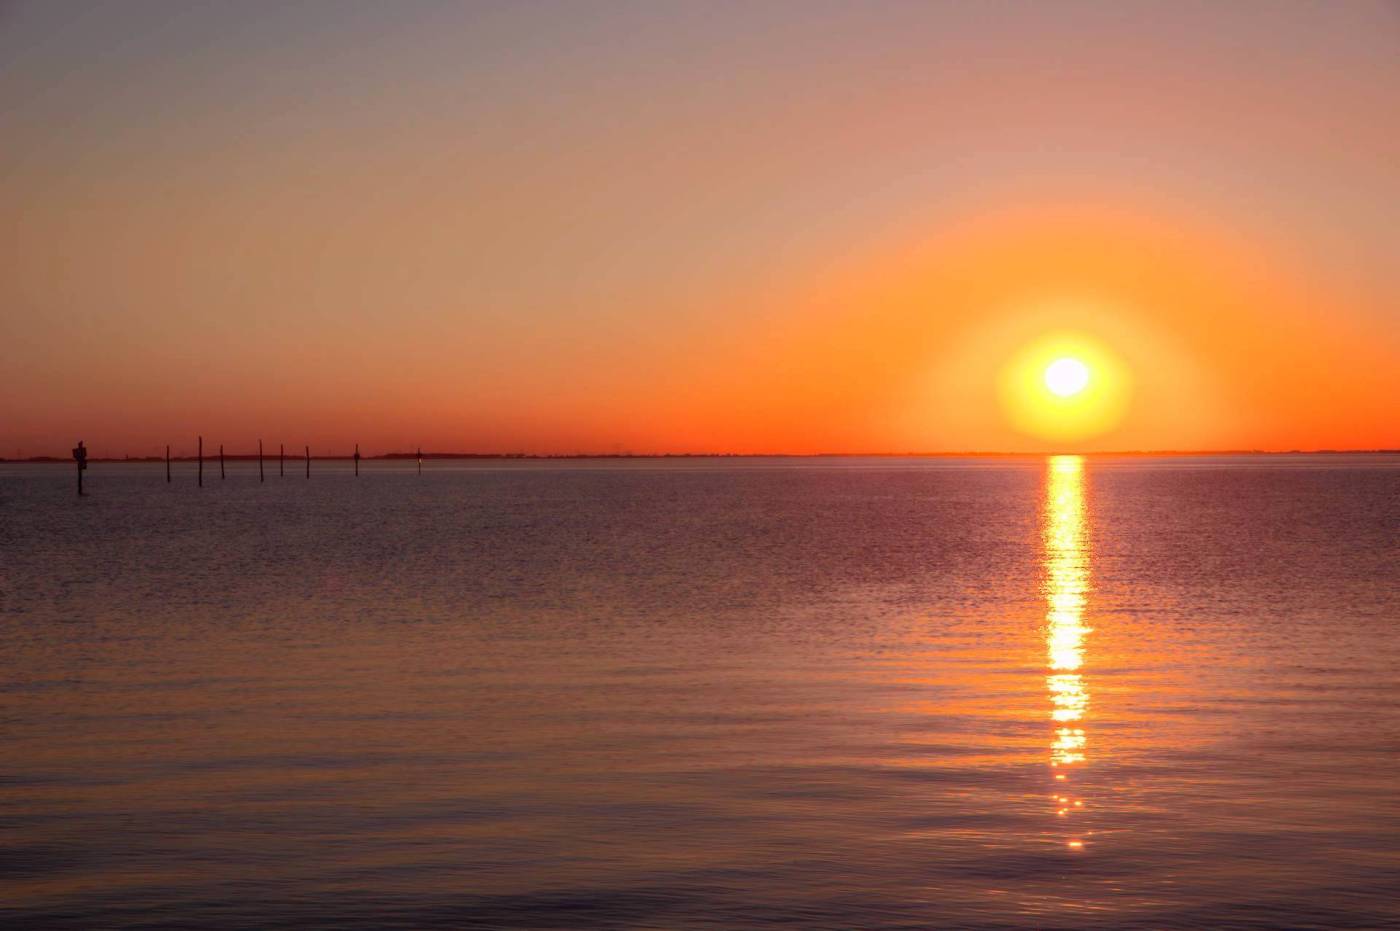
My picture of a sunset – the target picture – but no boat and no colored clouds
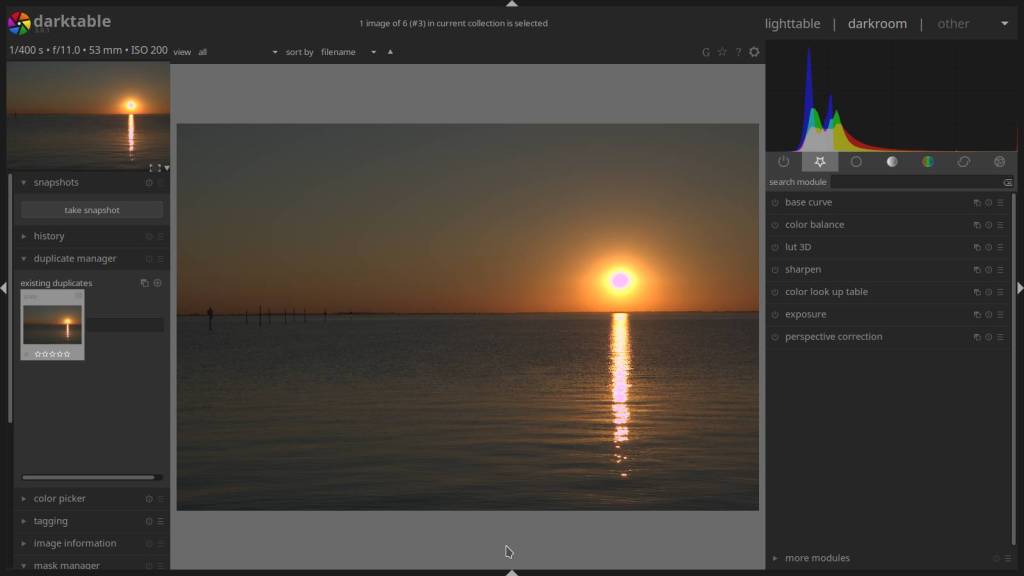
First step : open the “donor” picture in Darktable – make sure no adjustments are active
- open the “effects group” -> module icons just below the histogram -> the last one on the right -> normally it contains only “color mapping”
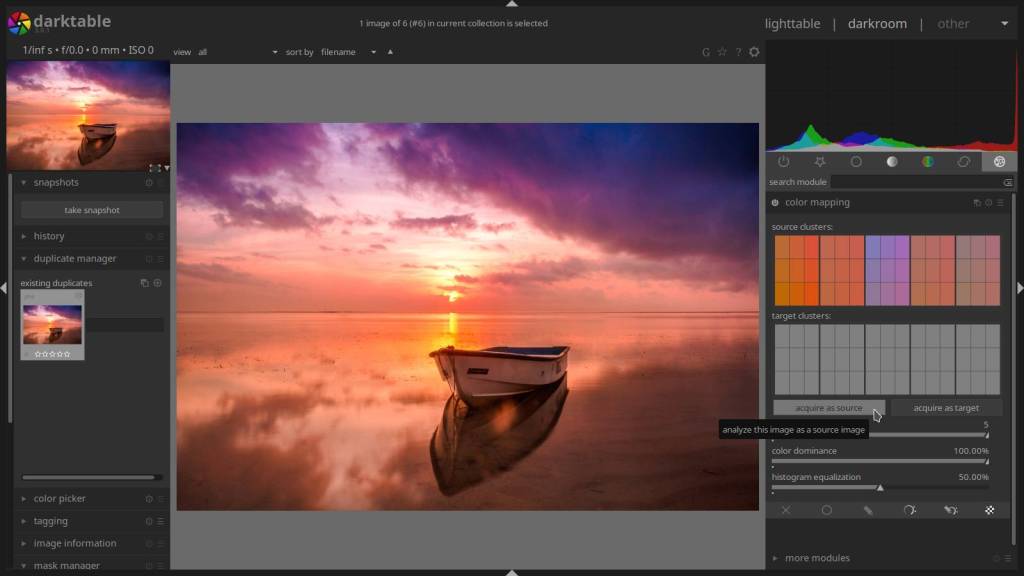
- in “color mapping” set the “numbers of clusters” slider to 5 -> the more clusters, the more dominant color is included, if you choose 1, then only the most dominant color is included.
- leave color dominance at max. (100) -> to be used in the target picture
- leave histogram settings at 50% -> to be used in the target picture
- hit the “acquire as source” button -> the source clusters will fill up with the five most dominant colors
- before going to the next step – take a good look at the active histogram, you would like that your target picture later has a similar look
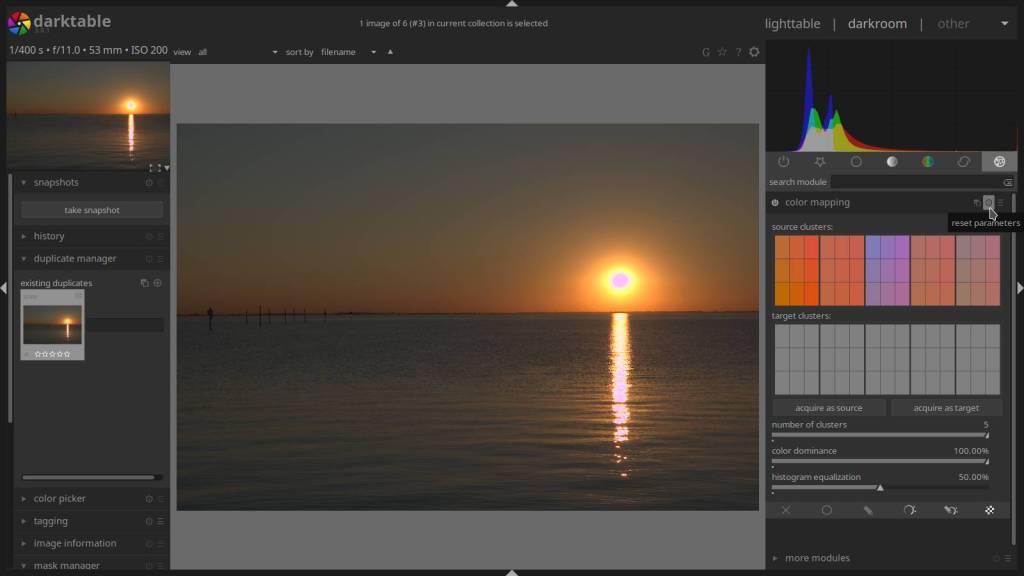
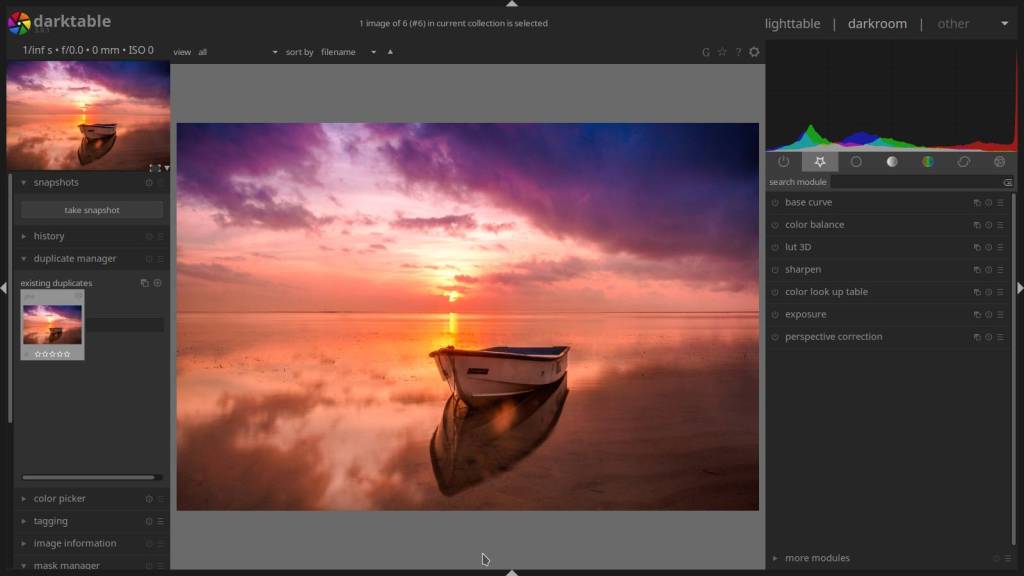
- open the target picture
- go to “color mapping” -> if the source clusters from before are missing -> click the “reset parameters” button, and they will appear
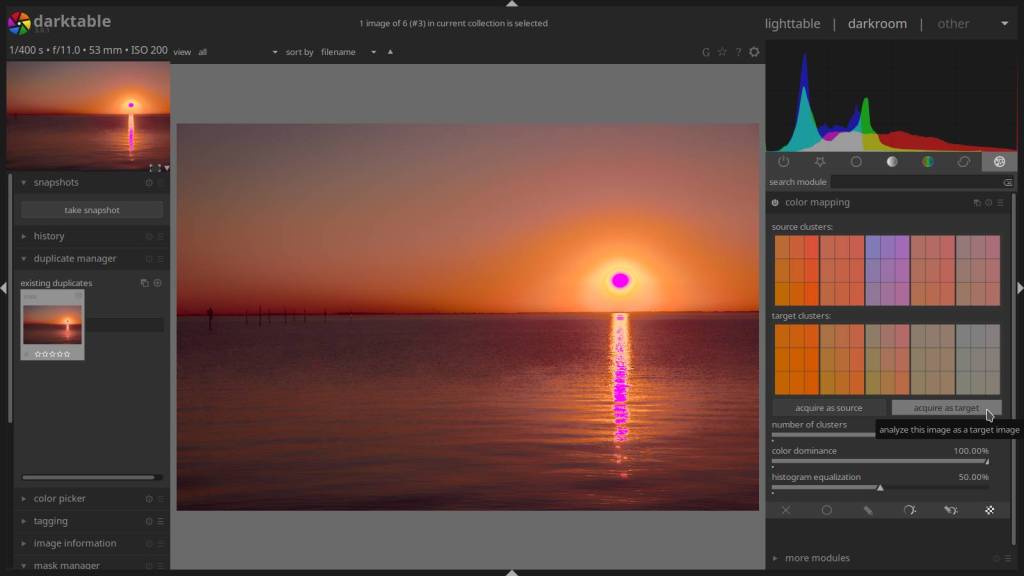
- hit the “acquire as target” button – the source colors will merge with the target colors
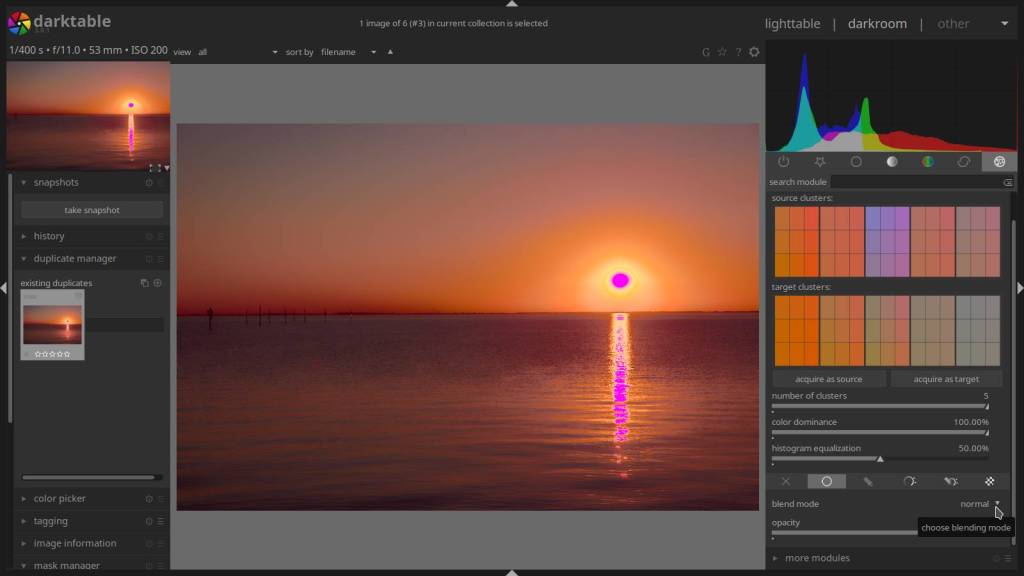
- next step is change the “blend mode” – here you need to experiment a bit, a few tips :
- choose a different blend mode – step by step -> adjust opacity if needed
- look very close how the histogram reacts -> your aim is a histogram similar as the donor picture

Almost done – just some fine tuning
- change color dominance slider to taste
- change histogram equalization to get a similar histogram as donor picture – and to taste
- if needed adjust exposure

The result, wel, as said before it is never the same, but the result is pleasing and “Looks Like” the donor picture.
Not quite clear yet ?
Below a video about the steps taken, the video is subtitled – click the subtitles icon below.
Below an explanation from the Darktable help file about elements within the color mapping module :
module controls
acquire as source/target
Press these buttons to generate color clusters for the source and target image, respectively. The processing takes a few seconds during which the GUI remains unresponsive.
number of clusters
The number of color clusters to use. If you change this parameter all collected color clusters are reset and need to be acquired anew.
color dominance
This parameter controls the mapping between source and target clusters. At the minimum value mapping is based on color proximity. This typically leads to very subtle effects on the target image. At the maximum value mapping is based on the relative weight of the color clusters – dominant colors of the source image are mapped to dominant colors of the target image. This typically leads to a very strong effect. Intermediate values incrementally shift between these extremes.
histogram equalization
Modify the target image’s contrast by matching its histogram with the histogram of the source image. This slider controls the extent of this effect.

Open Source Photography is a member of :

Discover more from Open Source Photography
Subscribe to get the latest posts sent to your email.


This is a module I’ve not used, but always mean to use. I shall give it a go! Great article, thanks for sharing.
LikeLiked by 1 person