
Also the cover picture for the month of February, developing RAW with Rawtherapee / Artherapee, with Agfa Black and White Film Simulation.
We have four scripts in one download this time. Agfa 200X and Agfapan 25,100 and 400. Download below
They are what I call “mini scripts” because they are clean and contain only what is needed.
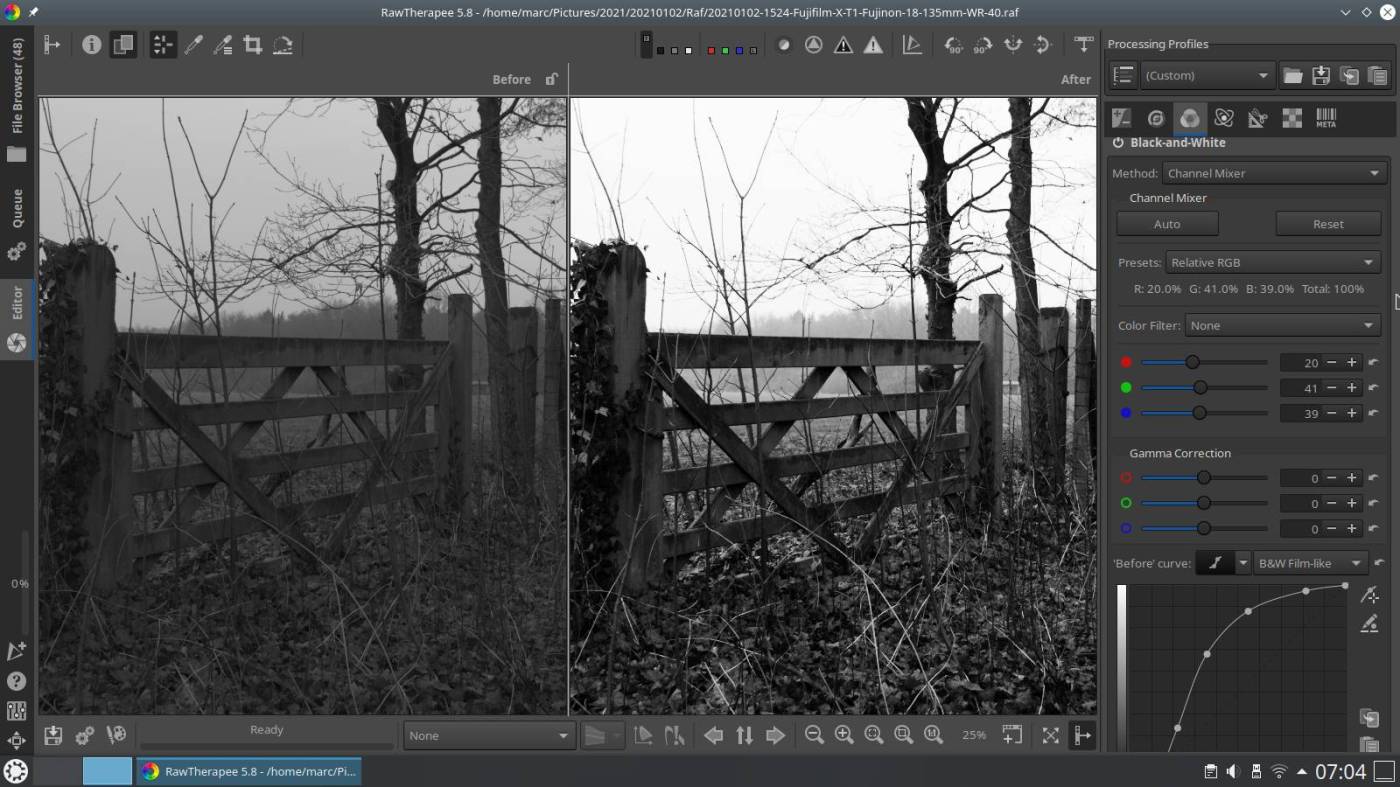
On the cover picture you see a normal desaturation on the left, on the right using the channel mixer, and in this case the settings for Agfapan 400. Furthermore a “film like” before curve and a parametric after curve.
The other Agfa film simulation scripts all contain the mixer settings that belong to their film type, but sometimes have different style before curves and flexible or parametric after curves.
Of course you can easily adjust this yourself, but the different curves help you to learn to work with it, or to overcome the fear of doing things differently.
Below are the Channel Mixer settings for the different Agfa film simulation versions:
Agfa 200X: 18,41,41
Agfapan 25: 25,39,36
Agfapan 100: 21,40,39
Agfapan 400: 20,41,39
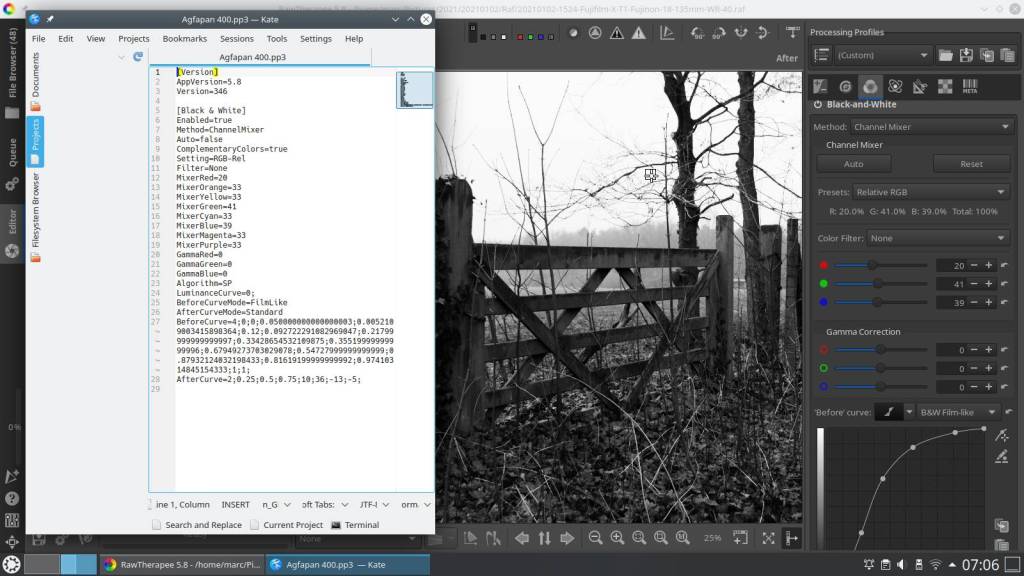
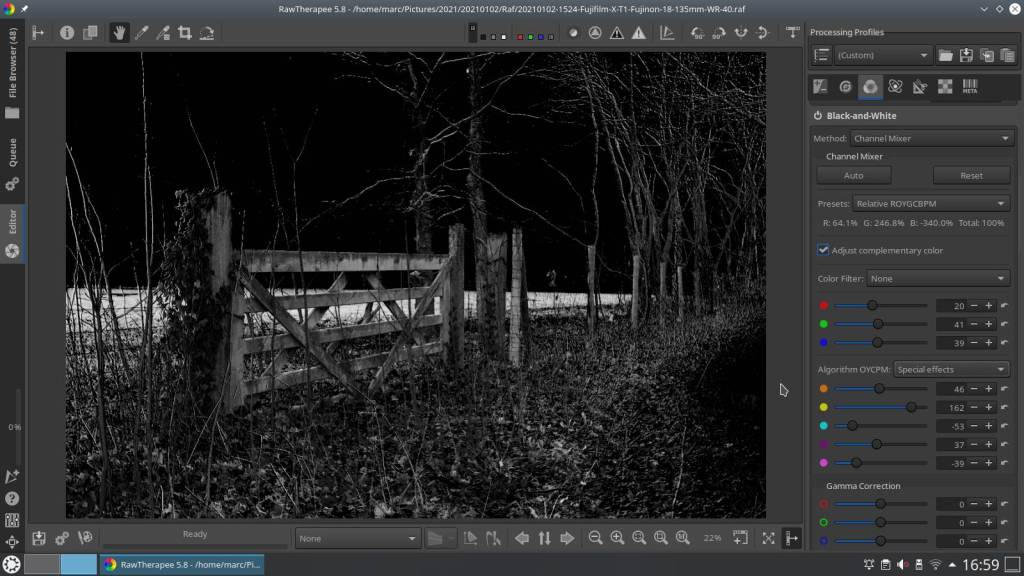
As you can see in the mini script below, more color settings are possible than just the RGB.
You can do this in Rawtherapee by changing the button “Presets” under auto and reset in the channel mixer to “Relative ROYGCBPM” – until now it was set to “Relative RGB”.
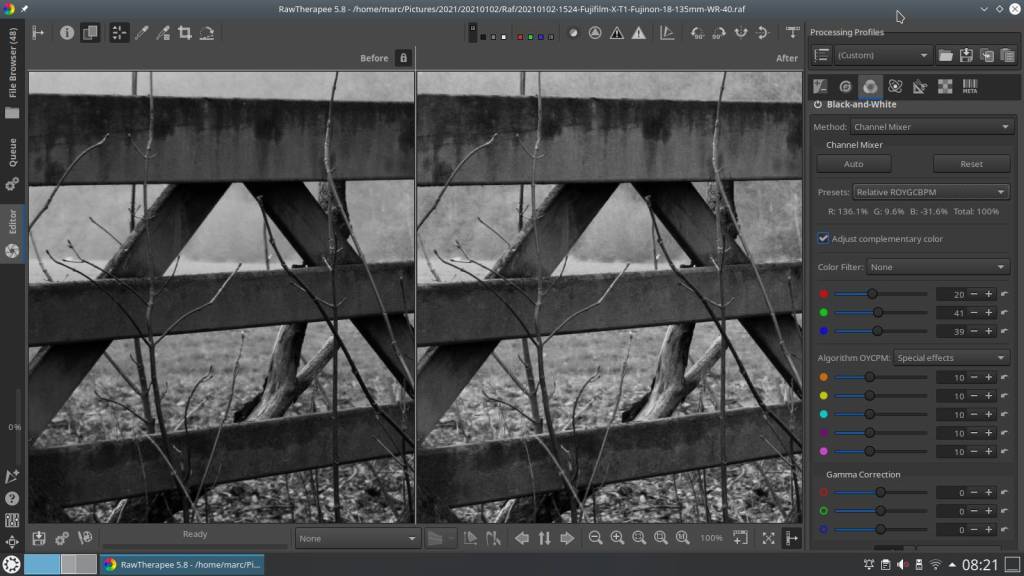
See also the screenshot below the script, you can clearly see that there are subtle changes in the grayscale.
Just for illustration, I adjusted all other values than RGB to “10”, which made the details stand out a bit better in the picture – look at the tree line behind the fence.
[Version]
AppVersion=5.8
Version=346
[Black & White]
Enabled=true
Method=ChannelMixer
Auto=false
ComplementaryColors=true
Setting=RGB-Rel
Filter=None
MixerRed=20
MixerOrange=33
MixerYellow=33
MixerGreen=41
MixerCyan=33
MixerBlue=39
MixerMagenta=33
MixerPurple=33
GammaRed=0
GammaGreen=0
GammaBlue=0
Algorithm=SP
LuminanceCurve=0;
BeforeCurveMode=FilmLike
AfterCurveMode=Standard
BeforeCurve=4;0;0;0.050000000000000003;0.0052109003415898364;0.12;0.092722291082969047;0.21799999999999997;0.33428654532109875;0.35519999999999996;0.67949273703029078;0.54727999999999999;0.87932124032198433;0.81619199999999992;0.97410314845154333;1;1;
AfterCurve=2;0.25;0.5;0.75;10;36;-13;-5;
[Version]
AppVersion=5.8
Version=346
[Black & White]
Enabled=true
Method=ChannelMixer
Auto=false
ComplementaryColors=true
Setting=ROYGCBPM-Rel
Filter=None
MixerRed=20
MixerOrange=10
MixerYellow=10
MixerGreen=41
MixerCyan=10
MixerBlue=39
MixerMagenta=10
MixerPurple=10
GammaRed=0
GammaGreen=0
GammaBlue=0
Algorithm=SP
LuminanceCurve=0;
BeforeCurveMode=FilmLike
AfterCurveMode=Standard
BeforeCurve=4;0;0;0.050000000000000003;0.0052109003415898364;0.12;0.092722291082969047;0.21799999999999997;0.33428654532109875;0.35519999999999996;0.67949273703029078;0.54727999999999999;0.87932124032198433;0.81619199999999992;0.97410314845154333;1;1;
AfterCurve=2;0.25;0.5;0.75;10;36;-13;-5;
The advantage of making the adjustments direct in Rawtherapee is that you can immediately assess and fine tune the result.
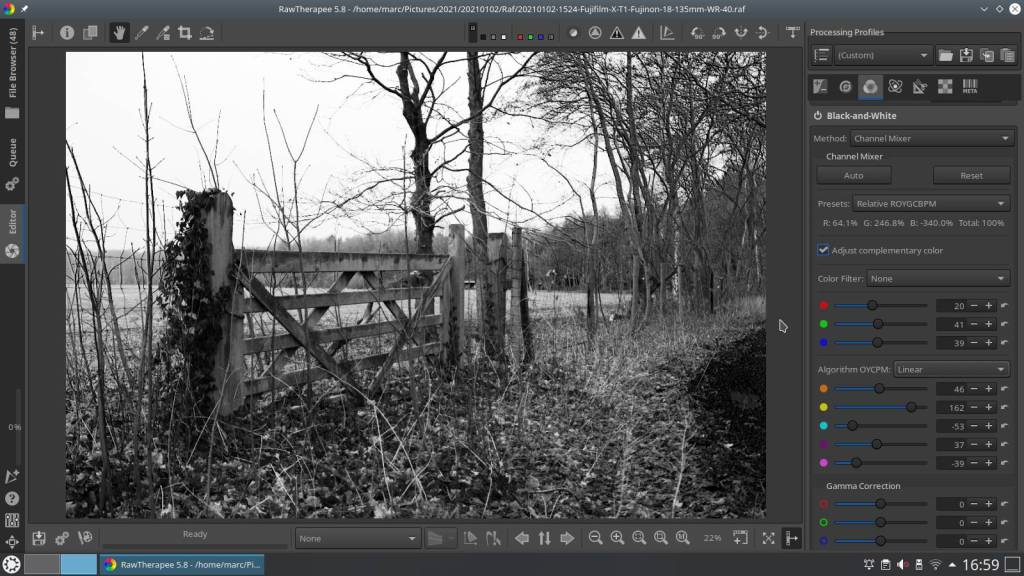
Adjusting the “Orange Yellow Cyan Purple Magenta” colors can make a lot of difference in the details of the picture, while keeping the overall picture the same.
There are also two options for doing this:
Change the button “Algorithm OYCPM” to Linear for a normal editing mode:
Or change to “Special Effects” to experiment with extreme results – in the picture below the same settings are used as above but the result is very different :
When you have done this on a few pictures, and you like the result, you can convert the obtained script to a Haldclut to get the same effect over and over again.
Another step further in developing yourself with Rawtherapee – or Artherapee.
Download Agfa B&W mini scripts :

Interested in Film Simulation Recipes?
One address:
Discover more from Open Source Photography
Subscribe to get the latest posts sent to your email.

