
Today I’m going to take a closer look at how to work with curves.
Because I can imagine that many wonder how you actually make such a curve, and especially how you adjust it.
Actually this is not difficult at all, Rawtherapee even has a tool to help you with that.
First of all : the purpose of those curves when converting to B&W is to give the target picture better exposure and contrast.
Without that curve, the picture would look flat gray and contrastless.
Visually everything is always clearer, that’s why I made a video so that everything can be followed better via an example.
But first below an overview about what happens in the video.
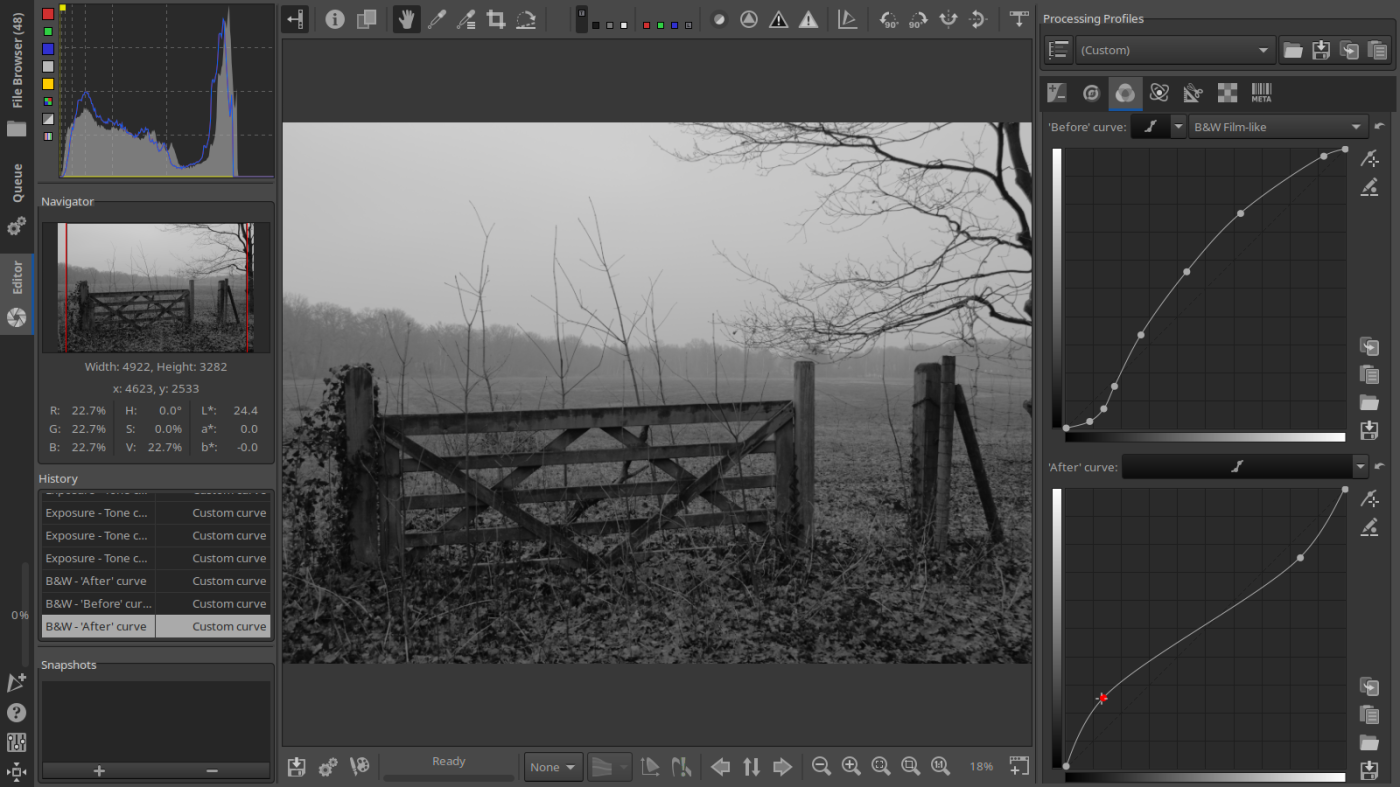
When the video starts I have opened a RAW picture and had set it to Neutral.
To give you an idea of what a curve does with a picture, and what it looks like, I used the “auto matched tone curve” button on the RAW.
The auto curve uses the settings of the embedded jpg.
Then I also show you how to remove control points from a curve – without resetting the curve to linear and start all over again – you click on one of the points and with the mouse button pressed you subtract the point from the curve by pulling it away. You immediately see the effect on the image.
Next I reset the curve with the auto button again and I copy the curve to use it on our B&W conversion as a startpoint.
I open the Color tab, part Black and White, and set desaturation to channel mixer.
Values of the Ilford FP4 are entered – 28-41-31
Before curve is set to flexible and film type.
I paste the auto curve from before – you will notice that the wooden gate (darker parts) are quite well exposed, the background (lighter parts) certainly aren’t.
Now I use the tool I spoke about earlier. To start this tool :
click on the icon with the “curve and cross” located to the right, at the end of the curve, at the top.
If you hover the mouse over a picture, you will see that the place on the curve that corresponds to that specific darker or lighter part of the picture, is indicated by a red – blue and green line (the RGB values) that crosses the curve. One way to place a control point at that specific point on the curve is by pressing the Ctrl button and left clicking the mouse button while on the picture. To adjust dark or light of that specific control point, select that point on the curve – click left and move up or down to darken/lighten dat point. You could also when placing a control point press Ctrl – left click mouse button and hold it down on the picture while simultaneously move up or down, but this only changes very subtle. Or just click any control point on the curve direct, hold and move up/down to change. Many ways to obtain the same result, try them out.
Towards the end of the video I also open a second curve (after curve) to fine tune more specifically.
The video lasts about 5 minutes, it was not my intention to obtain a perfect picture here, but to show you how to make and adjust the curve in the shortest possible time.
Below I also have a download of no less than eight B&W Ilford Film Simulation Presets.
They are as previously written “mini scripts”, ie Presets of which only the modified part is saved, which is much clearer and cleaner.
You can open the Preset in Windows Notepad or Linux Kate, and see at a glance what the script contains.
Each script contains the channel mixer values associated with that specific film type, the curves are “universal” and purely intended as a starting point.
You can immediately apply the above working method to one of your own pictures with one of these film simulation scripts.
Discovered today – and useful Tip :
To my great surprise there appears to be a split-off of RT called ART.
“ART is a fork of RawTherapee, a powerful cross-platform raw photo processing program”.
Link to the website : ART
Tip : To use Presets or Profiles in ART you have to change the file extension from * .pp3 to * .arp
To our French friends on the forum where I discovered this program ART (https://forum.artherapee.fr), and where, among other things, PictureFX HaldCluts were discussed, feel free to share comments here and hopefully likes, even in French.
It may take a while, but I will always try to answer.
A nos amis Français sur le forum où j’ai découvert ce programme ART (https://forum.artherapee.fr), et où, entre autres, PictureFX HaldCluts ont été discutés, n’hésitez pas à partager vos commentaires et j’espère que “Like’s”, même en Français.
Cela peut prendre un certain temps, mais j’essaierai toujours de répondre.
Regards – Cordialement, Marc.
For whom Presets and developing and everything around it is not their thing, there are still Recipes!
That is, if you are the lucky owner of a Fujifilm Camera!
If so, here is the website where you can find everything about it:
Discover more from Open Source Photography
Subscribe to get the latest posts sent to your email.


Oooh! Well spotted, I’ll check out that ART raw editor! Thank you for the Ilford presets too!
LikeLiked by 1 person
Thanks Mark, and there are a few more Agfa and Kodak presets coming up too.
LikeLiked by 1 person