
After editing my pictures with an Adobe Camera Profile, LUT, Preset, or fully manual adjustments, it’s time to sharpen and denoise.
My initial plan was to cover both sharpening and denoising in a single article. However, after some thought, I realized it would probably be better and clearer to address them separately, especially since opinions on these topics vary widely. So, at the risk of stirring up some debate, here’s my approach to sharpening in RawTherapee.
Just for the article and how I do it and my perspective on it : after the initial adjustments in exposure, profiles, presets, or LUTs, I begin by Sharpening. In the past, with Pentax DNG files, I did it the other way around, but with Olympus ORF files, I feel it’s better to do it this way. When I denoised first and then sharpened, I seemed to have more noise and less sharpness in the end result than when I did it the other way around. So, I prioritize optimal sharpening first and then reduce noise as much as possible without sacrificing (too much) detail.
If you prefer to do it the other way around, that’s no problem at all; the process remains roughly the same. Just be sure to do it in the way that works best for you.
Finally before we get started, all editing can and has been done in RawTherapee 5.9 & 5.10.
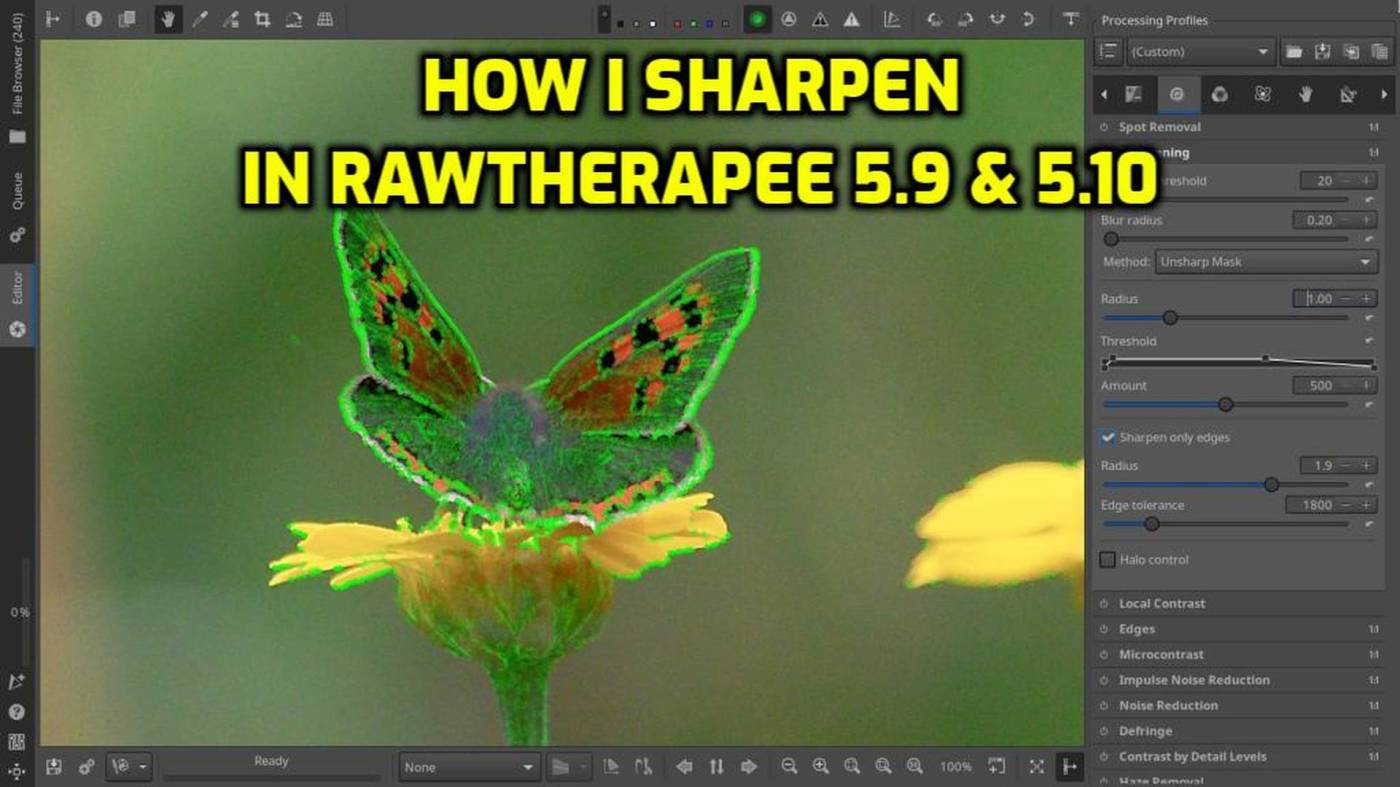
The Method :
As is often the case, I have a different approach to how I sharpen in RawTherapee than most people. This approach depends on the photo I’m working on. In most cases, there’s a single subject at the center, be it a bird, animal, or flower/plant. In many of those cases, there’s a clear contrast between the subject and the background, such as a bird standing out against the sky, or a flower with a very blurry background. And here lies my alternative approach.
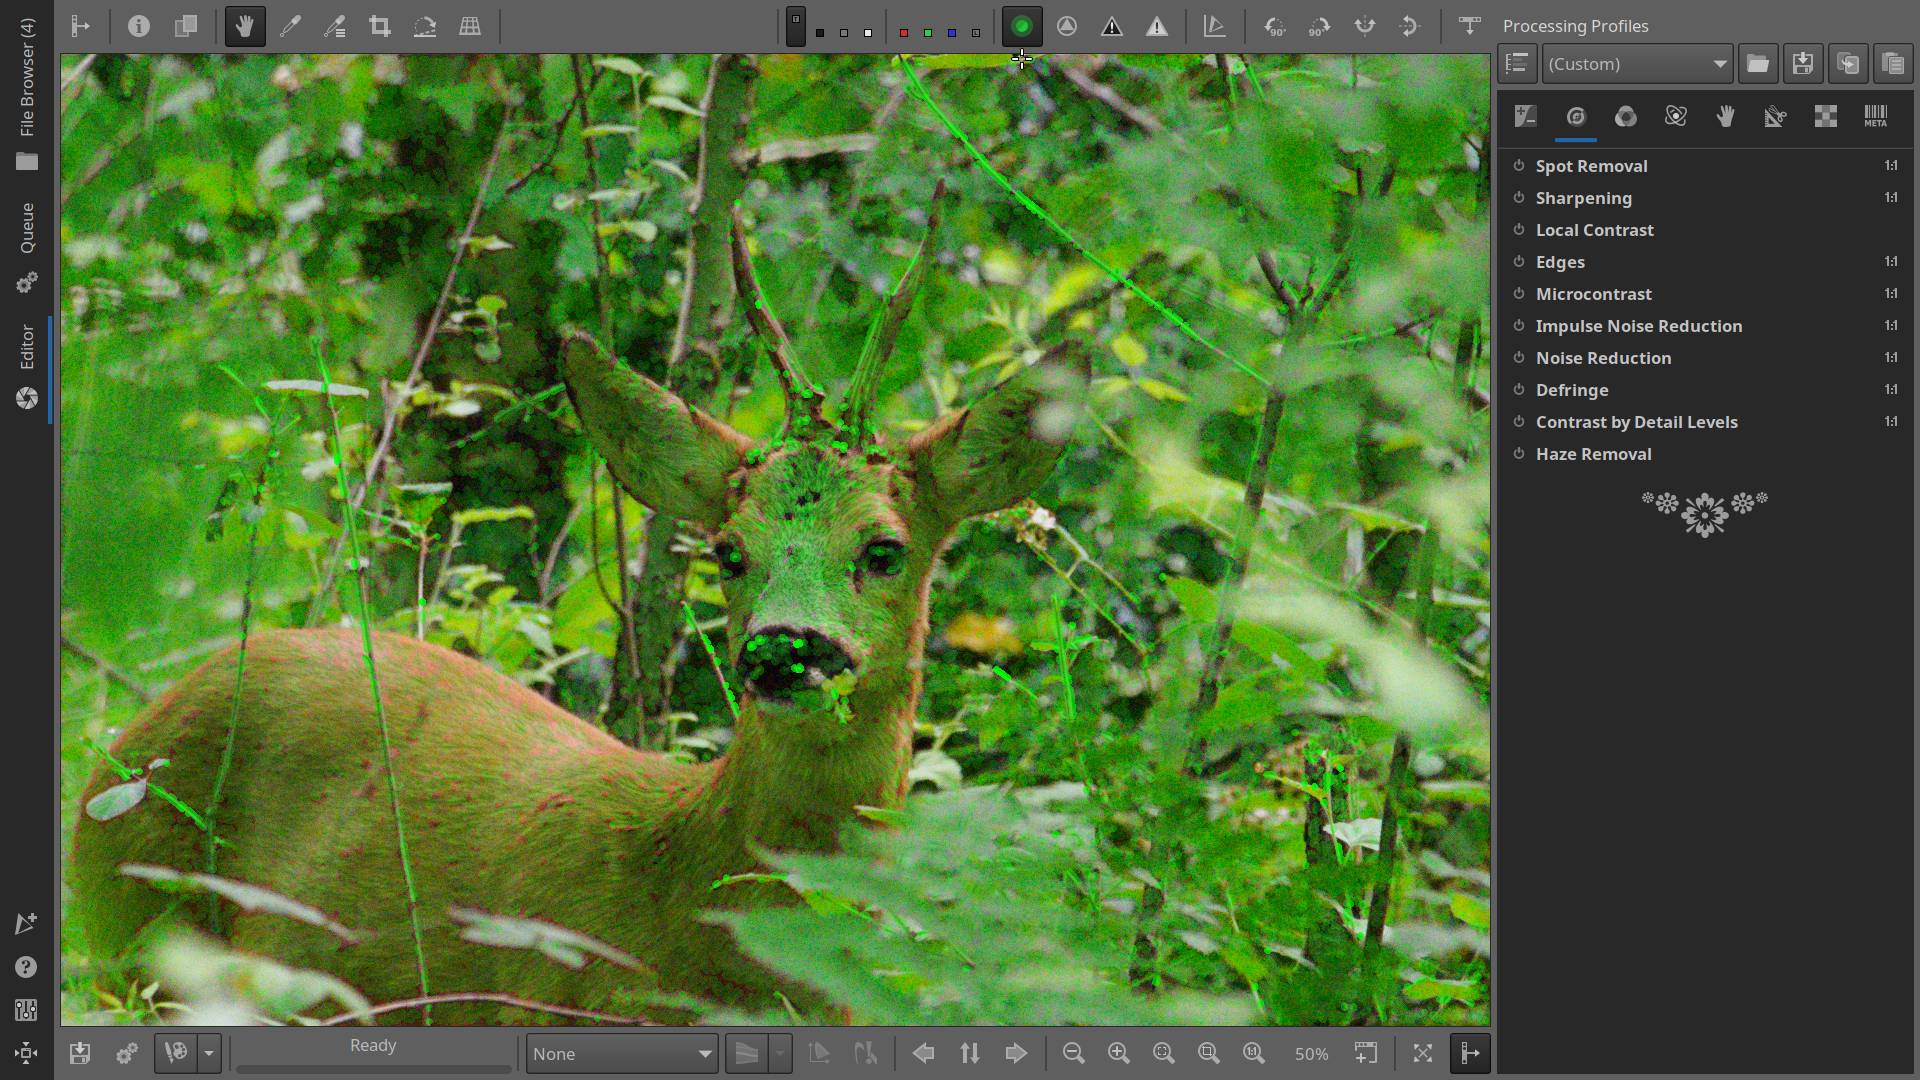
Most people are familiar with focus peaking from their digital cameras, along with zooming in, a very handy tool for manual lens focusing. RawTherapee has a similar tool called “Focus Mask”. While this tool is intended to initially assess whether a photo is sharp or not during viewing and sorting, you can also use it in a different way.
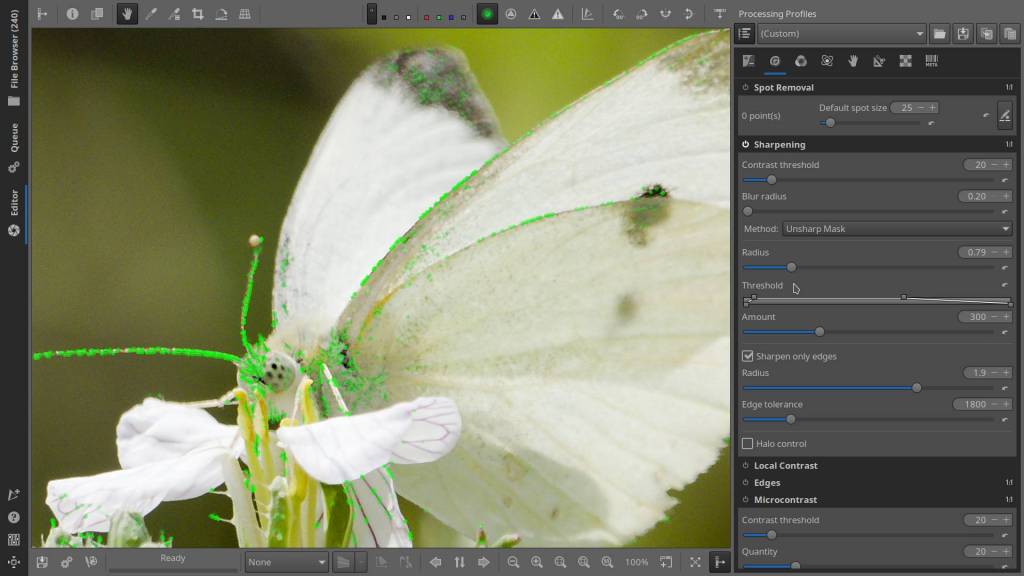
When I want to sharpen a photo, I aim to do it optimally, without under-sharpening, but also without overdoing it to the point where it looks bad. Focus Mask can help with this. When you open a photo with sufficient contrast between the subject and the background in RawTherapee, zoom in to 1/1, and activate the Focus Mask, you’ll notice that as you increase the sharpening slider, the green markings in the focus mask will also increase and decrease depending on the position of the sharpening slider.
This happens because, on one hand, the tool indicates the initial sharpness, which enhances with sharpening, but excessive sharpening can also induce a slight blurriness, leading to a reduction in the markings. Although the creators of RawTherapee did not intend for the Focus Mask tool to be used in this manner, the effect of sharpening and over-sharpening is akin to that of a camera’s Focus Peaking tool on your camera.
While there may be users who feel that the results are not optimal or that they can achieve better results visually than using this method, for me, it’s a tool that works very well. It certainly doesn’t hurt to give it a try; if it works for you, that’s a bonus, but if not, that’s perfectly fine too.
The Unsharp Mask In Practice :


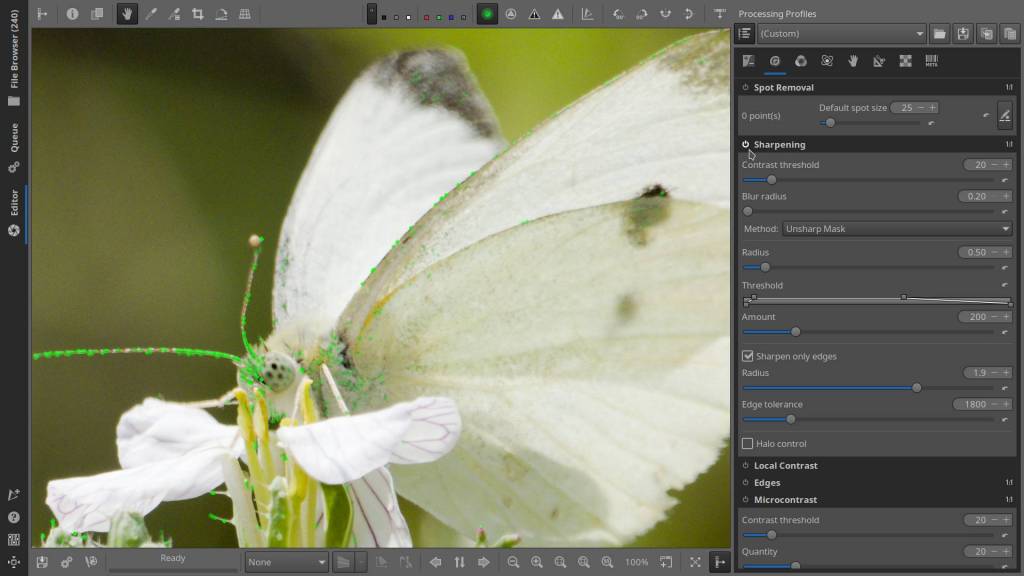


- Open a picture and adjust the exposure to optimal levels.
- Next, use the zoom button to enlarge the subject to 100%.
- Activate the Focus Mask and enable “Sharpen only edges.”
- Set the Amount to 200-250
- Then use the slider to increase the Radius between 0.5 and 1.5 until you find the optimal sharpness (when the green dots light up the most).
- You can further adjust the Amount as needed.
- Regularly check your progress by toggling the Focus Mask on and off, and repeating step 5 to 6
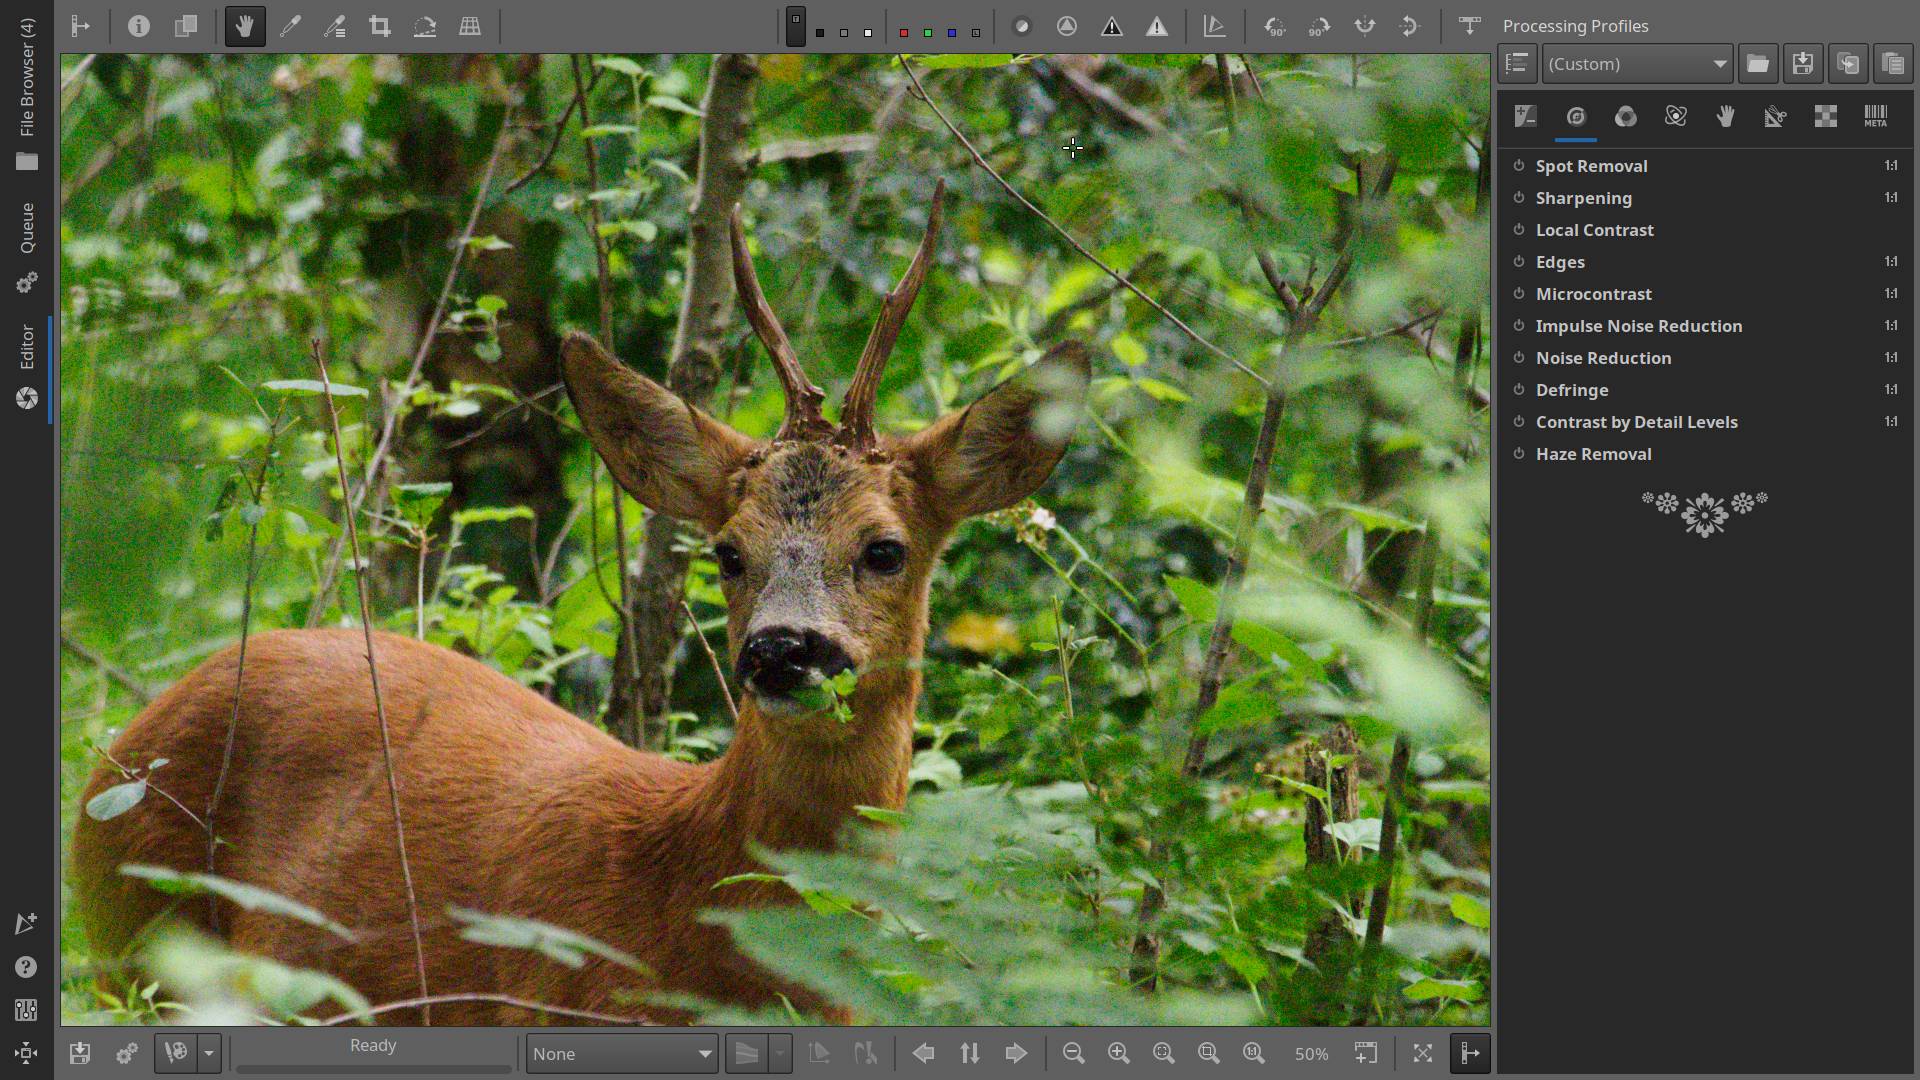
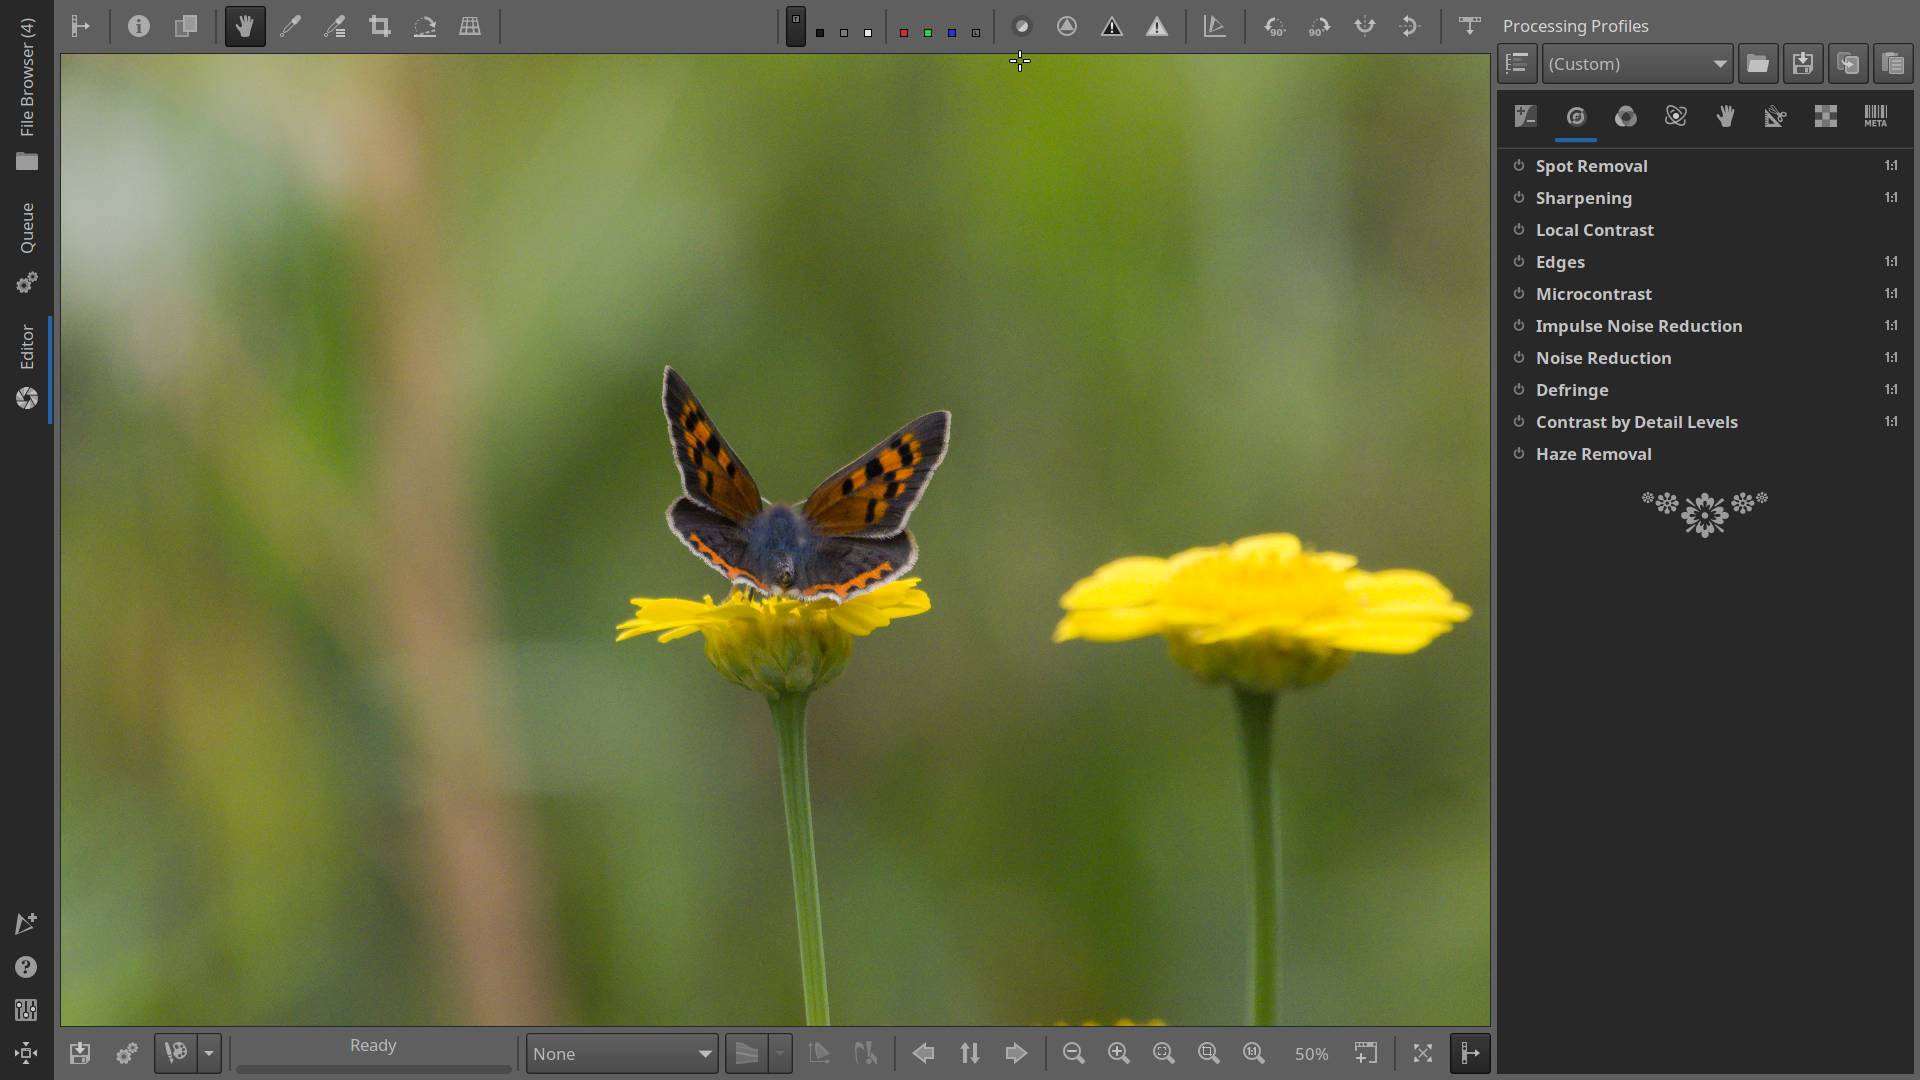
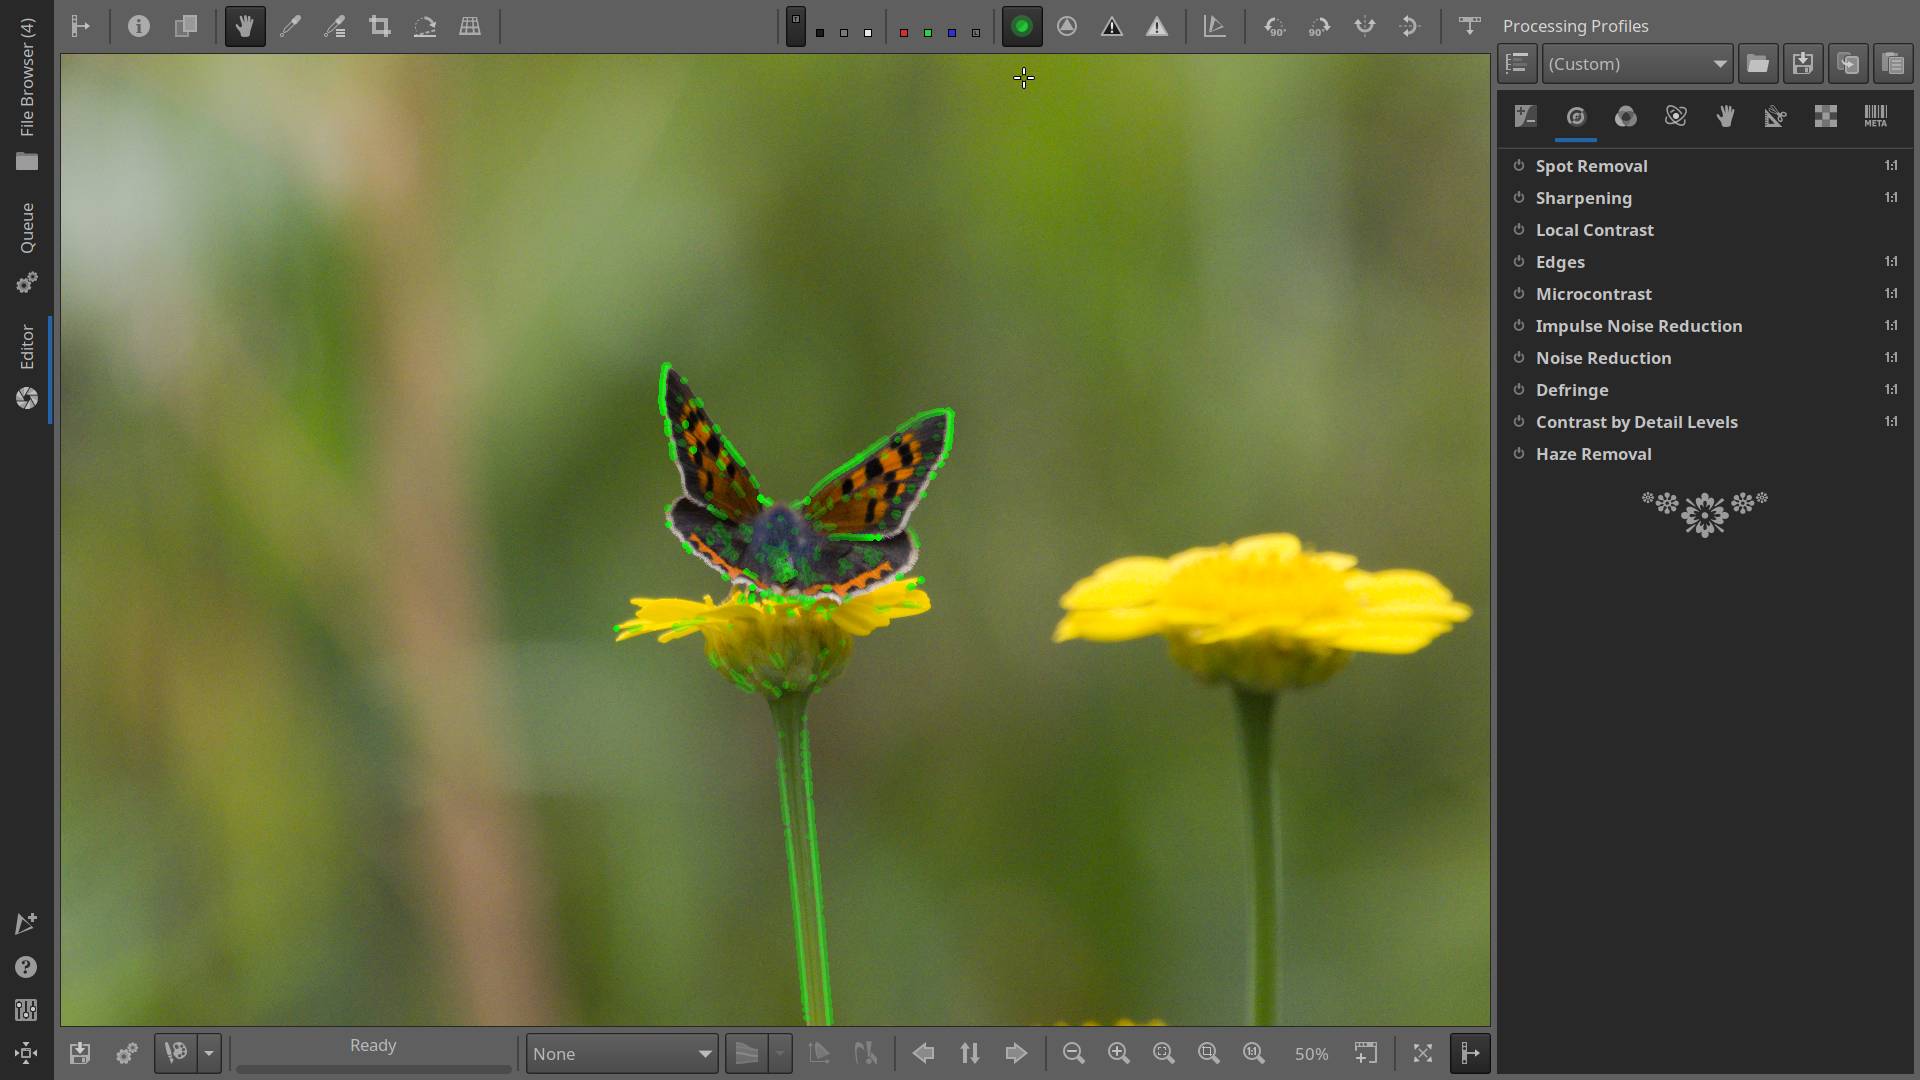
Pictures where this method doesn’t work well are those with shallow depth of field or low contrast between the subject and the background, as shown in the example below. Activating the Focus Mask in these situations results in a green image, making the “peaking” feature unusable. It’s similar to how it works in your camera: if you manually focus using focus peaking with a lens at f2.8, it works very well, but at f16, you can no longer see exactly where the sharpness lies.
RL Deconvolution in Practice :
The second method is RL Deconvolution, named after the creators of the algorithm, Richardson and Lucy. Neither method is inherently better than the other; they are just different. Sometimes the Unsharp Mask works better on a particular image, and other times RL Deconvolution is more effective. It’s best to try both and see which works best for your image.
Activating this method with the Focus Mask often results in a green-tinted image and some noise. You can easily remove both by adjusting the Contrast Threshold and the Blur Radius. The Amount setting also affects the green tint and noise, but I usually leave it at 100 and make adjustments with Contrast and Blur.
You adjust the sharpness using the Radius slider, so try to set it optimally. After that, you can use the Iterations slider. Iterations determine how many times the sharpening is applied, and too many can result in ugly images and artifacts. In my experience, the optimal value is between 15 and 35.
There remains one thing left for me to say:
I don’t have any Sponsoring Companies, Patreon Support, or Follower Donations. I don’t drink Coffee, so that’s not something you can assist me with either. However, what I truly need to keep going is motivation, and the best part is, it won’t cost you a thing. You can offer it for free—just hit the Like and Subscribe button !
This article was written by Marc R.
While I primarily speak Dutch and have some knowledge of English and a little French, ChatGPT helps ensure my writing is grammatically correct. I often mix Dutch and English in my drafts, and ChatGPT steps in to translate and correct.
The photo gallery of Open Source Photography, Olympus micro 4/3 system, Vintage Lens Photograpy, Film Simulation, PictureFX, HDR – Photographer : Marc R.
Discover more from Open Source Photography
Subscribe to get the latest posts sent to your email.

